
Many routine server management tasks, such as restarts, backups, map wipes, and notifications, don’t need to be done manually. With our Schedules feature, you can automate these tasks to keep your server running smoothly while reducing the amount of maintenance you need to perform.
Whether you want a simple daily restart or a highly customized automation with multiple actions and conditions, this guide will walk you through everything you need to know about creating and managing schedules.
Getting Started
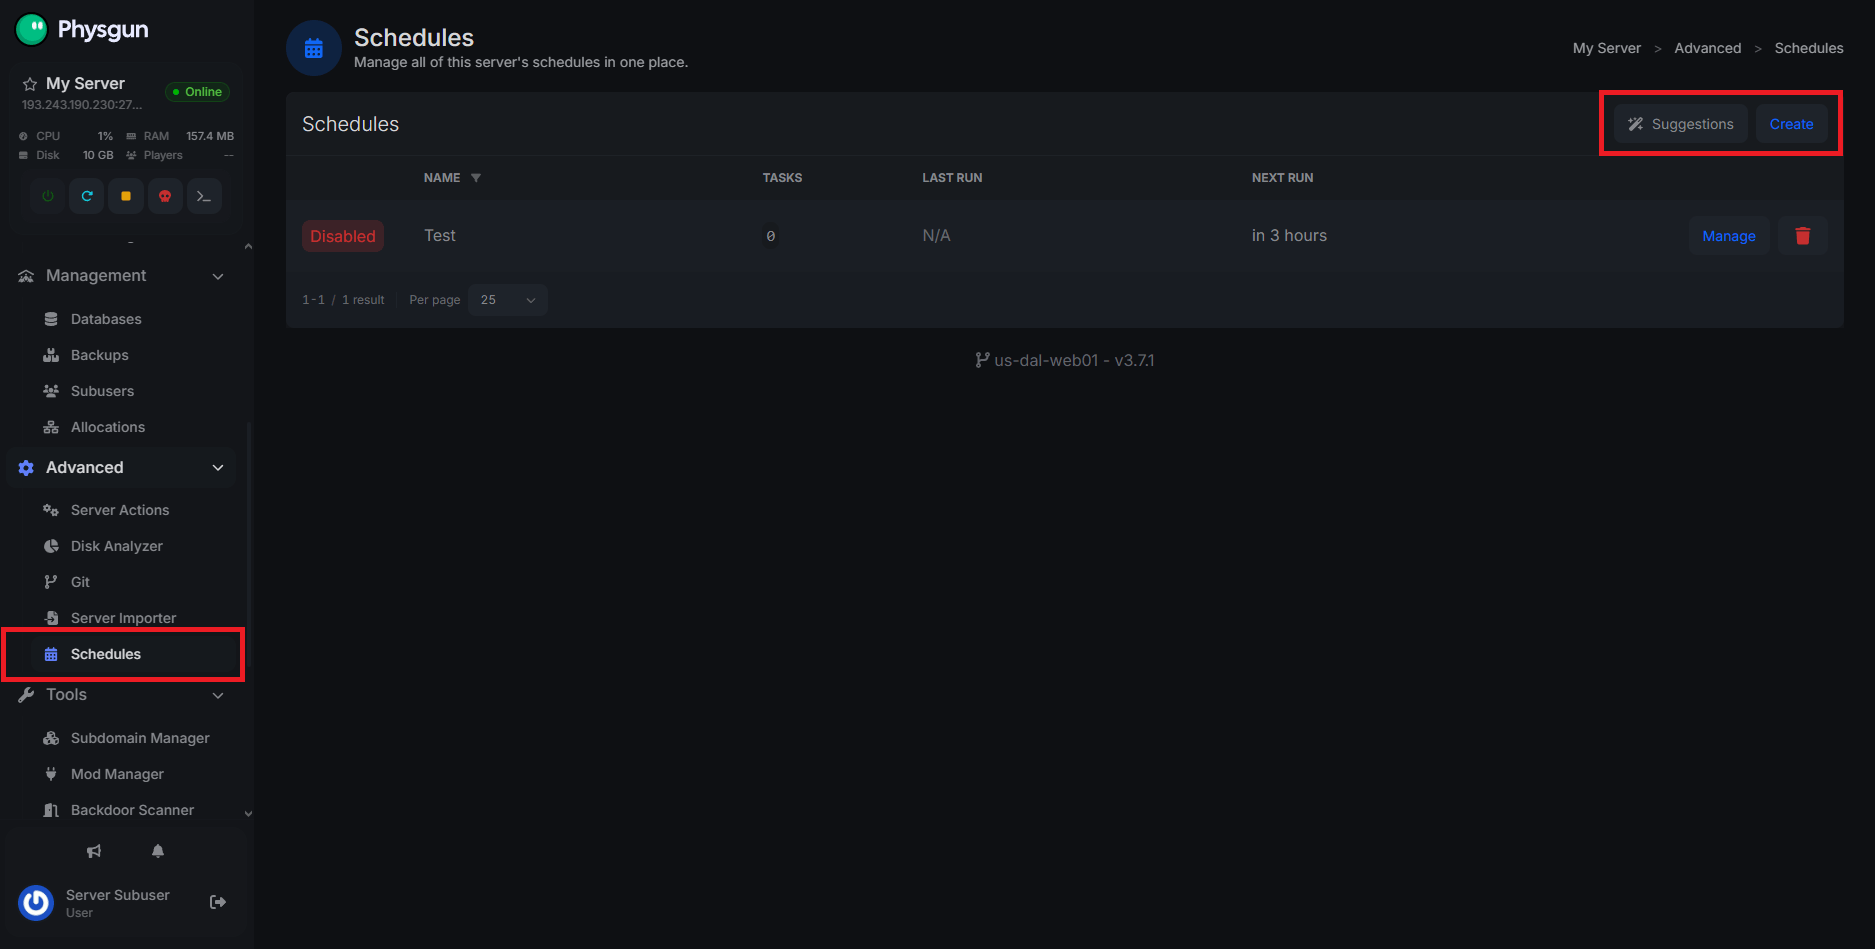
You can access schedules right in the Physgun panel. Just log into your Physgun panel, scroll down to the Schedules tab under the Advanced category, and it’s all right there.
At first glance, you’ll find two buttons:
- Create - Opens the schedule creator.
- Suggestions - Opens a list of suggested schedules.
In the schedule creator, you can create schedules from scratch, but if you want a quick solution to common automated actions, check out the suggestions list.
Creating a Schedule
Creating a Schedule through Suggestions
If you’re just looking to quickly schedule a restart or server backup, but don’t want to go through the trouble of learning how to set up times and conditions, you can use the suggestions!
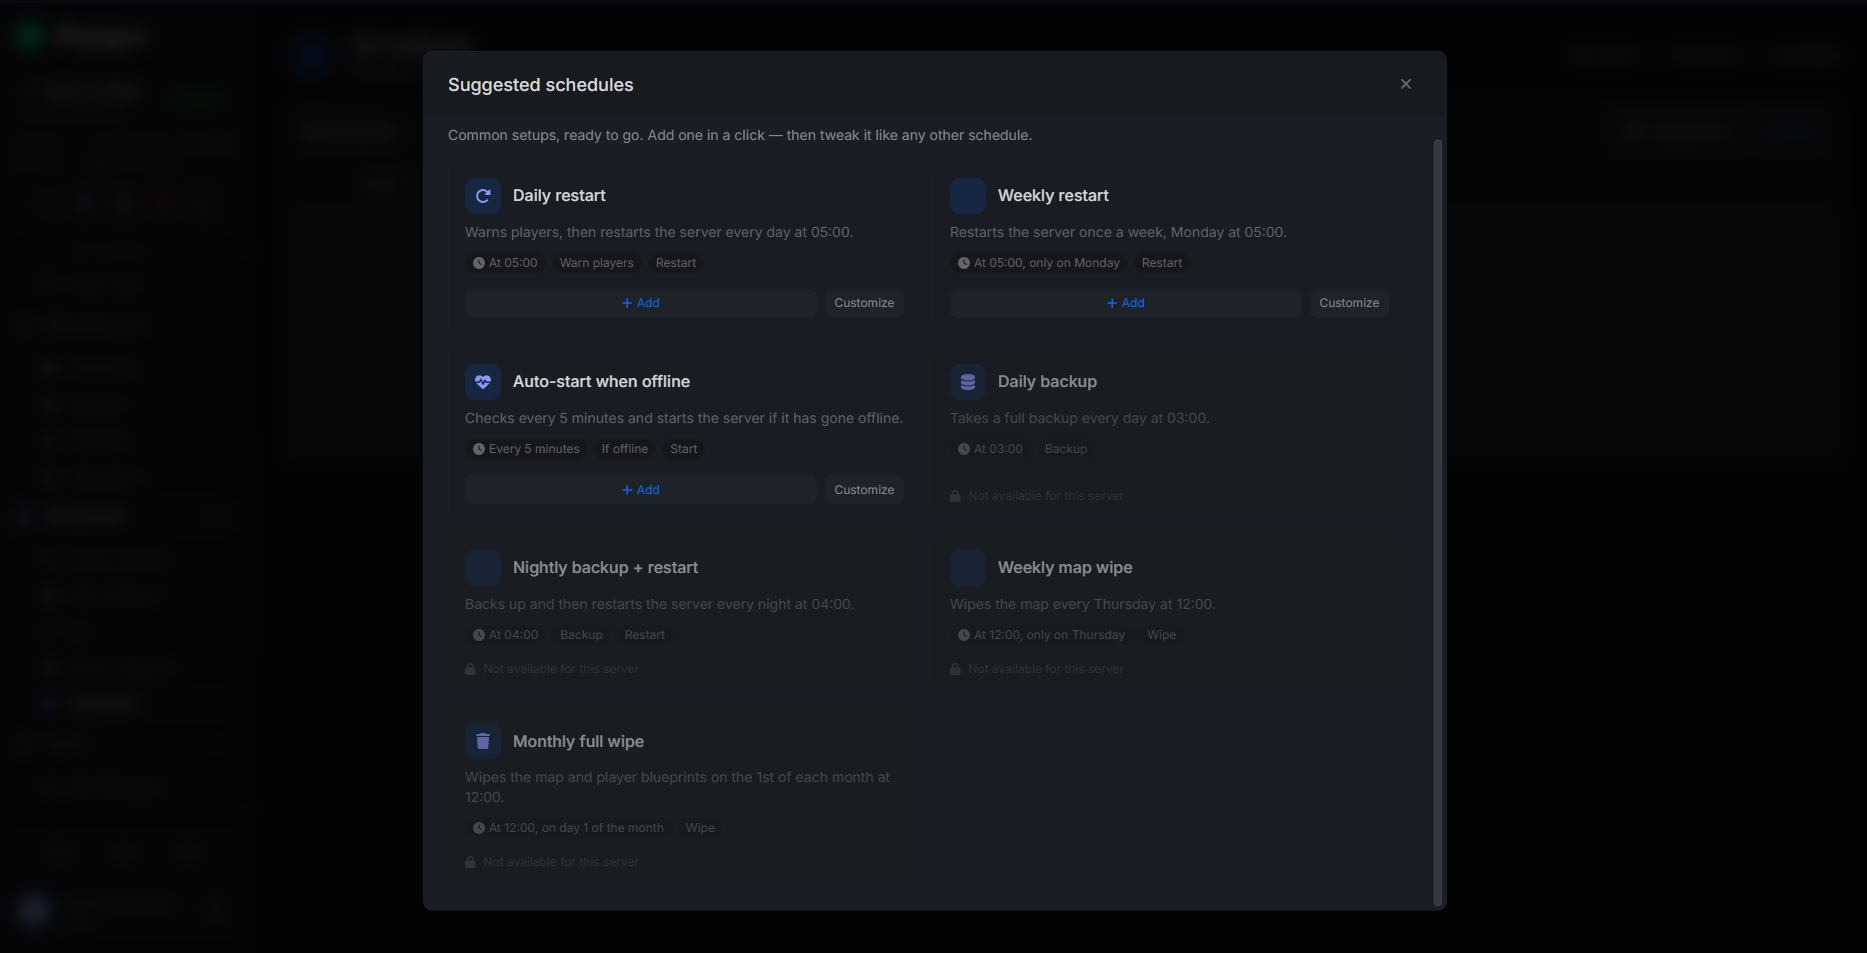
When selecting a suggested schedule, you’re given the following options:
- Daily Restart
- Auto-Start When Offline
- Nightly Backup + Restart
- Weekly Restart
- Daily Backup
- (Rust) Weekly Map Wipe
- (Rust) Monthly Full Wipe
You have the option of adding the schedule as is, or customizing the preset in the schedule creator. Just click Add if you want to use the preset.
Creating a Schedule from Scratch
Using the schedule creator, you can customize the following options:
Name
The name option lets you set the display name of your schedule.
Quick Presets
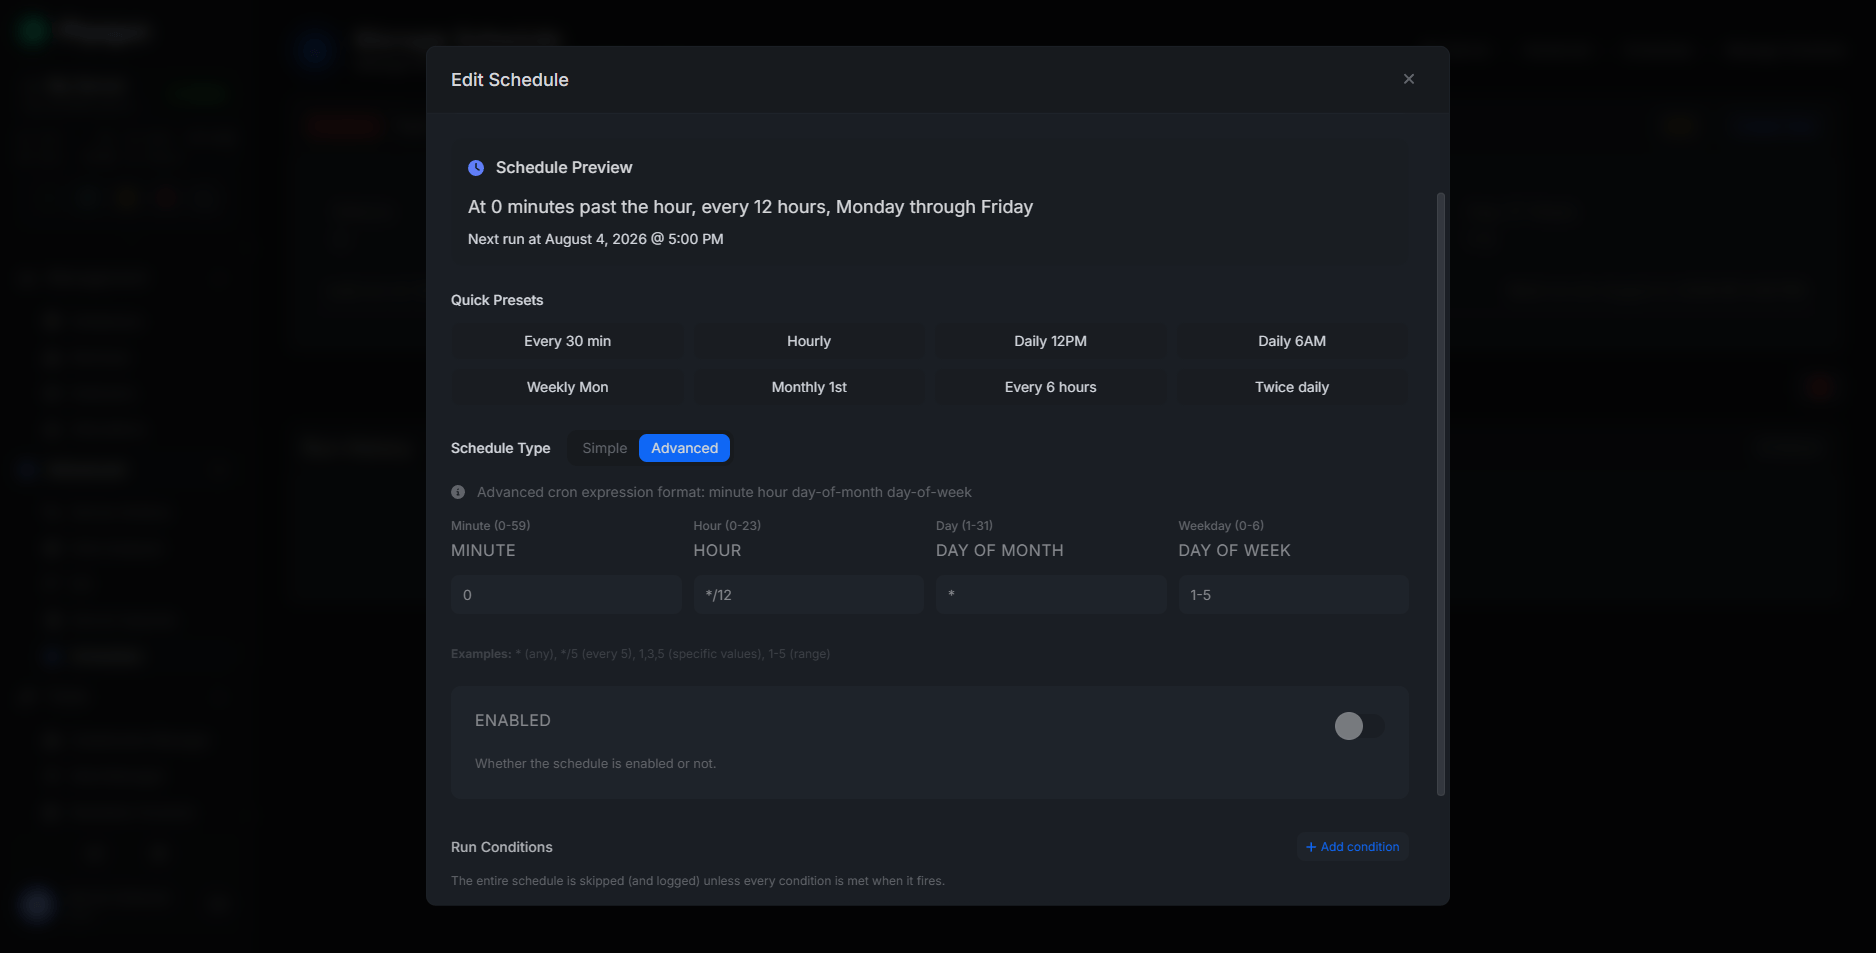
The quick presets allow you to set up common intervals for your schedule in one click. These options include:
- Every 30 minutes
- Hourly
- Daily @ 12 pm
- Daily @ 6 am
- Weekly on Monday
- Monthly on the 1st
- Every 6 hours
- Twice Daily
Schedule Type
Schedule types are split between simple and advanced. A simple schedule gives you preset and easy-to-read options, while an advanced schedule is more intricate.
Frequency/Time (Simple)
A simple schedule lays out the following options:
- Every X Minutes
- Every X Hours
- Daily
- Weekly
- Monthly
Frequency/Time (Advanced)
An advanced schedule lays out the following options:
- Minute
- Hour
- Day of Month
- Day of Week
Each option can be used individually or collectively. They all accept the following inputs:
- Integer (1, 2, 3, etc.) - An integer will hard-code a single timed value into the option. (5 minutes, 6 hours, etc.)
- Asterisk (*) - An asterisk represents “Any”. This will typically ignore any specific value for that option, allowing the schedule to run regardless of the time reflecting that value. (* hours = any hour)
- Asterisk/Integer (*/5) - An asterisk slash an integer represents “Every”. This tells the schedule to loop after one or more instances of that option have passed. (*/2 days = every two days)
- Integer-Integer (1-5) - An integer followed by a dash and another integer represents a range of numbers. (1-5 hours = every hour between 1 and 5)
Because understanding syntax is tough sometimes, here is an example that makes use of all of these.
| Minute | Hour | Day of Month | Day of Week |
|---|---|---|---|
| 0 | */12 | * | 1-5 |
This will run the schedule at 0 minutes past the hour, every 12 hours, Monday through Friday, while ignoring a specific day of the month due to the asterisk showing it can run on any date.
Enable/Disable
The enable/disable option allows you to define whether this schedule should be on.
Run Conditions
Run conditions prevent your schedule from executing until every condition is met:
- Server State
- Player Count
- CPU Usage (%)
- Memory Usage (%)
- Memory Usage (MB)
- Disk Usage (%)
- Disk Usage (MB)
Assigning Tasks to a Schedule
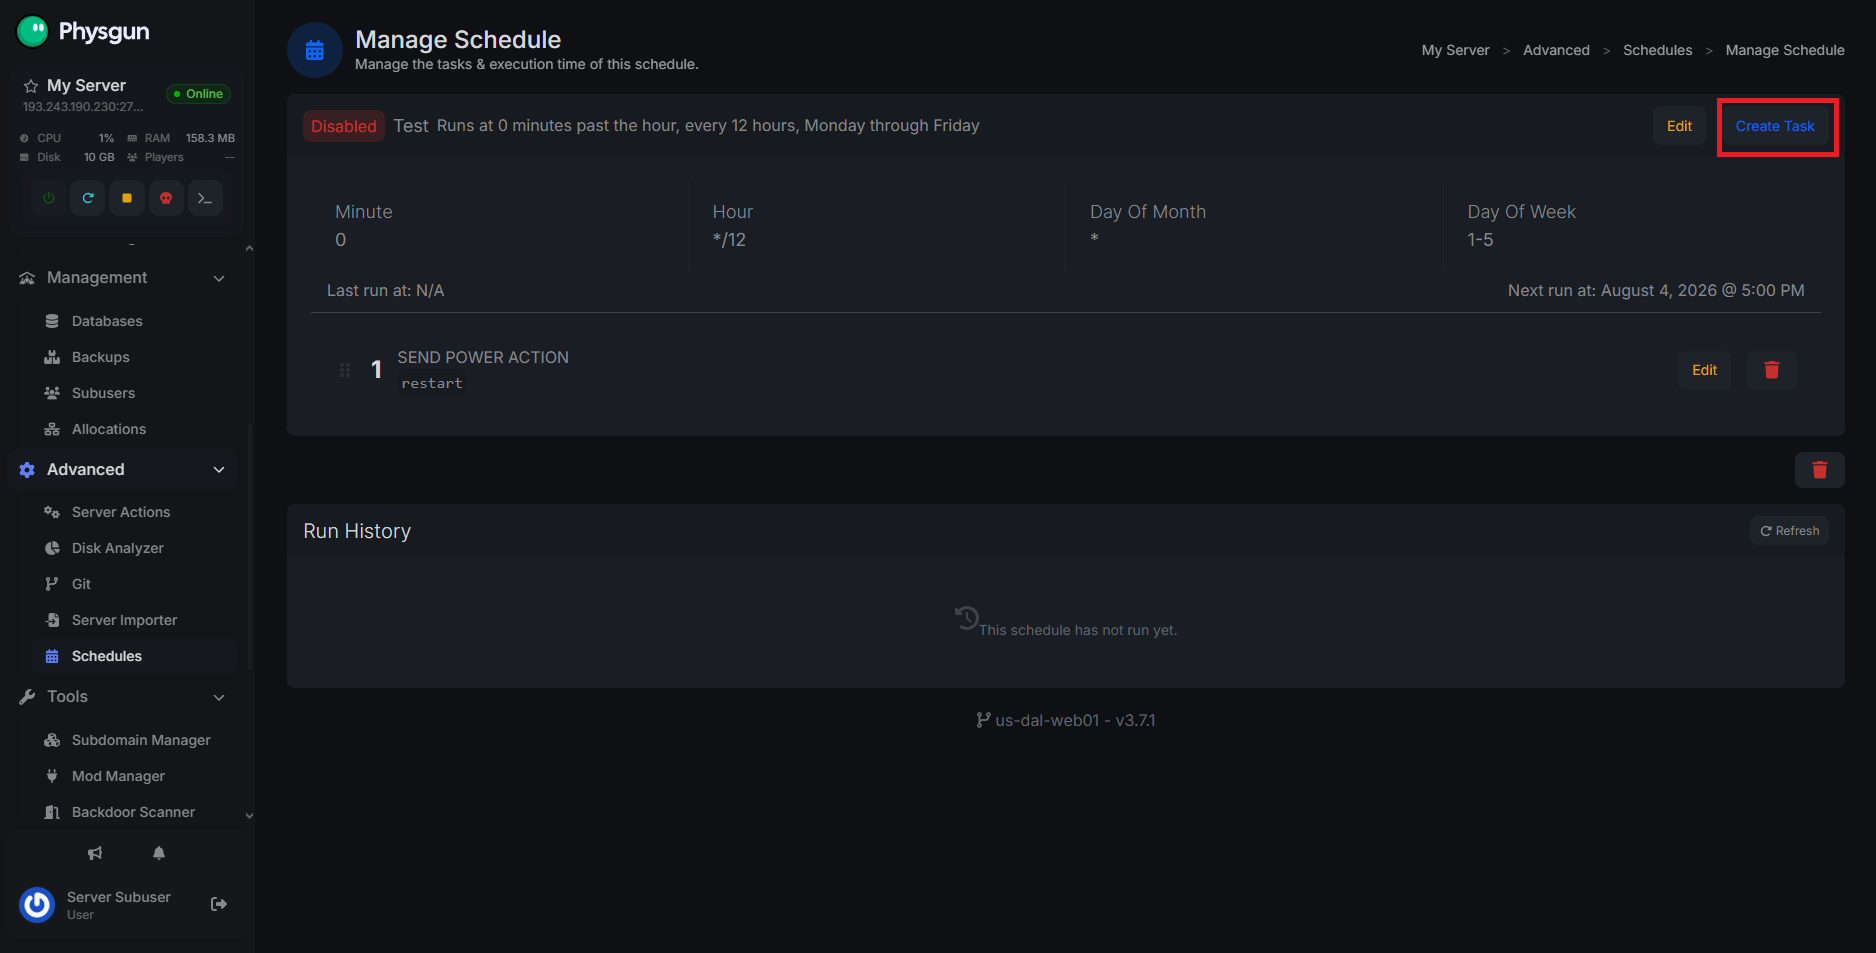
Once your schedule is created, if you didn’t use a suggestion, you will need to add tasks. Click Create Task to get started.
Here you can assign actions, give them a delay using the time offset, select payloads, and set specific conditions for each task.
The Actions tab gives you a list of options that represent the actual :
- Send Power Action - Contains options to control your server’s power status.
- Send Command - Fire a specific console command.
- Create a Backup - Create a backup of your server.
- Send an In-Panel Notification - Send a notification to you and/or your subusers on the panel.
- Send a Webhook - Send a webhook using a URL and specified message.
- Send a Discord Message - Send a message through a Discord webhook.
- Send a Slack Message - Send a message through a Slack webhook.
Time offsets allow you to set a timed delay after the schedule triggers for the specific action to fire. This is nice to have if you need to send restart messages ahead of time or make sure the server shuts off before a backup.
A payload is a trait, variable, or sub-action that’s specific to the action you’ve selected. These include webhook URLs and message contents, among other things.
Lastly, the conditions. These are identical to the aforementioned list of conditions, but they can be used for each action rather than the entire schedule.
Schedule Testing
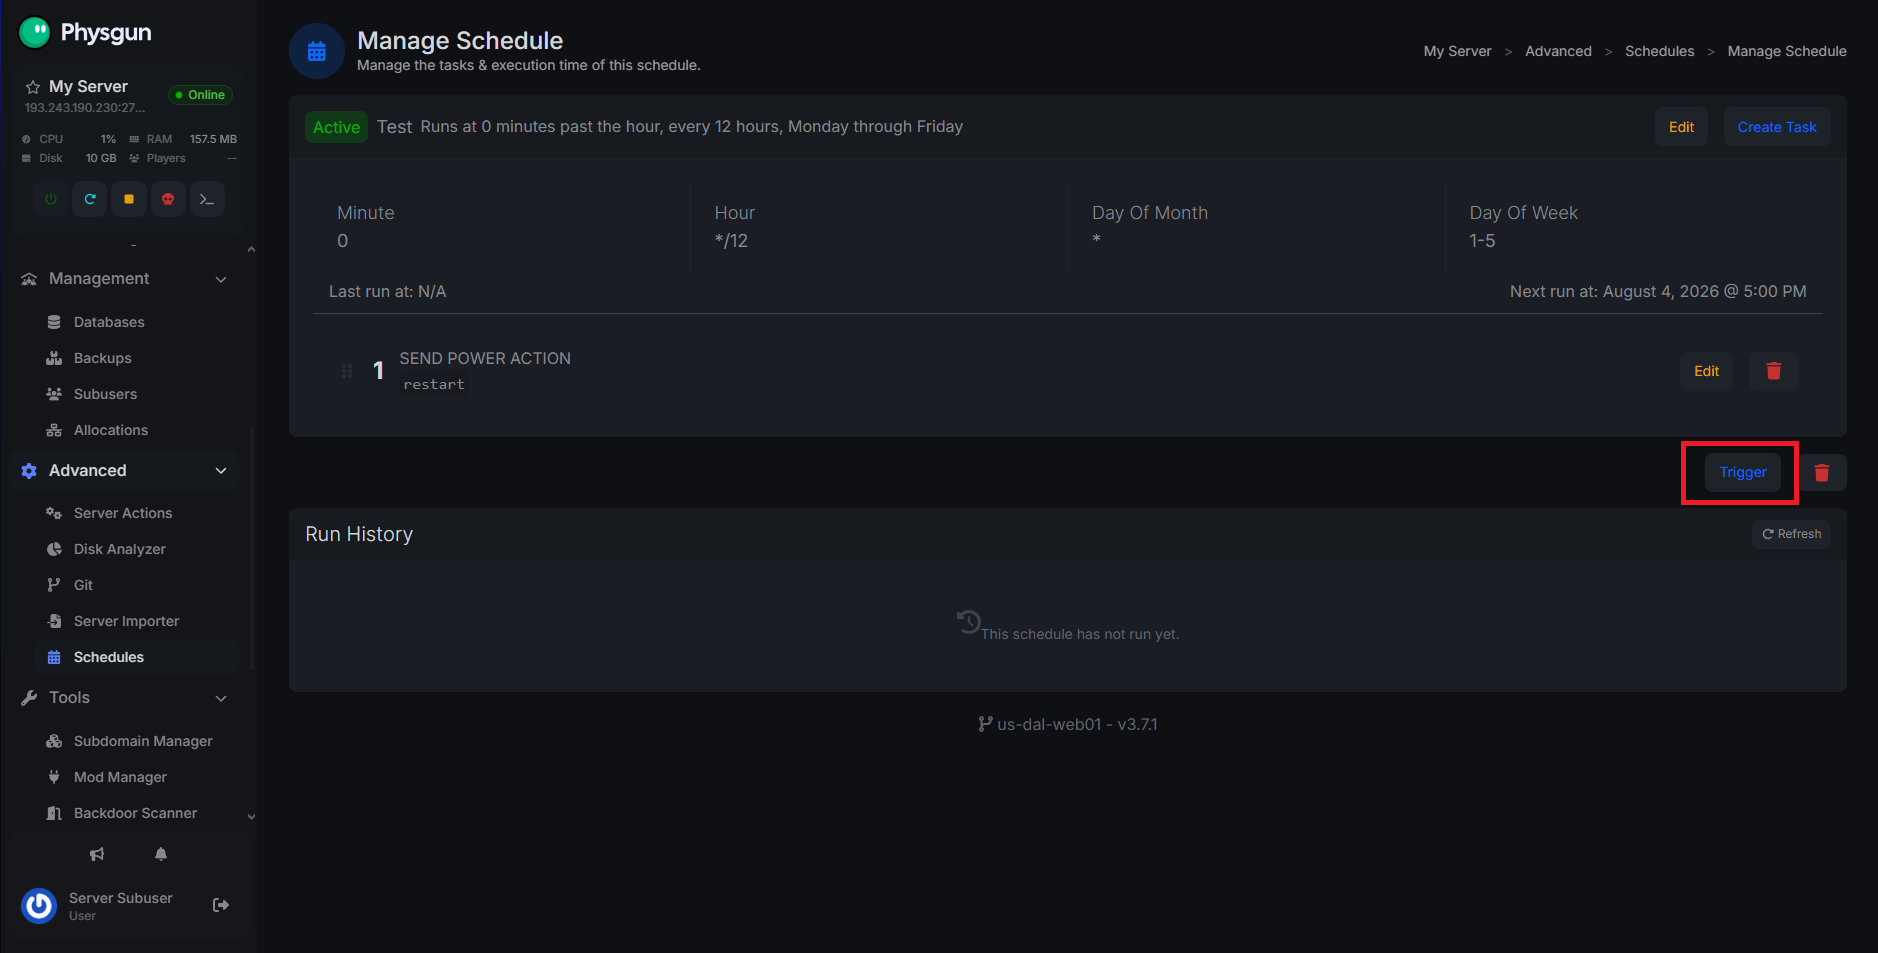
You don’t have to wait for the defined time to test out a schedule. If your schedule is enabled, you’ll see a Trigger button beneath the list of actions. Click it to manually fire your schedule.
If your schedule isn’t working as intended, make sure you’ve set the time correctly, the actions are configured properly, and you don’t have any conditions messing it up. Also, be sure to enable it if it wasn’t already. That can easily be forgotten.
Conclusion
The Schedules feature is a powerful way to automate repetitive server management tasks, helping you spend less time maintaining your server and more time building your community. From simple restart presets to advanced schedules with multiple actions and conditions, there’s a solution for servers of every size.