














Carbon is a modding framework for Rust that loads your plugins, from kits and economies to chat, and it runs most Oxide plugins without changes. A new Rust server runs vanilla, with no framework at all. On Physgun, switching to Carbon takes one setting, and Carbon installs itself the next time the server starts.
You only need access to your server in the Physgun Gamepanel. Players are disconnected while the server restarts, so pick a quiet moment. If your server runs Oxide right now, read the next section first.
Coming from Oxide
Use Oxide or Carbon, never both. Before you switch, remove Oxide’s own files:
- Stop your server.
- Open File Manager and go to
RustDedicated_Data/Managed. - Delete the files whose names start with
Oxide..
Do not delete the oxide folder. Carbon moves it into the carbon folder on its own, along with your plugins, configs and data.
Switch to Carbon
- Select Server Options in the menu on the left.
- Type
Moddingin the search box at the top of the page. Only the Modding Framework setting stays on the page. - Select the box under Modding Framework. It shows vanilla on a server without mods.
- Select carbon in the list.
The panel saves your choice straight away and shows “Startup variable successfully saved.” You don’t need to press a save button. The change applies the next time the server starts.
Leave Auto Update on, which is the default. It keeps Rust up to date when the server starts, and Carbon needs an up-to-date Rust to load. You can search for Auto Update on the same page to check it.
Start the server with Carbon
- Select Console in the menu on the left.
- Select Start. If your server is already running, select Restart and confirm.
- Watch the console while the server boots.
Carbon downloads and installs itself during this first start, so it takes longer than usual. On our test server it took about three minutes. Near the start you’ll see a line like Carbon 2.0.262.0 [2026.10.01.0] ... on Linux. Later, [Physgun] Carbon detected! Setting up permissions bridge... shows up. The server is ready once Server startup complete appears and the status at the top left says Online.
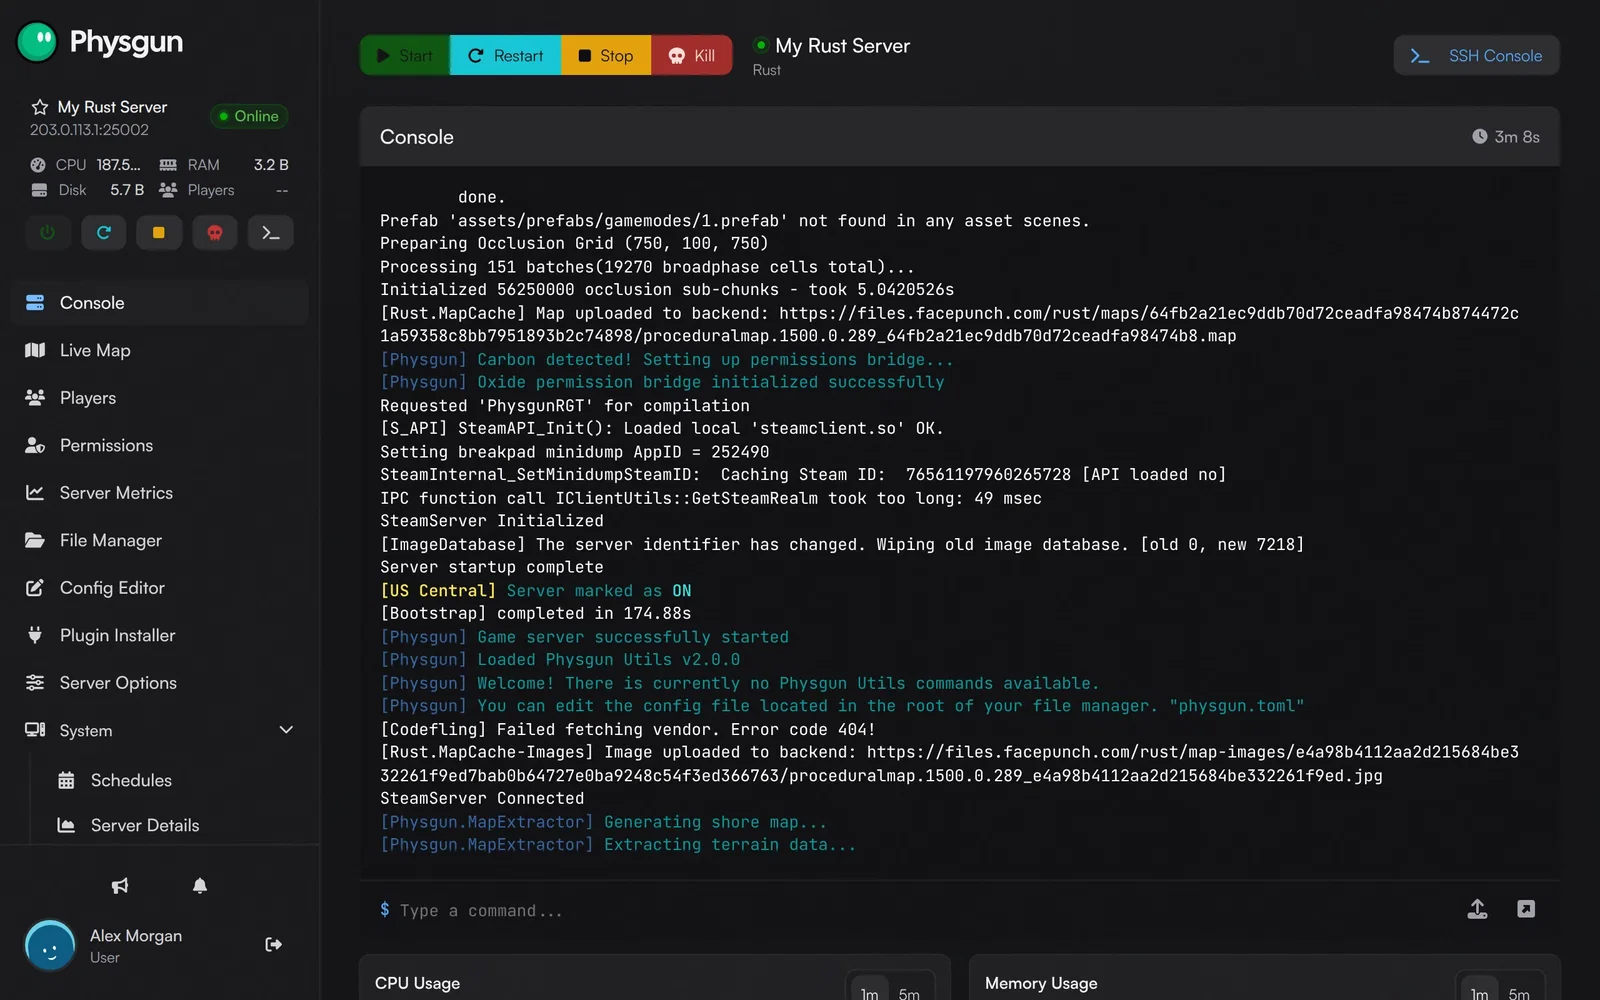 Wait for CarbonCarbon installs during this start, so it takes a few minutes longer.
Check that Carbon is running
In the command box below the console (the one that says “Type a command…”), type c.version and press Enter. The reply gives the Carbon build and the Rust version it runs on, for example:
Carbon 2.0.262.0/linux/2026.10.01.0 [production] [production_build] on Rust 118/2634.289.1Next, type c.plugins and press Enter to see a table of the plugins Carbon has loaded. Even on a fresh install it isn’t empty. You’ll see Core, which is part of Carbon, and PhysgunRGT, a plugin that comes with your Physgun server. The last line, failed plugins (0), means every plugin loaded.
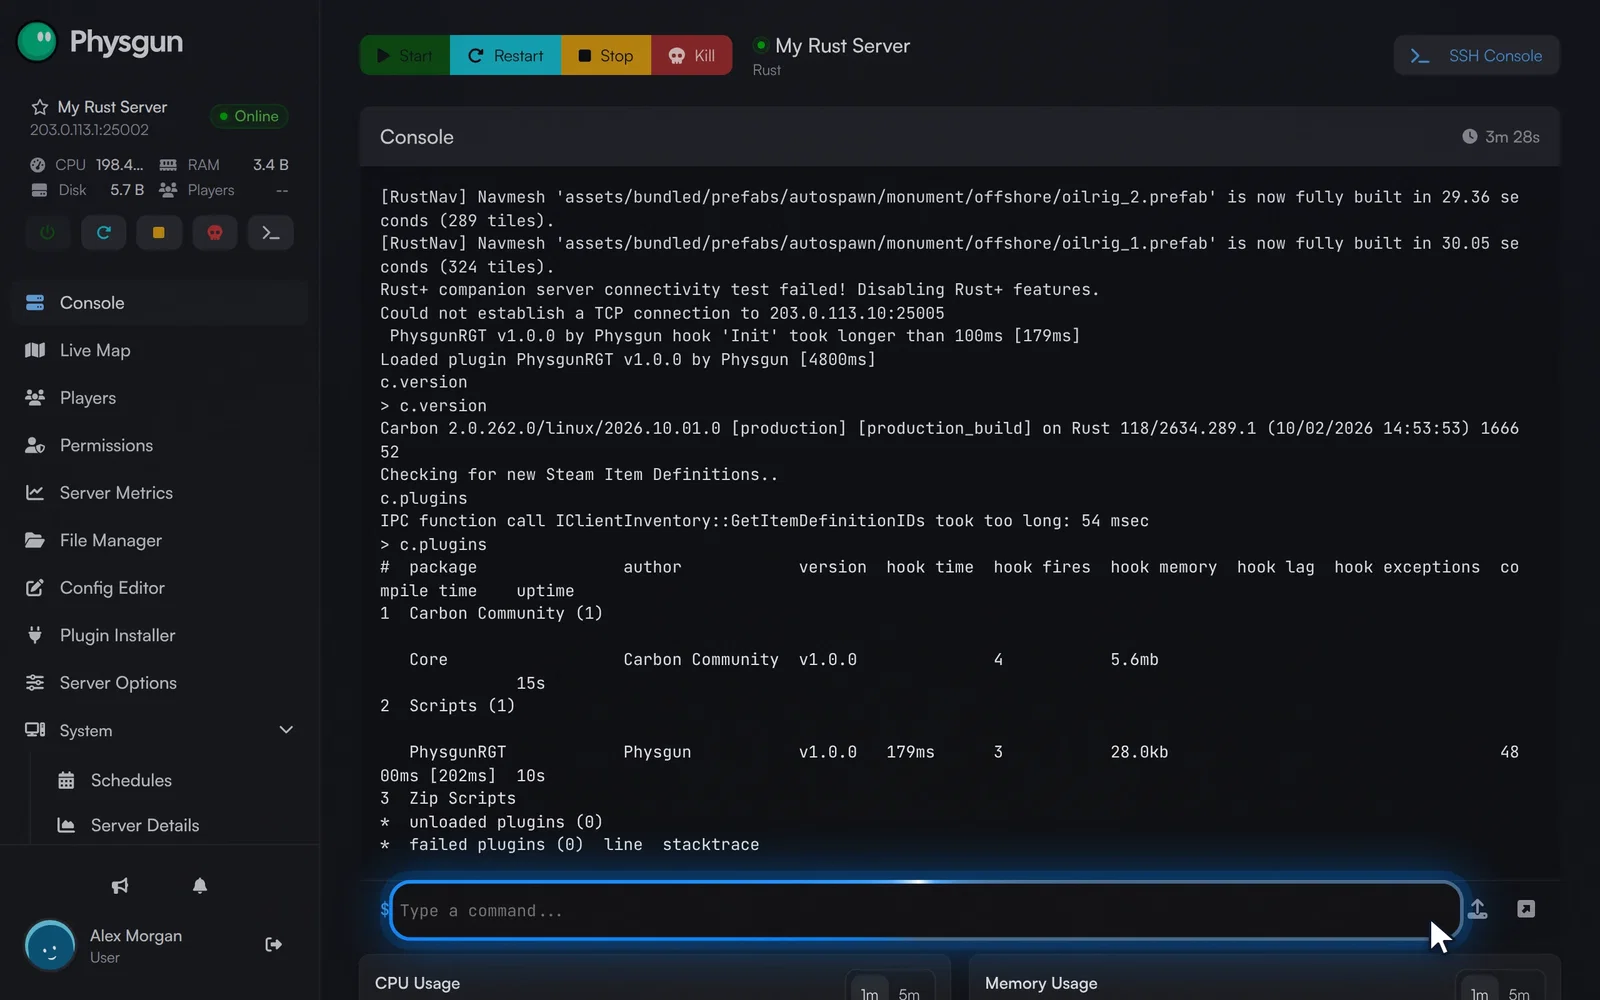 Check your pluginsPress Enter to list the plugins Carbon has loaded.
Carbon’s folders
Carbon creates a carbon folder during the first start. You can open it from File Manager in the menu on the left. These are the folders inside it that you’ll use most:
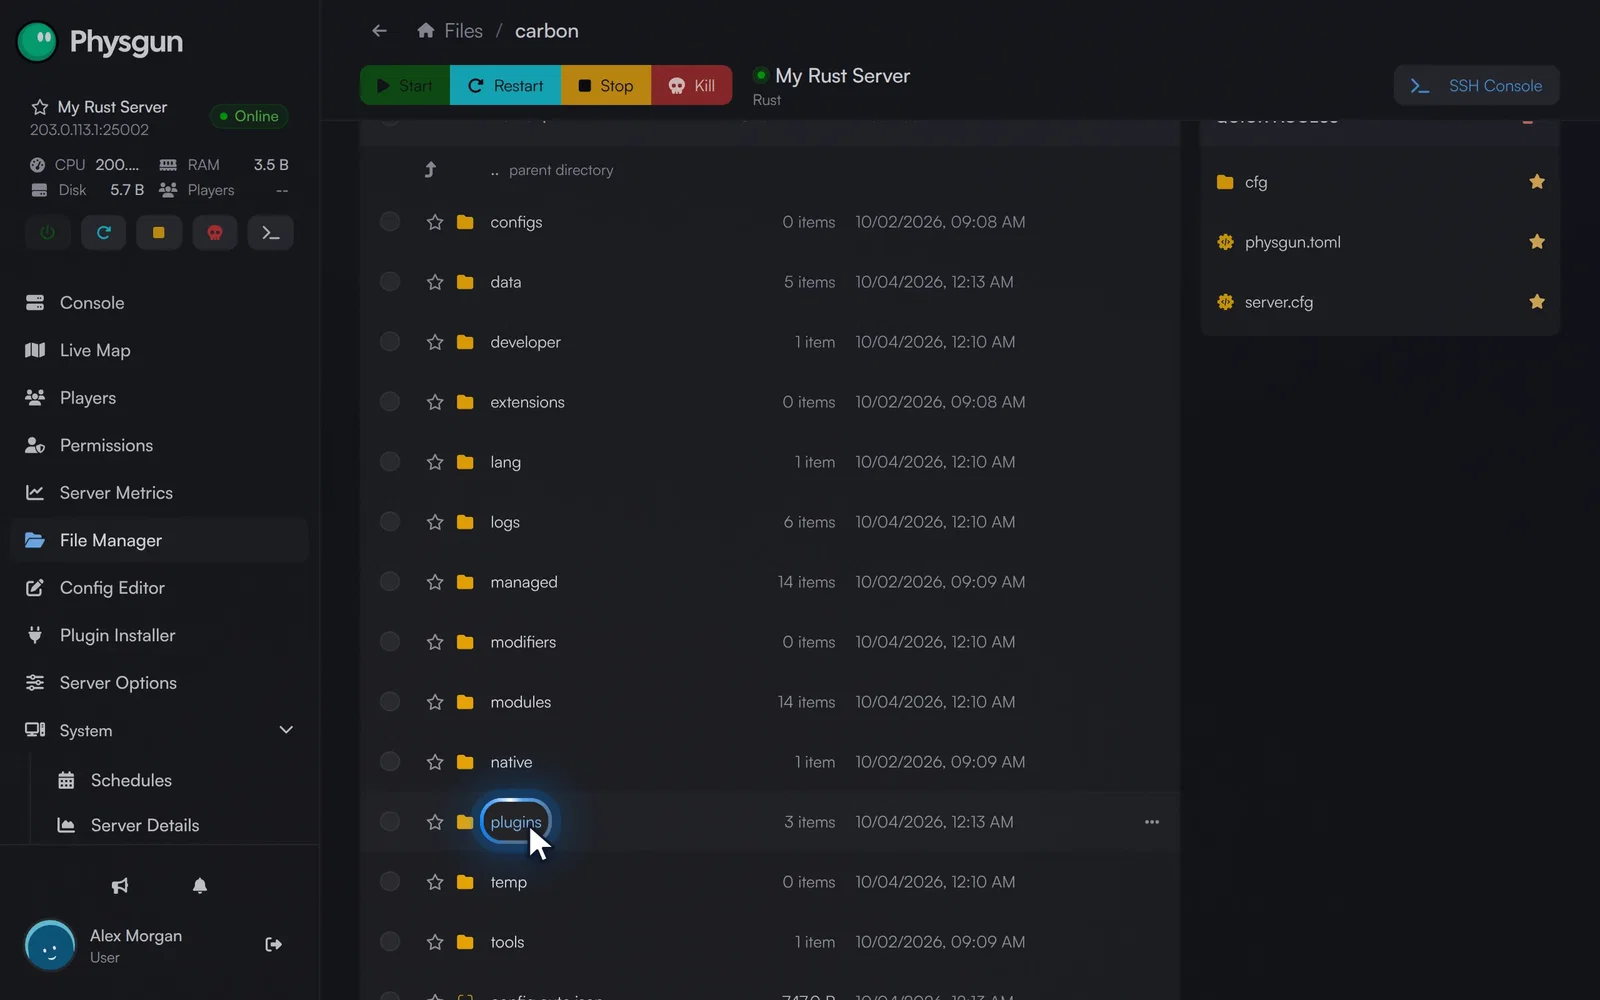 Find the plugins folderUpload plugin files here. Their settings go in configs and saved data in data.
| Folder | What goes in it |
|---|---|
carbon/plugins | Plugin files (.cs) |
carbon/configs | Each plugin’s settings |
carbon/data | What plugins save, such as player data |
carbon/modules | Carbon’s built-in modules |
Carbon’s own settings are in carbon/config.json. To add a plugin, upload its .cs file to carbon/plugins. The console then shows a Loaded plugin line for it, and it appears in c.plugins. You can also find plugins on the Plugin Installer page.
Install Carbon manually
If you run a Rust server yourself, outside the Physgun Gamepanel, this is the manual way. On Physgun, use the Modding Framework setting above instead.
- Stop the server. If it ran Oxide, delete the
Oxide.files inRustDedicated_Data/Managed(see Coming from Oxide). - Go to Carbon’s releases page. Download
Carbon.Windows.Release.ziporCarbon.Linux.Release.tar.gz. - Extract the archive into the server’s root folder, the one with
RustDedicated.exeorRustDedicatedin it. Keep the folder layout from the archive. - On Windows, start the server as usual.
- On Linux, source Carbon’s environment script in the same shell before you start the server:
cd /path/to/rust-server
tar -xzf Carbon.Linux.Release.tar.gz
source carbon/tools/environment.sh
./RustDedicated -batchmode # followed by your usual launch options
Then check it with c.version and c.plugins in the server console, the same way as above. Carbon’s documentation says to keep the server files verified and up to date every time the server boots.
If Carbon does not load
- No Carbon lines in the console: check that Modding Framework is set to carbon (see Switch to Carbon), then restart.
- The server seems stuck on the first start: Carbon is still downloading. Wait for
Server startup completebefore you restart again. c.versionis not recognised: Carbon did not load. Check that Auto Update is on and restart, so Rust and Carbon are on matching versions.- Errors after moving from Oxide: some
Oxide.files are probably still inRustDedicated_Data/Managed. Delete them as described in Coming from Oxide. - A plugin is missing or failed: run
c.pluginsand look at the failed plugins line. Make sure the.csfile is incarbon/pluginsand not in a subfolder, and that you have the plugin’s latest version.