Managing access to your Physgun Firewall Portal is essential when multiple administrators, developers, or team members need to help manage your server’s network security. Rather than sharing a single login, the portal allows you to add individual users to your team so everyone can securely access the tools and settings they need.
In this guide, we’ll show you how to navigate the Physgun Firewall Portal, invite existing users to your team, and create new Physgun billing accounts for people who don’t already have one.
Note: The Physgun Firewall Portal is only available to Physgun customers who own a VPS, dedicated server, or colocation service, as well as their subusers.
 Navigating Your Portal
If this is your first time using the firewall portal, some navigation tips may be in order. For starters, to access your portal, visit https://portal.physgun.com and log in using your billing portal information.
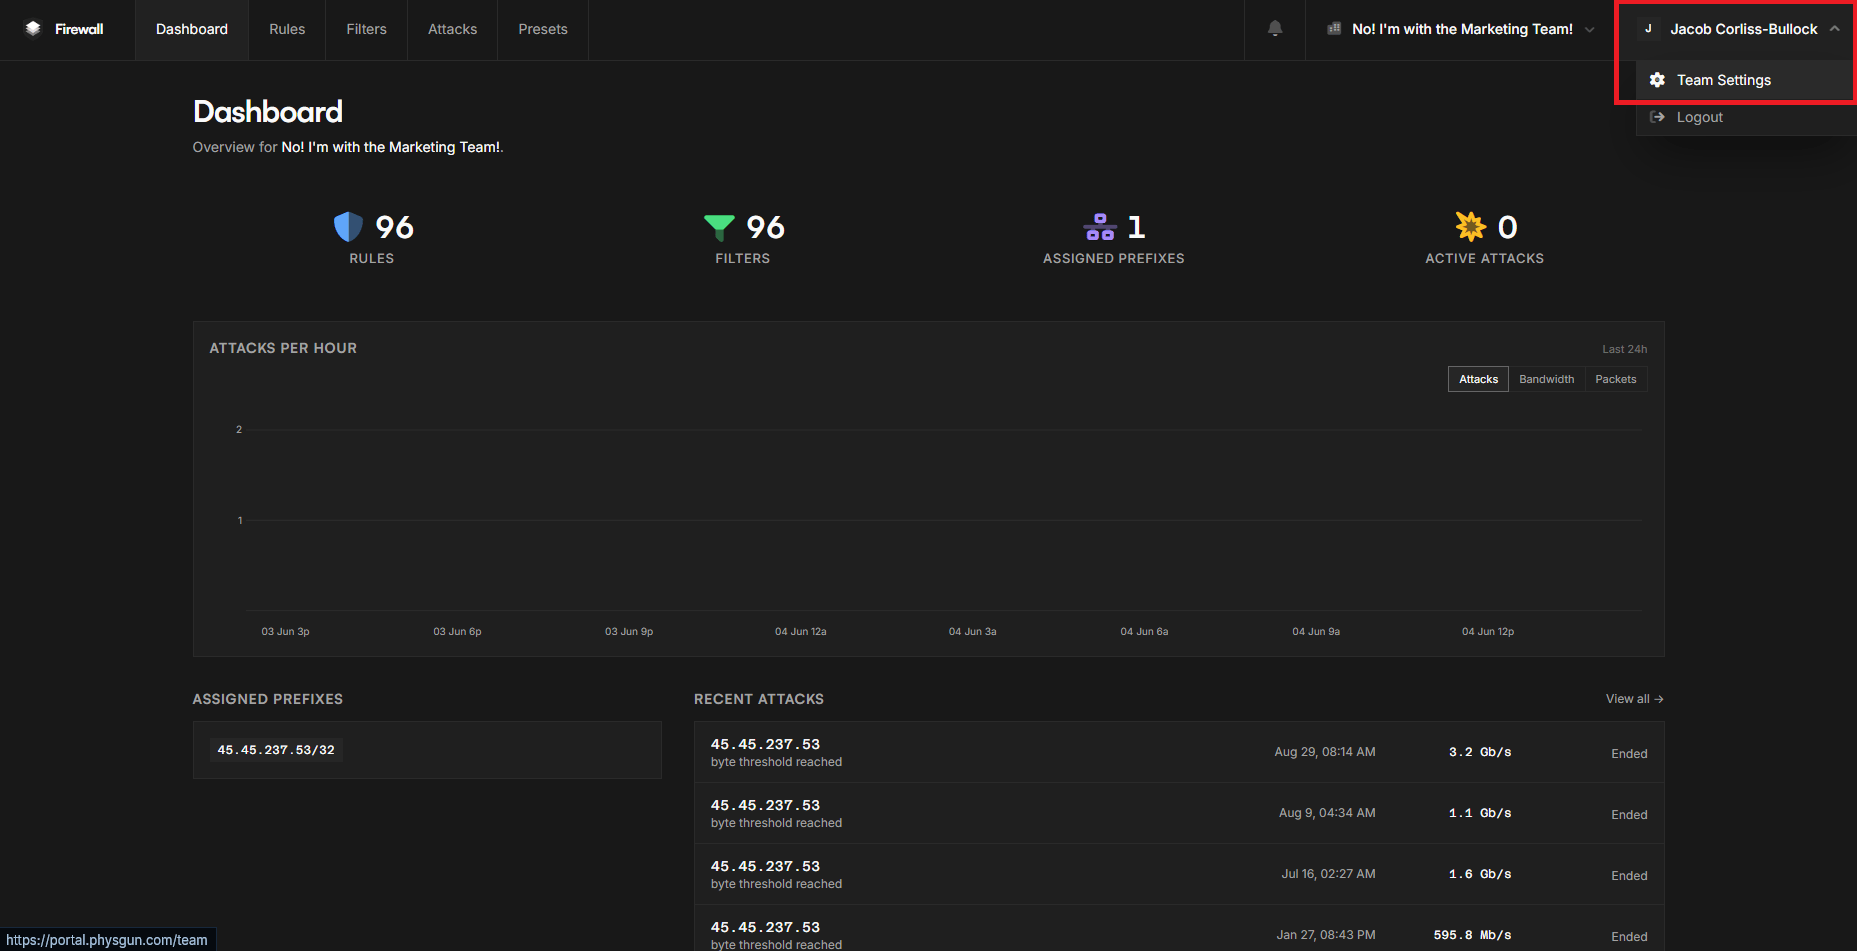
Once you’re in your dashboard, navigate to your profile in the top right corner and select Team Settings. If you have multiple teams, make sure the correct one is selected using the drop-down menu next to your profile.
Adding People to Your Firewall
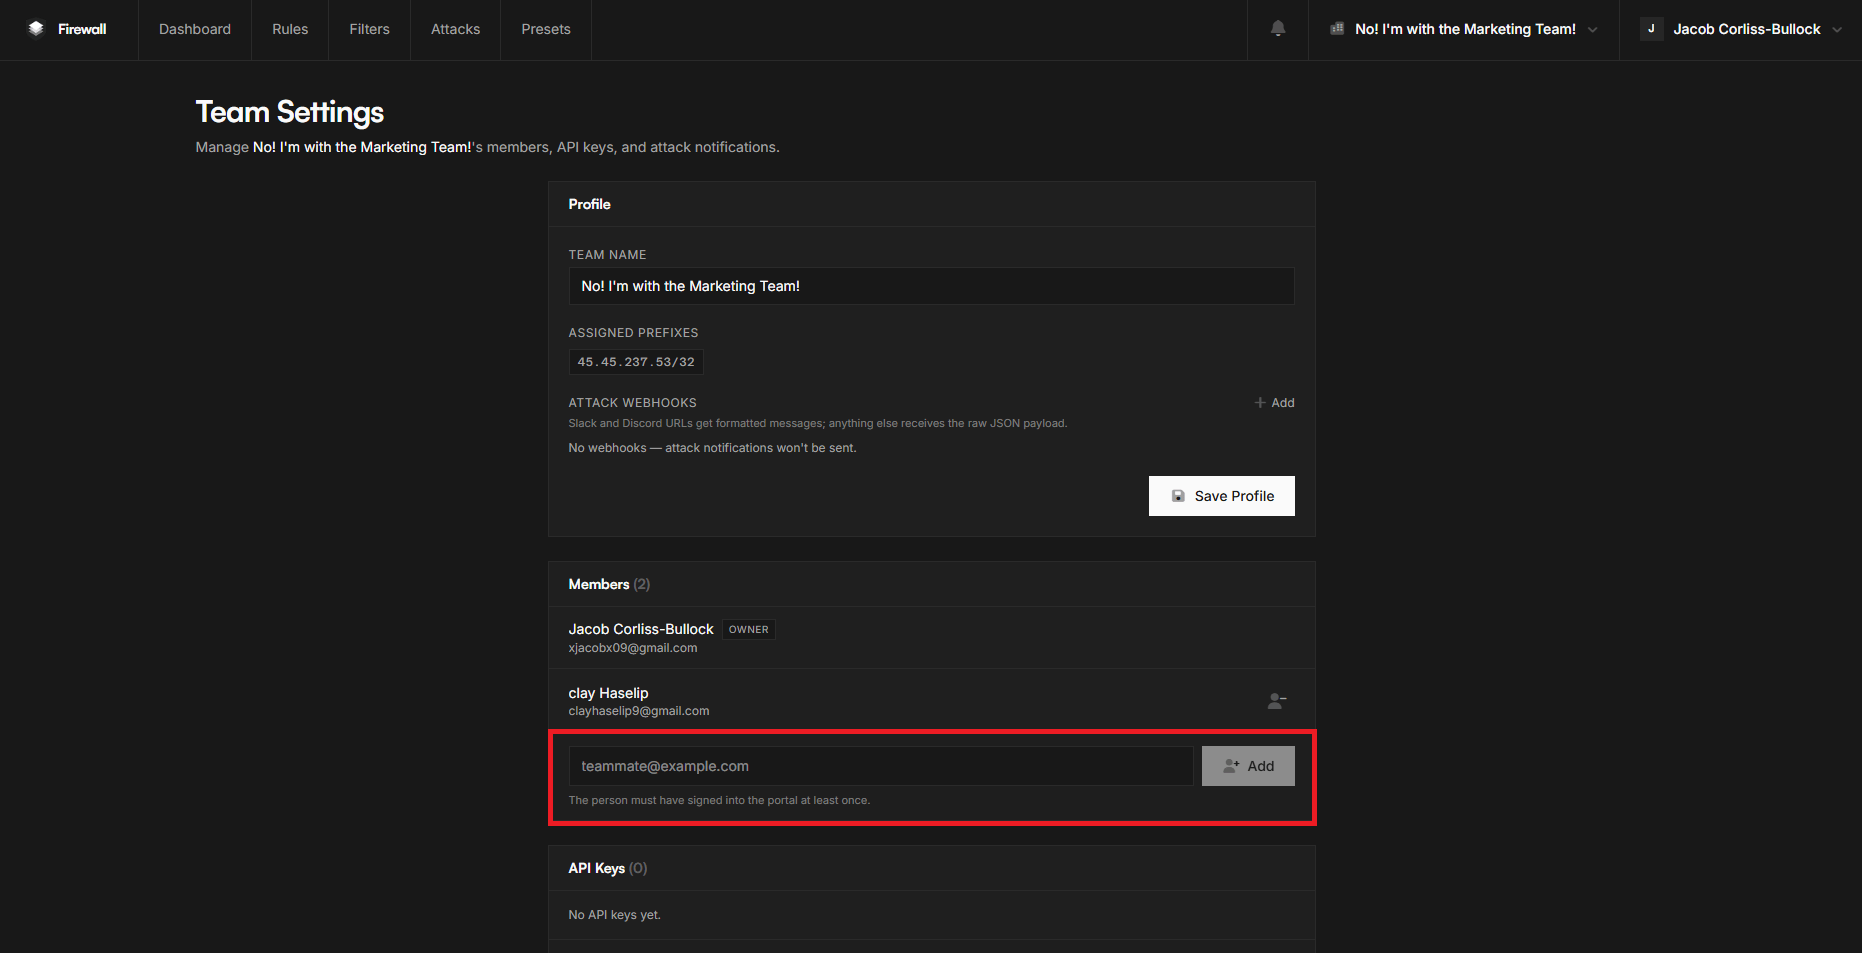
Now that you’re in your team settings, you should see a section that says “Members”. This is where you can add members to your portal using their email. Before you can add someone to your portal, you need to make sure they have a Physgun billing account and have attempted to log in to the firewall portal. If they already have one, input their email in the text box and click “Add”. If they don’t have one, read the next section to learn how to create a new account.
Creating a Physgun Billing Account
- Visit https://physgun.com.
- Click the Login drop-down menu in the top-right corner and select Billing Portal.
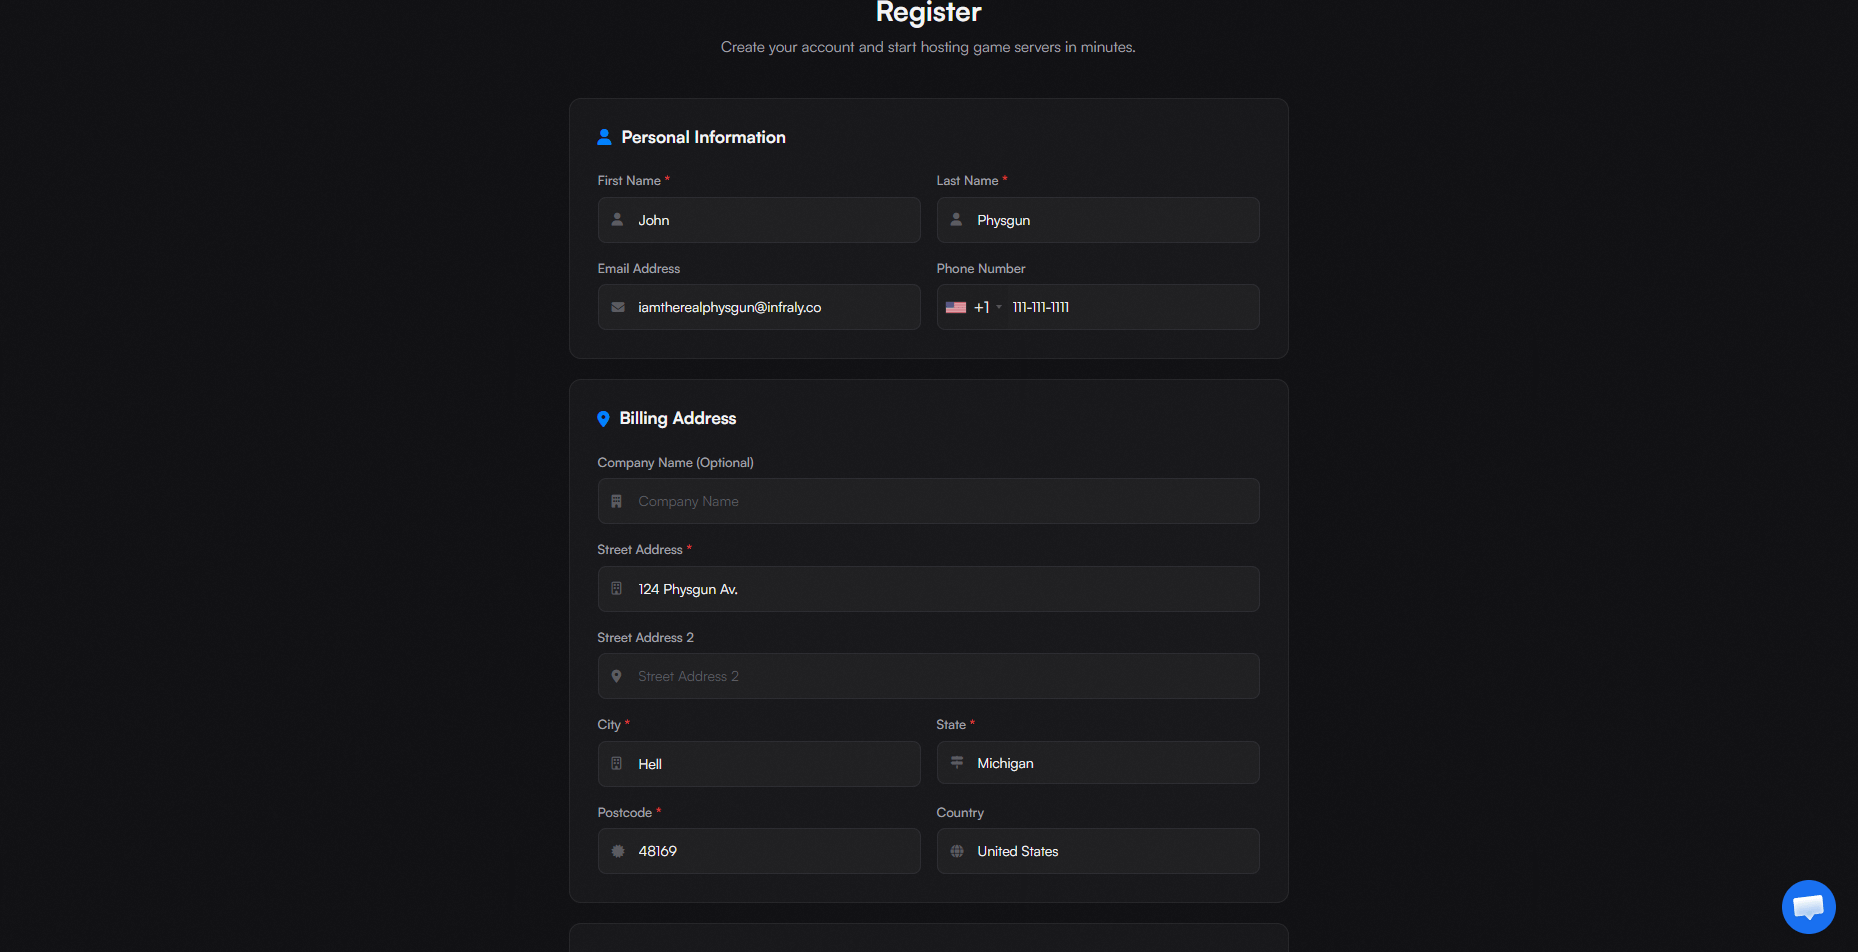
- Physgun will ask you for your name, contact information, billing address, and some other minor information, including how you heard about us and whether you’d like to sign up for newsletters.
- Fill out the necessary information, acknowledge the terms of service, and click Register.
- Once registered, visit https://portal.physgun.com and log in.
- That’s all that needs to be done on their end! Just add them to your portal as mentioned before, and they’re ready to go!
Conclusion
Adding users to your Physgun Firewall Portal only takes a few minutes and makes managing your firewall much easier when working with a team. By assigning each person their own account, you can maintain better security, accountability, and access control without sharing credentials.
Whether you’re bringing on additional server administrators, developers, or trusted staff members, the Team Settings page provides a simple way to manage portal access. Once your users have billing accounts and have been added to the team, they’ll be ready to help manage your firewall and server infrastructure.