

Creating a playable level for S&Box may feel like stepping into two different worlds. Hammer 2 handles the heavy lifting (static geometry, baked lighting, navigation meshes) while the newer Scene Editor adds gameplay logic, prefabs, and dynamic systems.
By the end of this guide, you’ll have a simple map compiled to a .vmap, populated with spawn points and basic lighting, and ready for upload to the Steam Workshop.
Launching Hammer 2
- Run
sbox-dev.exe(usually found atsteamapps/common/sbox/sbox-dev.exe), or install and launch s&box editor on Steam. - Create a new Addon project. Name it whatever you’d like your map to be called.
- Once loaded into the editor, in the top bar, choose Tools → Hammer Editor.
Hammer launches directly from the S&BOX development executable, ensuring the correct version of Source 2 tools is used.
Creating Your First Map
Starting a New VMAP
- File → New opens a blank workspace.
- Save immediately (
Ctrl+S) and give the file a clear name, e.g.sandbox_arena.vmap.
Interface Overview
- 3D viewport – Walk through the level in real time.
- Orthographic views – Top, side, and front views help line up geometry.
- Object hierarchy – Lists all brushes and entities for quick selection.
- Asset Browser – Drag materials, models, or prefabs onto the map.
- Inspector – Adjust properties of the selected object.
- Tool palette – Switch between Block, Selection, and Entity tools.
Basic Hammer Controls
| Action | Shortcut |
|---|---|
| Block Tool | Shift + B |
| Selection Tool | Shift + S |
| Entity Tool | Shift + E |
| Fullbright preview | F5 |
| Lightmap preview | F6 |
| Compile map | F9 |
The 3‑D camera behaves like a first‑person shooter: right‑mouse to look, WASD to move, hold Shift for faster travel. Grid snapping (default 4‑unit) prevents tiny gaps that can cause leaks or collision glitches.
Tip: Turn on grid snapping while laying out basic walls; it saves hours of debugging later.
Building Basic Geometry
Floor
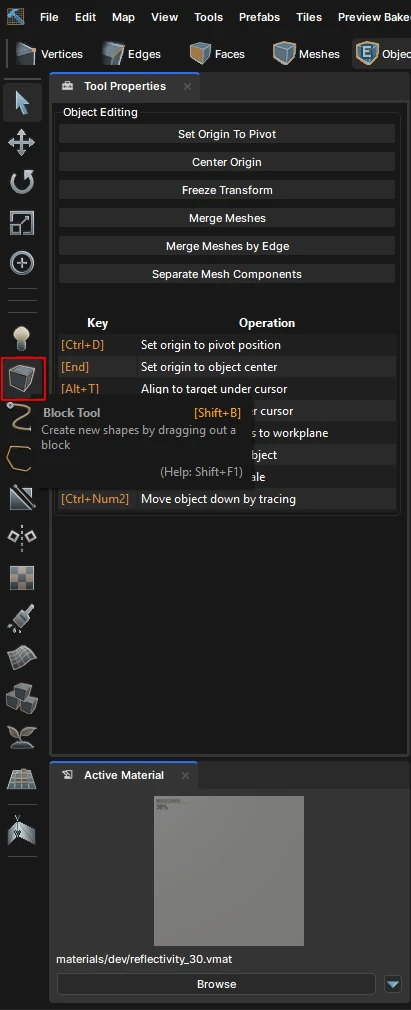
- Activate the Block Tool from the left side navbar.
- Click and drag a large rectangle across the 2‑D view.
- Pull the top handle upward to give the floor thickness (usually 4 units).
Walls and Rooms
- Duplicate the floor block, scale it down, and raise it to form walls.
- Keep all vertices aligned to the grid; avoid sub‑unit offsets.
- For doorways, simply delete a section of the wall brush.
Verticality
Add ramps by creating a sloped block (use the Vertex Tool to pull a corner) or stack platforms at different heights. Test movement frequently with the play button in the top toolbar.
Applying Materials
Open the Asset Browser, locate the Source 2 material library, and drag a material onto any brush. Popular choices for a starter map:
materials/concrete/concrete_01.vmatmaterials/metal/metal_grid.vmatmaterials/grass/grass_01.vmat
When assigning textures, watch the UV scale in the Inspector – a value of 0.25 often yields a realistic repeat for large surfaces. Reusing the same material across many brushes reduces draw calls and improves performance.
Adding Lighting
Basic Light Entities
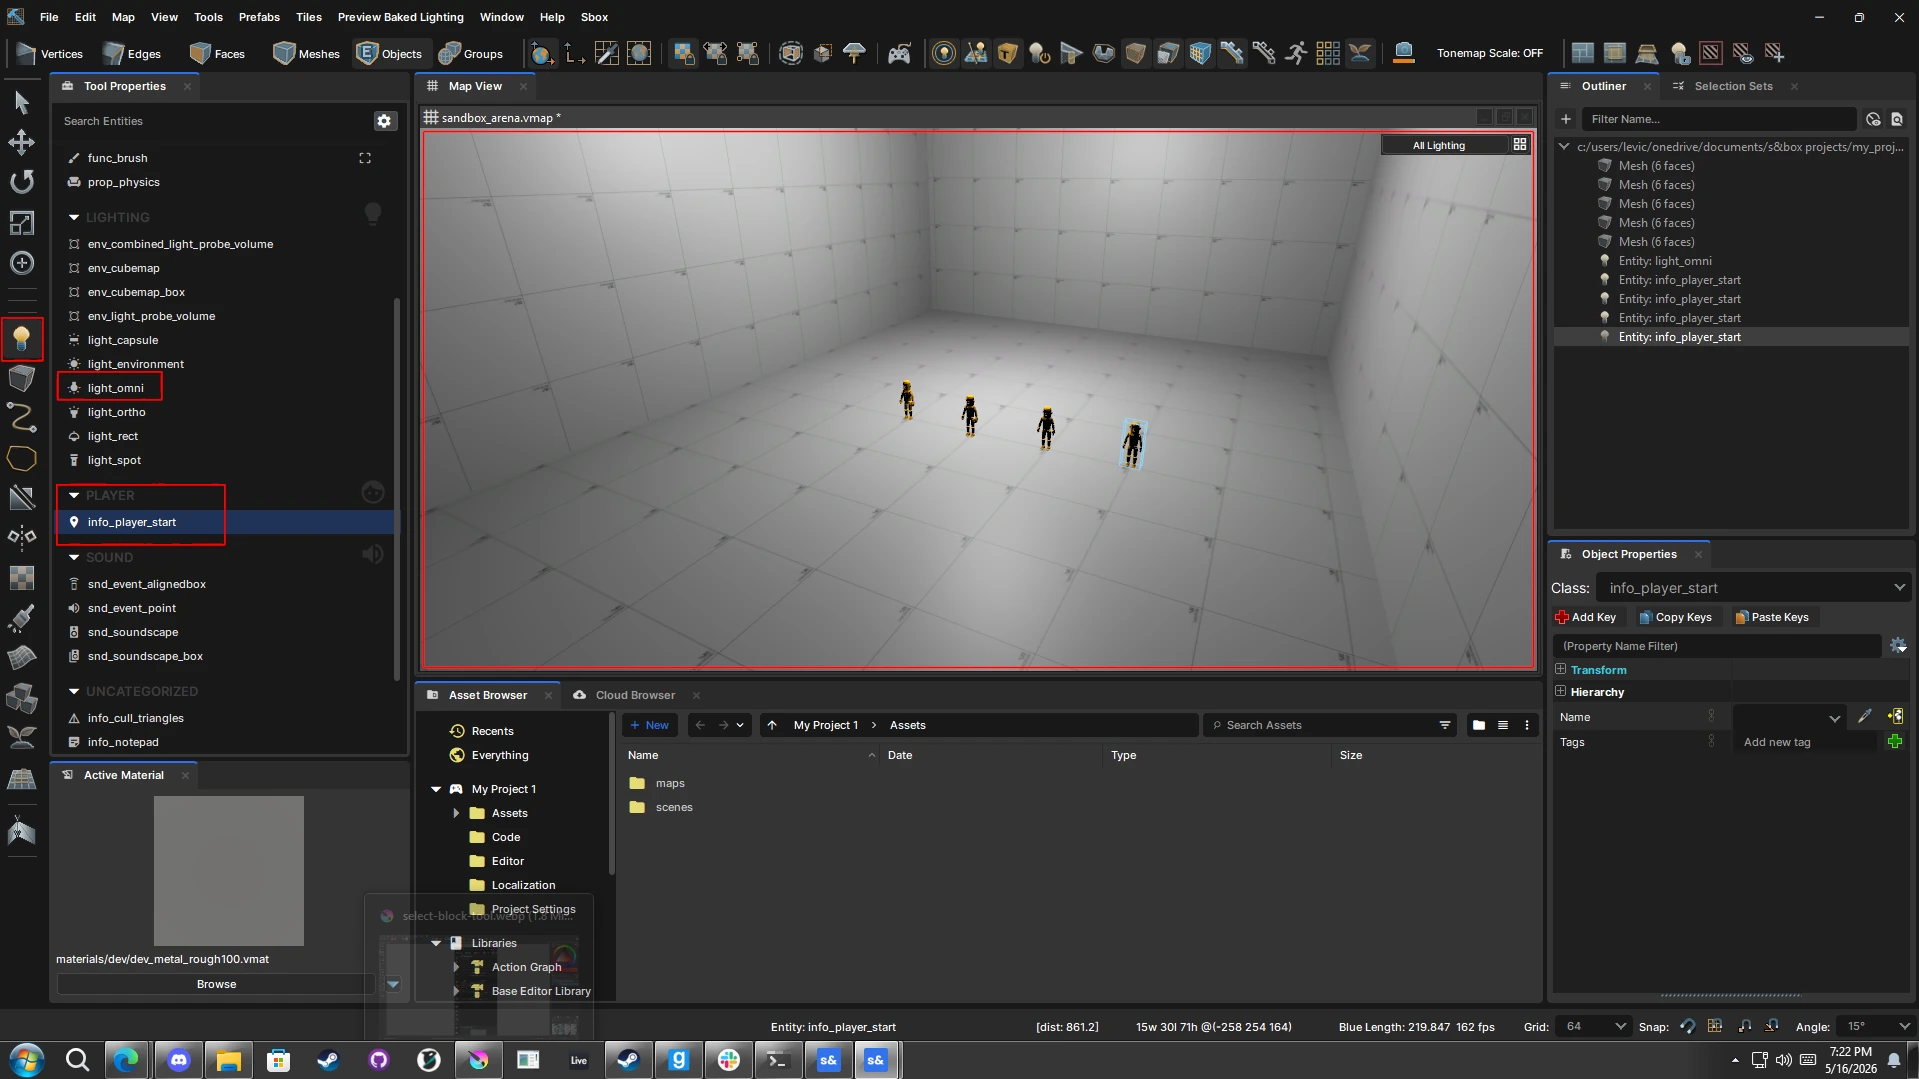
- Switch to the Entity Tool.
- Place a
light_omniin the center of the room. - In the Inspector, set Brightness to
250and choose a warm color. - Add a
light_environmentnear the skybox to simulate ambient daylight.
Previewing
- Press F6 for a light‑map preview – you’ll see baked shadows and bounce lighting.
- Toggle F5 for fullbright; this helps spot geometry errors that are hidden by shadows.
Note: Hammer only handles baked lighting. Dynamic lights (e.g., flickering torches) are added later in the Scene Editor.
Adding Spawn Points
- With the Entity Tool, click where you want players to start.
- Set the Class field to
info_player_start. - Duplicate the entity for each team or game mode, moving each copy to a distinct location.
Warning: A map lacking at least one
info_player_startwill refuse to load in multiplayer sessions.
Compiling the Map
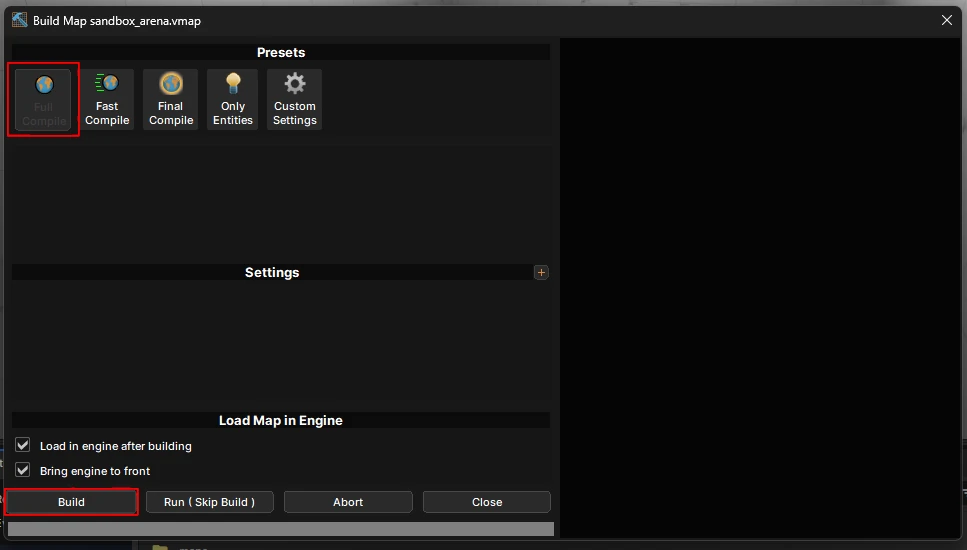
Press F9 to open the compile dialog. Two main presets exist:
- Fast Compile – Quick iteration, lower lightmap resolution.
- Full Compile – Generates high‑quality lightmaps and runs additional optimization passes.
Select Full Compile before you share the map; the resulting .vmap will be smaller and run smoother on players’ machines.
After a successful build, Hammer automatically launches the map in a test instance, letting you verify geometry, lighting, and spawn points instantly.
Importing the Map Into a Scene
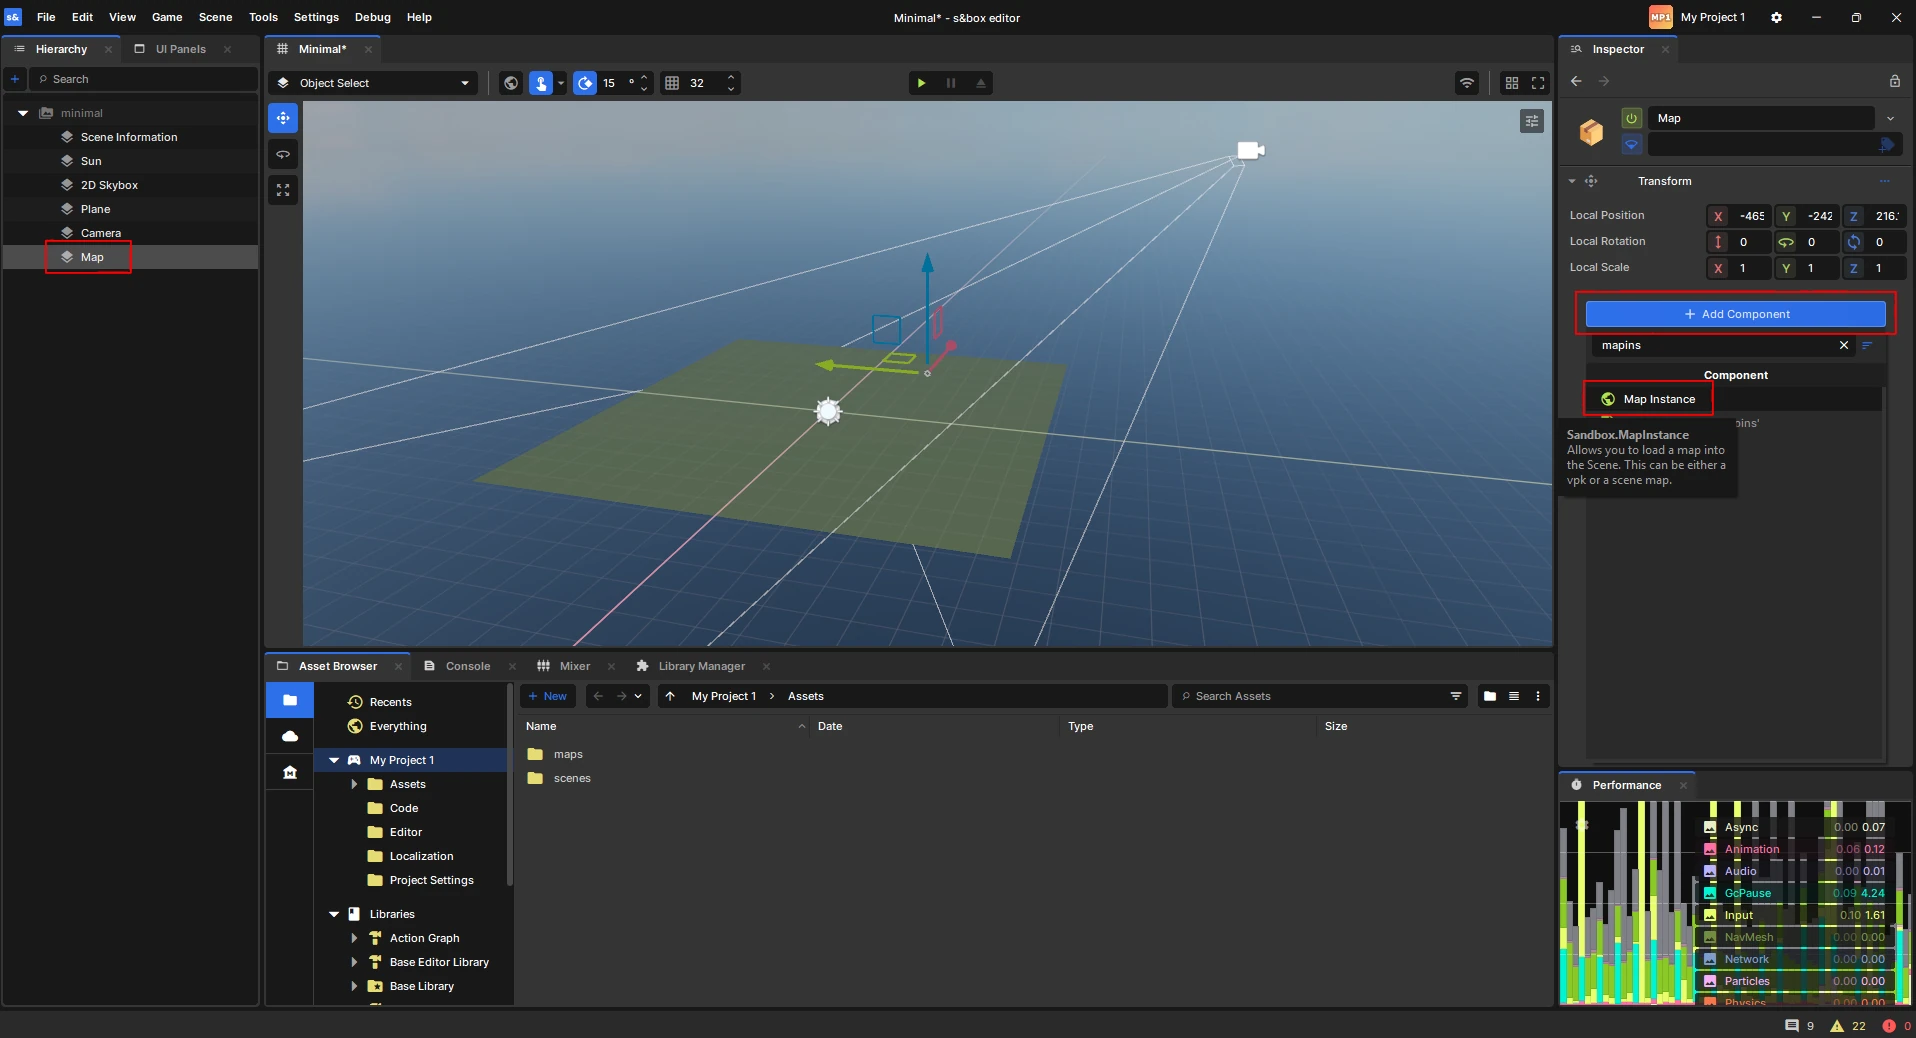
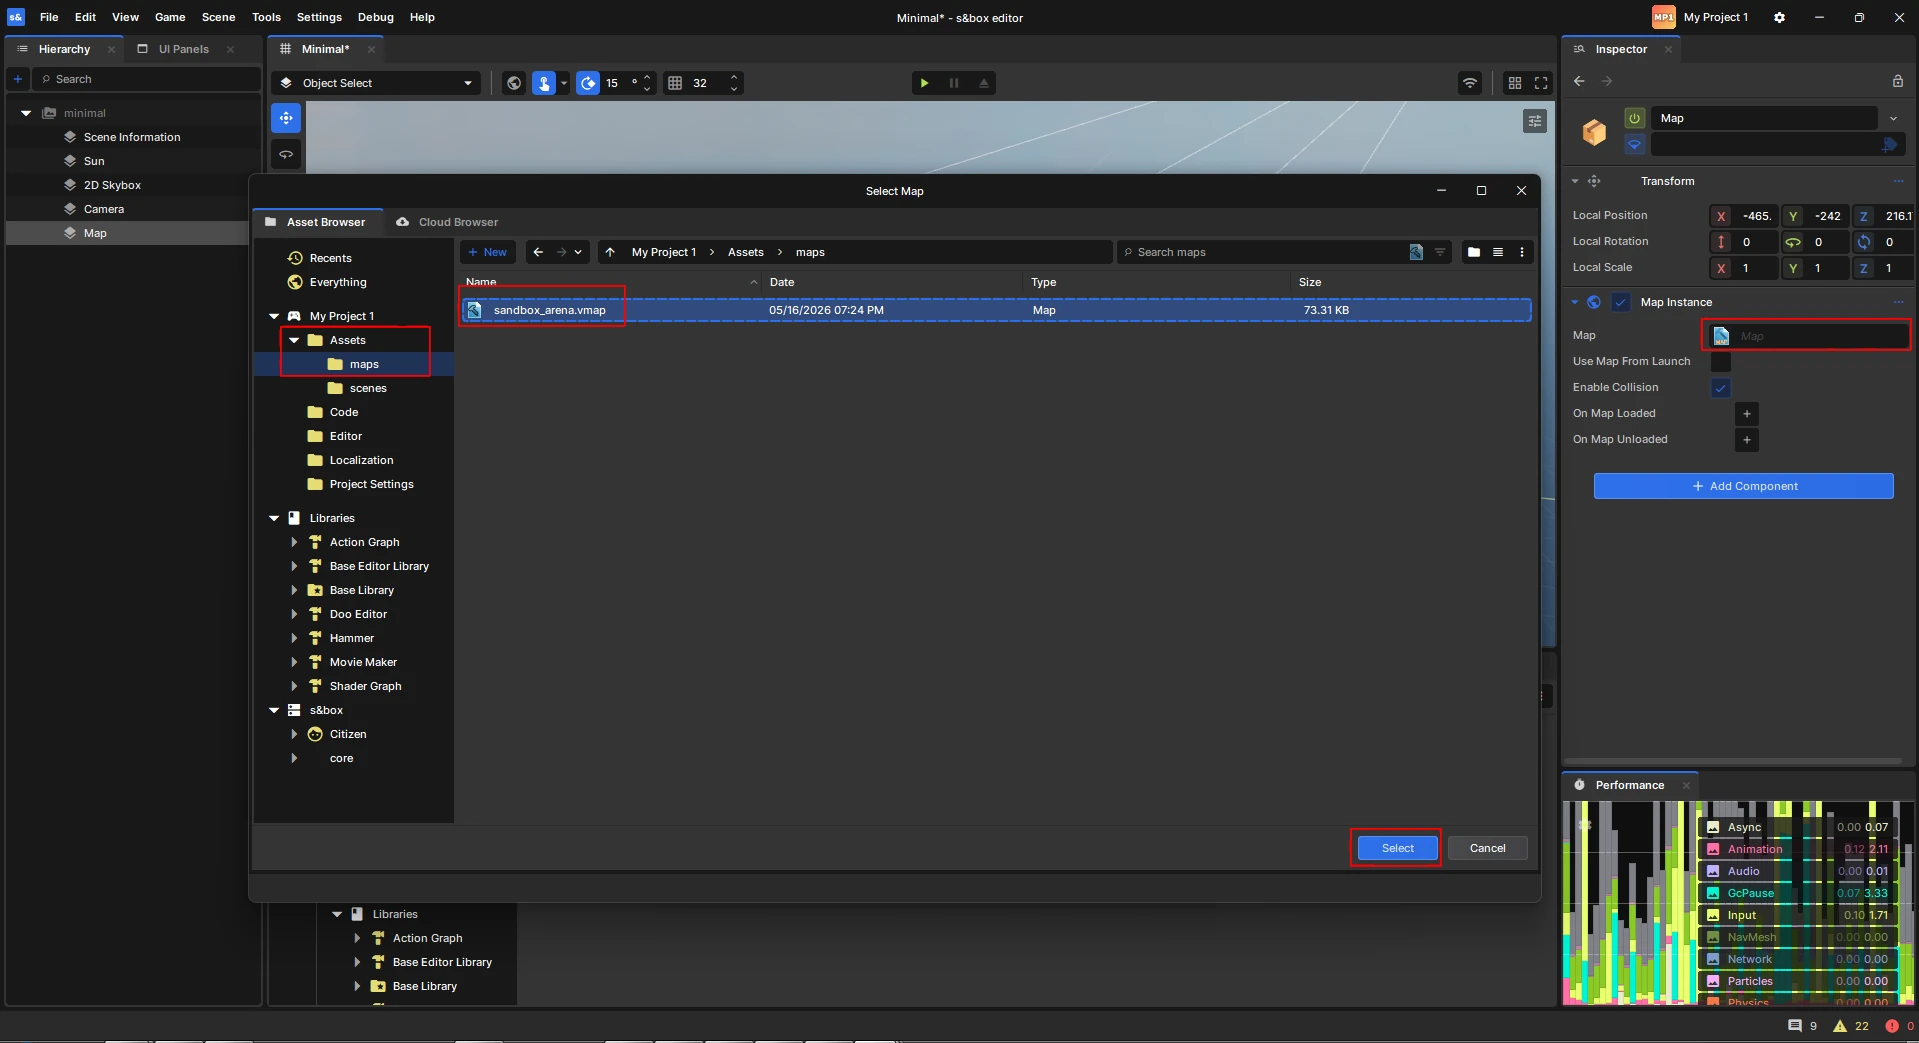
- Open the Scene Editor (found in the same Tools menu).
- Create a new empty GameObject.
- Add a Map Instance component from the Add Component menu.
- Drag the compiled
sandbox_arena.vmaponto the component’s Map field.
The Map Instance links the static world from Hammer with any gameplay components you add in the Scene hierarchy.
Adding Gameplay Elements
Keep in Hammer
- All static brushes, collision meshes, and baked lightmaps.
- Navigation meshes (
navmesh) for AI.
Add in Scene
- Scripts – C# or Lua files that control doors, triggers, or scoring.
- Prefabs – Interactive props like crates, weapons, or health packs.
- Dynamic lights – Spotlights that follow moving objects.
- UI elements – Mini‑maps, scoreboards, or chat windows.
A clean separation makes it easier to re‑use the same world geometry across multiple game modes.
Testing Your Map
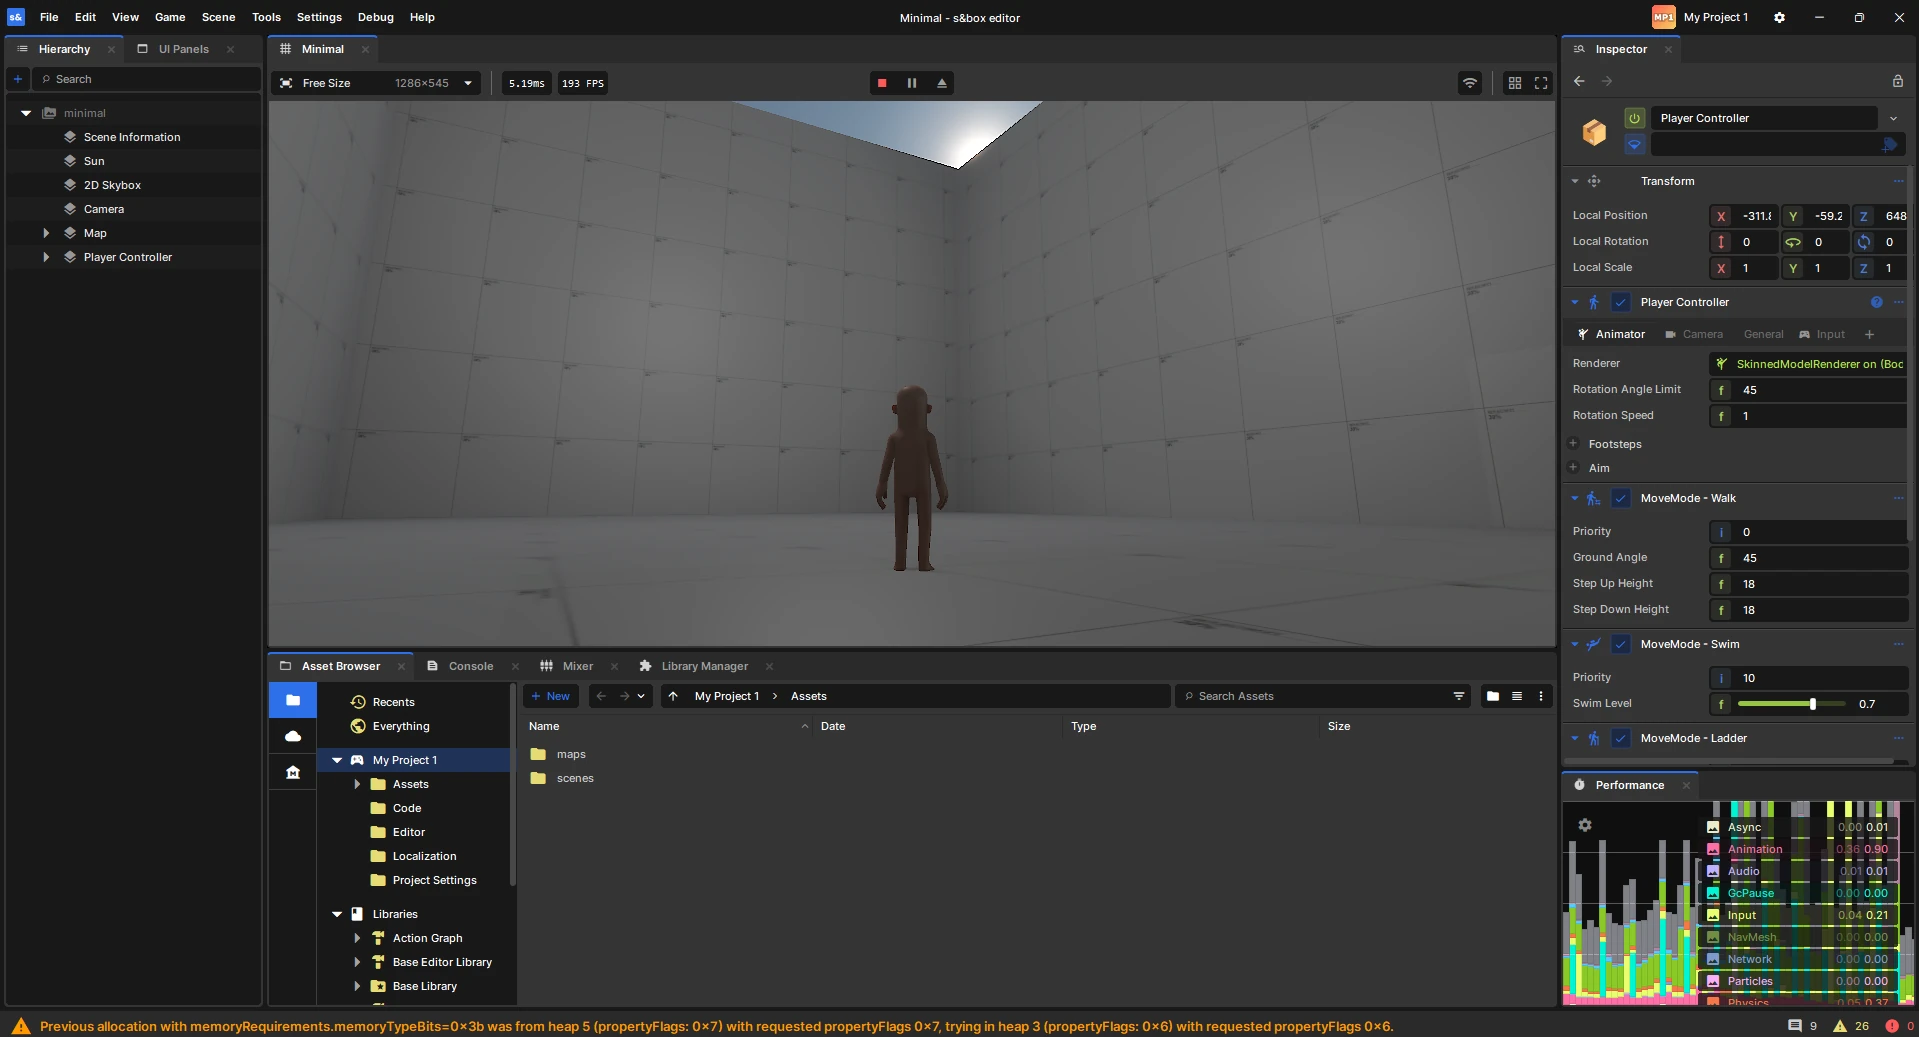
- Run the scene from the Scene Editor; the map loads automatically.
- Walk through every corridor, jump onto platforms, and verify that you can’t fall through walls.
- Open a local multiplayer session (two instances of S&BOX) to ensure each player spawns at a distinct
info_player_start. - Watch the console for warnings about missing assets or broken colliders.
Typical hiccups include:
- Missing Map Instance path – double‑check the relative path (
maps/sandbox_arena.vmap). - Leaked geometry – use the Leak Finder tool under Tools → Leak Detection.
- Dark spots – rebuild lighting or add additional
light_spotentities.
Optimizing Your Map
- Consolidate props – group static meshes into a single brush where possible.
- Limit dynamic lights – each one adds a draw call; use baked light whenever you can.
- Reuse materials – the engine batches identical textures automatically.
- Trim unused assets – delete any imported models that never appear in the scene.
A well‑optimized map stays under 5 MB after compilation and runs at a stable frame rate even on modest hardware.
Tip: Keep the draw call count visible in the developer console (
developer 1). Aim for under 2,000 in a typical indoor map.
Publishing to the Workshop
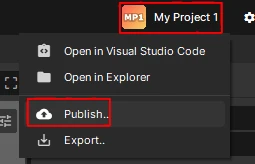
- In the editor, click your project settings at the top right and select Publish
- Go through the steps required, including adding the name and organization for the map.
- Select Next when prompted and go through the steps including setting the gamemode the map is for and more.
- After completing these steps, you will now have your published map.
After a short processing period, your map appears in the S&Box Workshop where other players can play it and use it in their own projects instantly.
Common Beginner Mistakes
| Symptom | Likely Cause | Fix |
|---|---|---|
| Player falls through floor | Brush thickness too thin or missing collision | Increase brush height to at least 4 units |
| Map loads black | No light_environment or failed compile | Add a sky‑box light and recompile |
| Doors appear too small | Incorrect scale or missing prop_door entity | Adjust brush dimensions and replace with a proper door prefab |
| High CPU usage | Too many dynamic lights or overlapping meshes | Convert lights to baked, merge nearby geometry |
Remember: the map must be compiled after every major geometry change. Skipping this step leaves the engine with outdated collision data, leading to invisible walls or phantom obstacles.
Need more assistance? Feel free to join the Physgun Discord, or the S&Box Discord for 24/7 help!
Happy mapping!