

S&box is Facepunch’s modern multiplayer game platform built on Source 2 and powered by C#. It uses a scene-based editor, real-time hot reloading, and a component-driven architecture that makes building and testing games fast and iterative. In this guide, you’ll create a basic playable scene, understand core scripting concepts, add simple gameplay logic, and prepare a project for publishing.
Introduction
S&box is not a traditional “separate engine + editor” workflow. Instead, the editor and runtime are tightly integrated, allowing you to build, test, and modify games in real time.
Key concepts you will use:
- Scene-based world system
- GameObjects with Components
- C# scripting with hot reload
- Built-in multiplayer networking
By the end, you’ll understand the full basic loop: create a project → build a scene → add logic → test → publish.
Requirements
Before starting, make sure you have:
- Steam account
- .Net 10+ Installed
- S&box installed via Steam
- C# IDE (Visual Studio, Rider, or VS Code)
- Basic understanding of C# (recommended but not required)
Installing S&box
S&box is installed through Steam and includes both the runtime and editor environment.
Installation Steps
- Open Steam
- Purchase or Install S&box+s&box editor from your library (S&Box Editor can be found under Tools in your Steam Library)
- Launch the application
- Wait for initial asset compilation
Default install location:
C:\\Program Files (x86)\\Steam\\steamapps\\common\\sbox
Note: First launch may take longer due to shader and engine compilation.
Creating Your First Project
Create a New Game Project
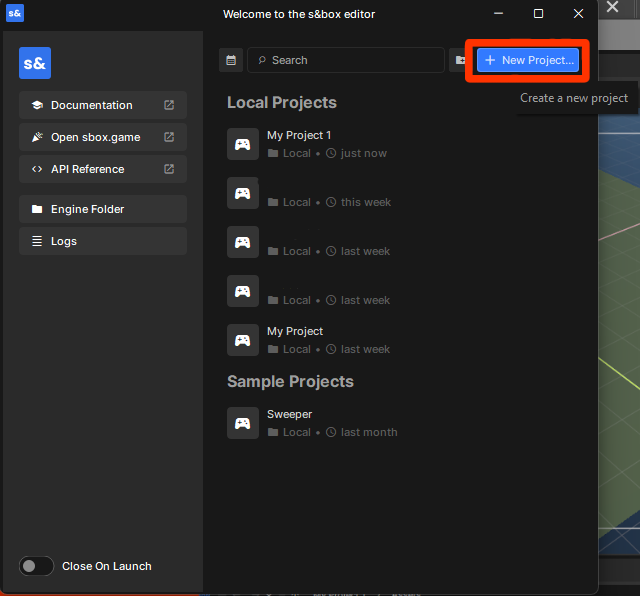
- Launch the S&box Editor
- Select New Project
- Choose Game Project
- Pick a template (Empty Game recommended)
- Name your project and create it
S&box will generate a structured folder automatically.
Project Structure Overview
S&box organizes content into clear directories:
code/        → C# gameplay scripts and components
content/     → scenes, prefabs, maps
materials/   → shaders and material definitions
models/      → 3D assets (FBX supported)
sounds/      → audio files
Everything inside these folders is automatically tracked and hot reloaded.
Understanding the Core Engine System
S&box uses three main building blocks:
Scene
A scene is your entire playable world. It contains all objects, lighting, and gameplay elements.
GameObject
A GameObject is an entity in the world with transform data (position, rotation, scale).
Component
A Component adds behavior to a GameObject (movement, rendering, health, interaction).
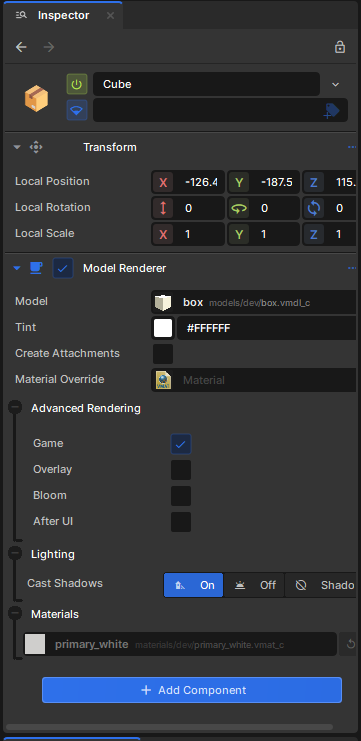
This is the foundation of all gameplay systems in S&box.
Creating Your First Scene
Build a Simple Level
- Open Scene Editor
- Create a new scene
- Add a floor using primitive tools
- Place basic props (cubes, ramps, etc.)
- Add lighting (Directional Light recommended)
- Add a Spawn Point entity
- Save the scene inside
content/
Scenes are saved as .vmap files.
Testing Your Scene
- Press Play (F5) to run the scene
- Use free camera mode to inspect the environment
- Verify player spawns correctly
- Test collisions and lighting
Tip: Iteration is instant, so continuously test while building.
Writing Gameplay Code
S&box uses modern C# with .NET 10 and supports live hot reload.
Scripts live in the code/ folder and automatically compile when saved.
Creating a Simple Component
Create a file called Rotator.cs:
using Sandbox;

public sealed class Rotator : Component
{
    protected override void OnUpdate()
    {
        // Rotate object every frame
        GameObject.Transform.Rotation *= Rotation.FromYaw( 90f * Time.Delta );
    }
}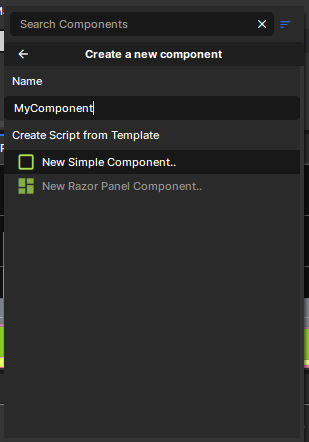
Attach this component to any GameObject in the scene. When you press Play, it will rotate.
Understanding Components
Components are the core gameplay system in S&box.
They:
- Attach to GameObjects
- Can run logic every frame
- Can be reused across objects
- Support full C# debugging and tooling
Everything from players to UI is built using components.
Creating A Player Controller
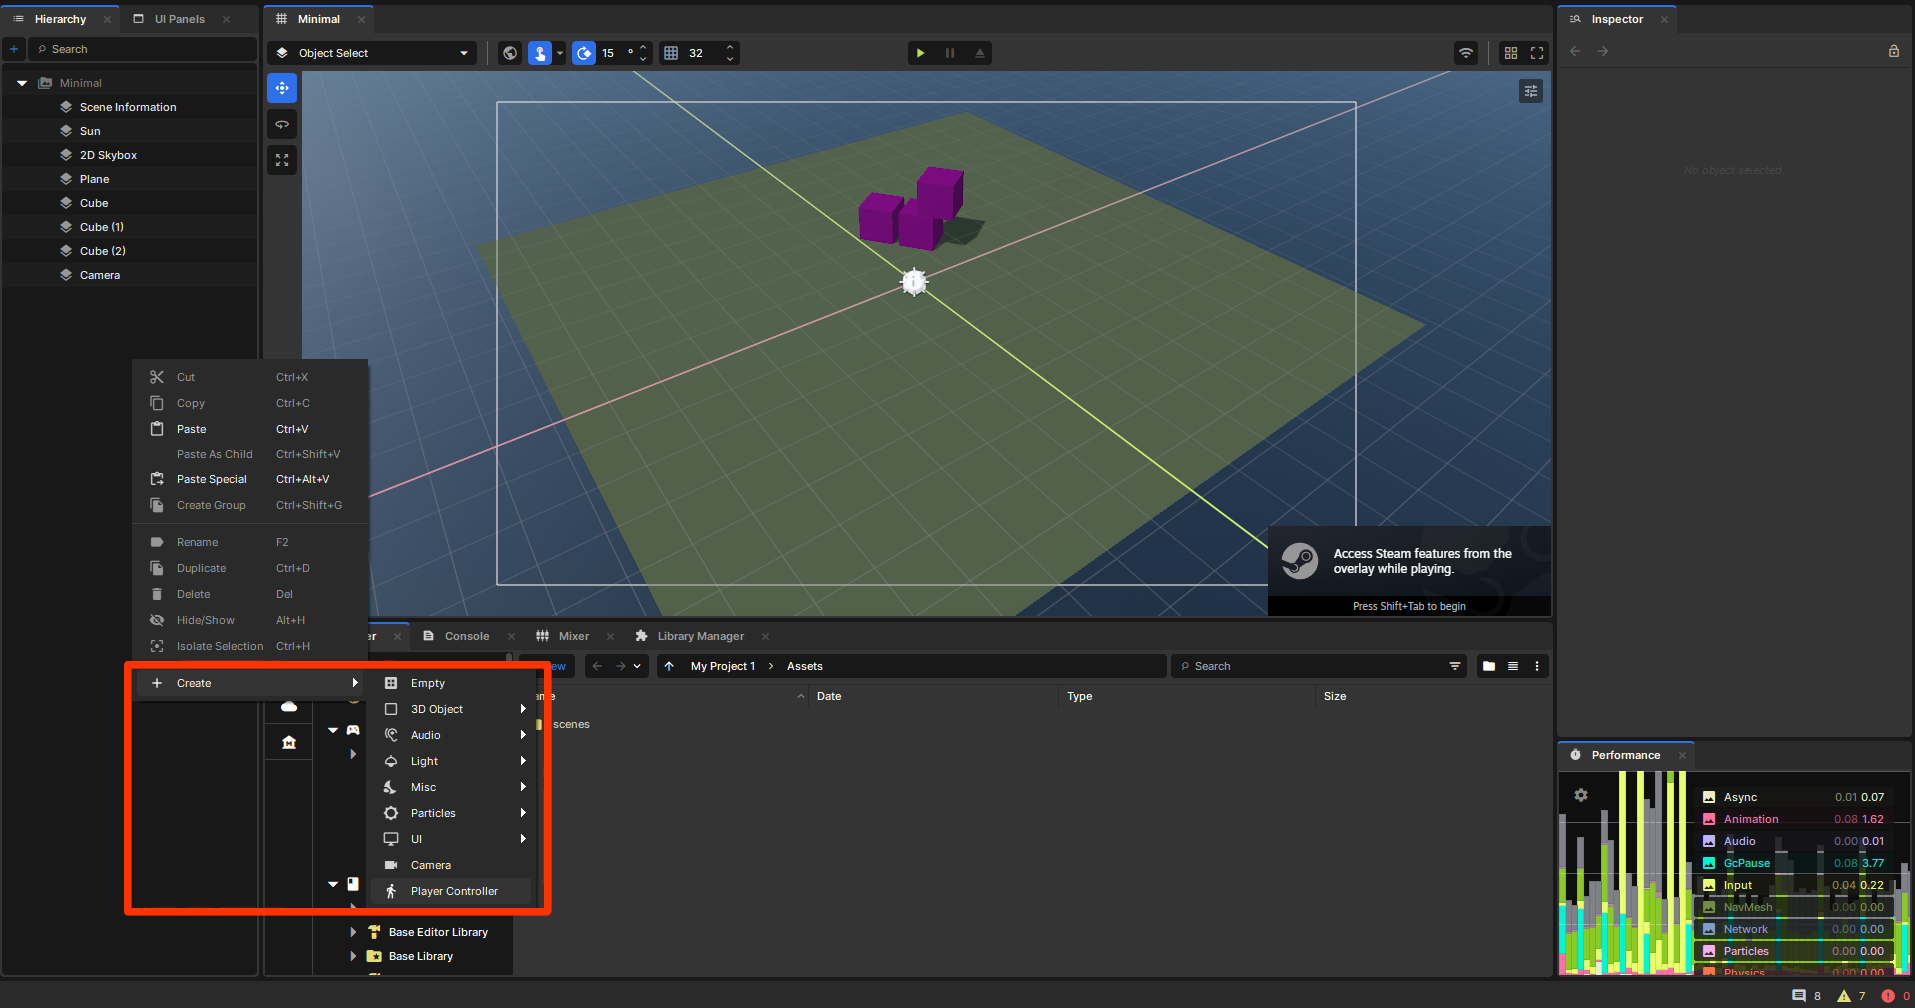
S&box already has a basic character controller built in you can use. Just right click in your Hierarchy and select “Player Controller”. As long as you have a camera in the same scene, once you press play, you will now have a basic character that can run around, jump, swim, and more!
Importing Assets
Supported Formats
- Models:
.fbx - Textures:
.png,.jpg,.tga - Audio:
.wav,.ogg
Import Process
- Drop files into correct folder
- Wait for automatic import
- Assign materials in the inspector
Tip: Keep texture sizes power-of-two (512, 1024, etc.) for best performance.
Adding Audio
Audio can be triggered through code or components.
Sound.Play( "sounds/explosion.wav" );Place audio files inside the sounds/ directory for automatic recognition.
Building UI
S&box uses a panel-based UI system similar to HTML/CSS.
Basic HUD Example
using Sandbox.UI;

public class Hud : Panel
{
    public Hud()
    {
        Add.Label( "Health: 100" );
    }
}
UI styles are defined using SCSS-like syntax.
Multiplayer Basics
S&box is built with multiplayer-first architecture.
Key concepts:
- Server is authoritative
- Clients predict movement locally
- State sync happens automatically
- RPCs are used for remote calls
Important Rules
- Never trust client-side logic for gameplay decisions
- Use server-side validation for gameplay systems
- Test multiplayer early
Testing and Debugging
Developer Tools
- Console (F1 key)
- Entity inspector
- Performance profiler
Useful commands:
ent_list→ view entitiesrestart→ restart scenedebug_overlay→ show debug info
Common Beginner Mistakes
Overbuilding too early
Start with a single mechanic before expanding.
Ignoring Scene structure
Keep logic in components, not scattered scripts.
Not using hot reload properly
S&box is designed for constant iteration.
Poor multiplayer planning
Always design with server authority in mind.
Conclusion
S&box development revolves around scenes, components, and C# scripting. Once you understand the core loop, building games becomes a fast iterative process rather than a traditional compile-run cycle.