

Whether you’re handing your staff their admin tools or giving your VIPs their perks, permissions decide who can use each plugin’s commands on your Rust server. Set them up once and every new player you trust is only a SteamID64 away from the right access.
This guide covers setting up groups and permissions in the Physgun Gamepanel, plus owners and moderators, which work on every Rust server, modded or vanilla. For each player you need their SteamID64: the 17-digit number that starts with 7656. You can find your own in Steam under your account details.
Switch to Oxide or Carbon
Groups and plugin permissions only exist when your server runs Oxide or Carbon. If all you need is owners and moderators on a vanilla server, you can skip ahead to the owners and moderators section.
- Select Server Options in the menu on the left.
- Type
Moddingin the search box. - Select the box under Modding Framework. It shows vanilla on a new server.
- Select oxide, or carbon if your plugins are made for Carbon. The setting saves on its own.
Turn on permissions
- Select Permissions in the menu on the left.
- Select Enable permissions. You only do this once per server.
- Select Start at the top of the page, or Restart if the server is already running.
The first start with Oxide takes a few minutes, so give it time. Once it has loaded, the page shows the Matrix, Groups, Players and Auth Levels tabs and the built-in default and admin groups. Every player is in default, so leave both of those groups in place.
Plugins add their own permissions here as soon as they are installed and the server has started with them. Install plugins with the Plugin Installer or the file manager.
Create a group
- Select the Groups tab.
- Select Create group.
- Enter a Name, such as
vip. Use lowercase letters, numbers, dashes or underscores. You cannot rename a group later, so pick a name you’re happy with. - Optionally enter a Display title, such as
VIP. Some plugins show it to players. - Select Create group.
- Select Review changes, then Apply 1 change. Nothing reaches your server until you apply it.
- Select Close.
- Reload the page in your browser so the group shows as created.
Planning more than one tier? Open a group and you’ll also find Rank and Inherits from. A group that inherits from another gets all of that group’s permissions too, so a vip-plus group can build on vip without you granting everything twice.
Add players to the group
- Select the group in the list.
- Under Members, select the add button to the right of Search members….
- Paste one or more SteamID64s, one per line, for example
76561198979425569. - Select the Add button. It shows how many players you pasted.
- Select Close. The new members wait in Review changes until you apply them in the next section.
Grant a permission
- Select the Matrix tab. Each column is a group and each row is a permission.
- Type the permission in Search permissions…, for example
oxide.show. Plugin permissions are lowercase and usually start with the plugin’s name. - Select the cell where the permission meets your group’s column.
- Select Review changes. It lists the new member and the new permission.
- Select Apply 2 changes. A running server picks them up right away. If the server is offline, they apply on its next start.
- Select Close.
You can also give one player a permission without a group: open them on the Players tab and use Grant a permission… under Own permissions. A player gets their own permissions plus those of every group they are in.
Check what a player has
- Select the Players tab. It lists everyone who has a group or permission.
- Select the player.
- Look at Everything combined. It lists every permission the player ends up with and where it comes from, such as “From the vip group”.
- Select Close.
Want to see it working in the game? Join with an account that is not an admin and run the plugin command that needs the permission.
Owners and moderators
Owners have full control of the server, including every admin command and the F1 console, and can add other admins. Moderators get admin powers in-game but cannot add admins, which makes them the right fit for most of your staff. The Auth Levels tab works on vanilla servers too.
- Select the Auth Levels tab.
- Under Owners, enter the player’s SteamID64, for example
76561198979425569. - Select Add owner.
- Read the warning, then select Add owner again. Only make owners of people you trust completely.
- Under Moderators, enter a SteamID64, for example
76561198074425791. - Select Add moderator.
- Select Review changes, then Apply 2 changes. The server saves the new owner and moderator straight away.
- Select Close.
Now join the server, press F1 and run an admin command such as noclip. If you were already connected when you were added, reconnect first.
You may also spot an Owner ID setting in Server Options. It makes a SteamID an admin too, but only when the server is installed or reinstalled, so on a server that is already set up, stick with Auth Levels.
Take a permission away
- Select the Matrix tab.
- Type the permission in Search permissions….
- Select the ticked cell in your group’s column.
- Select Review changes.
- Select Apply 1 change. Players in the group lose the permission right away.
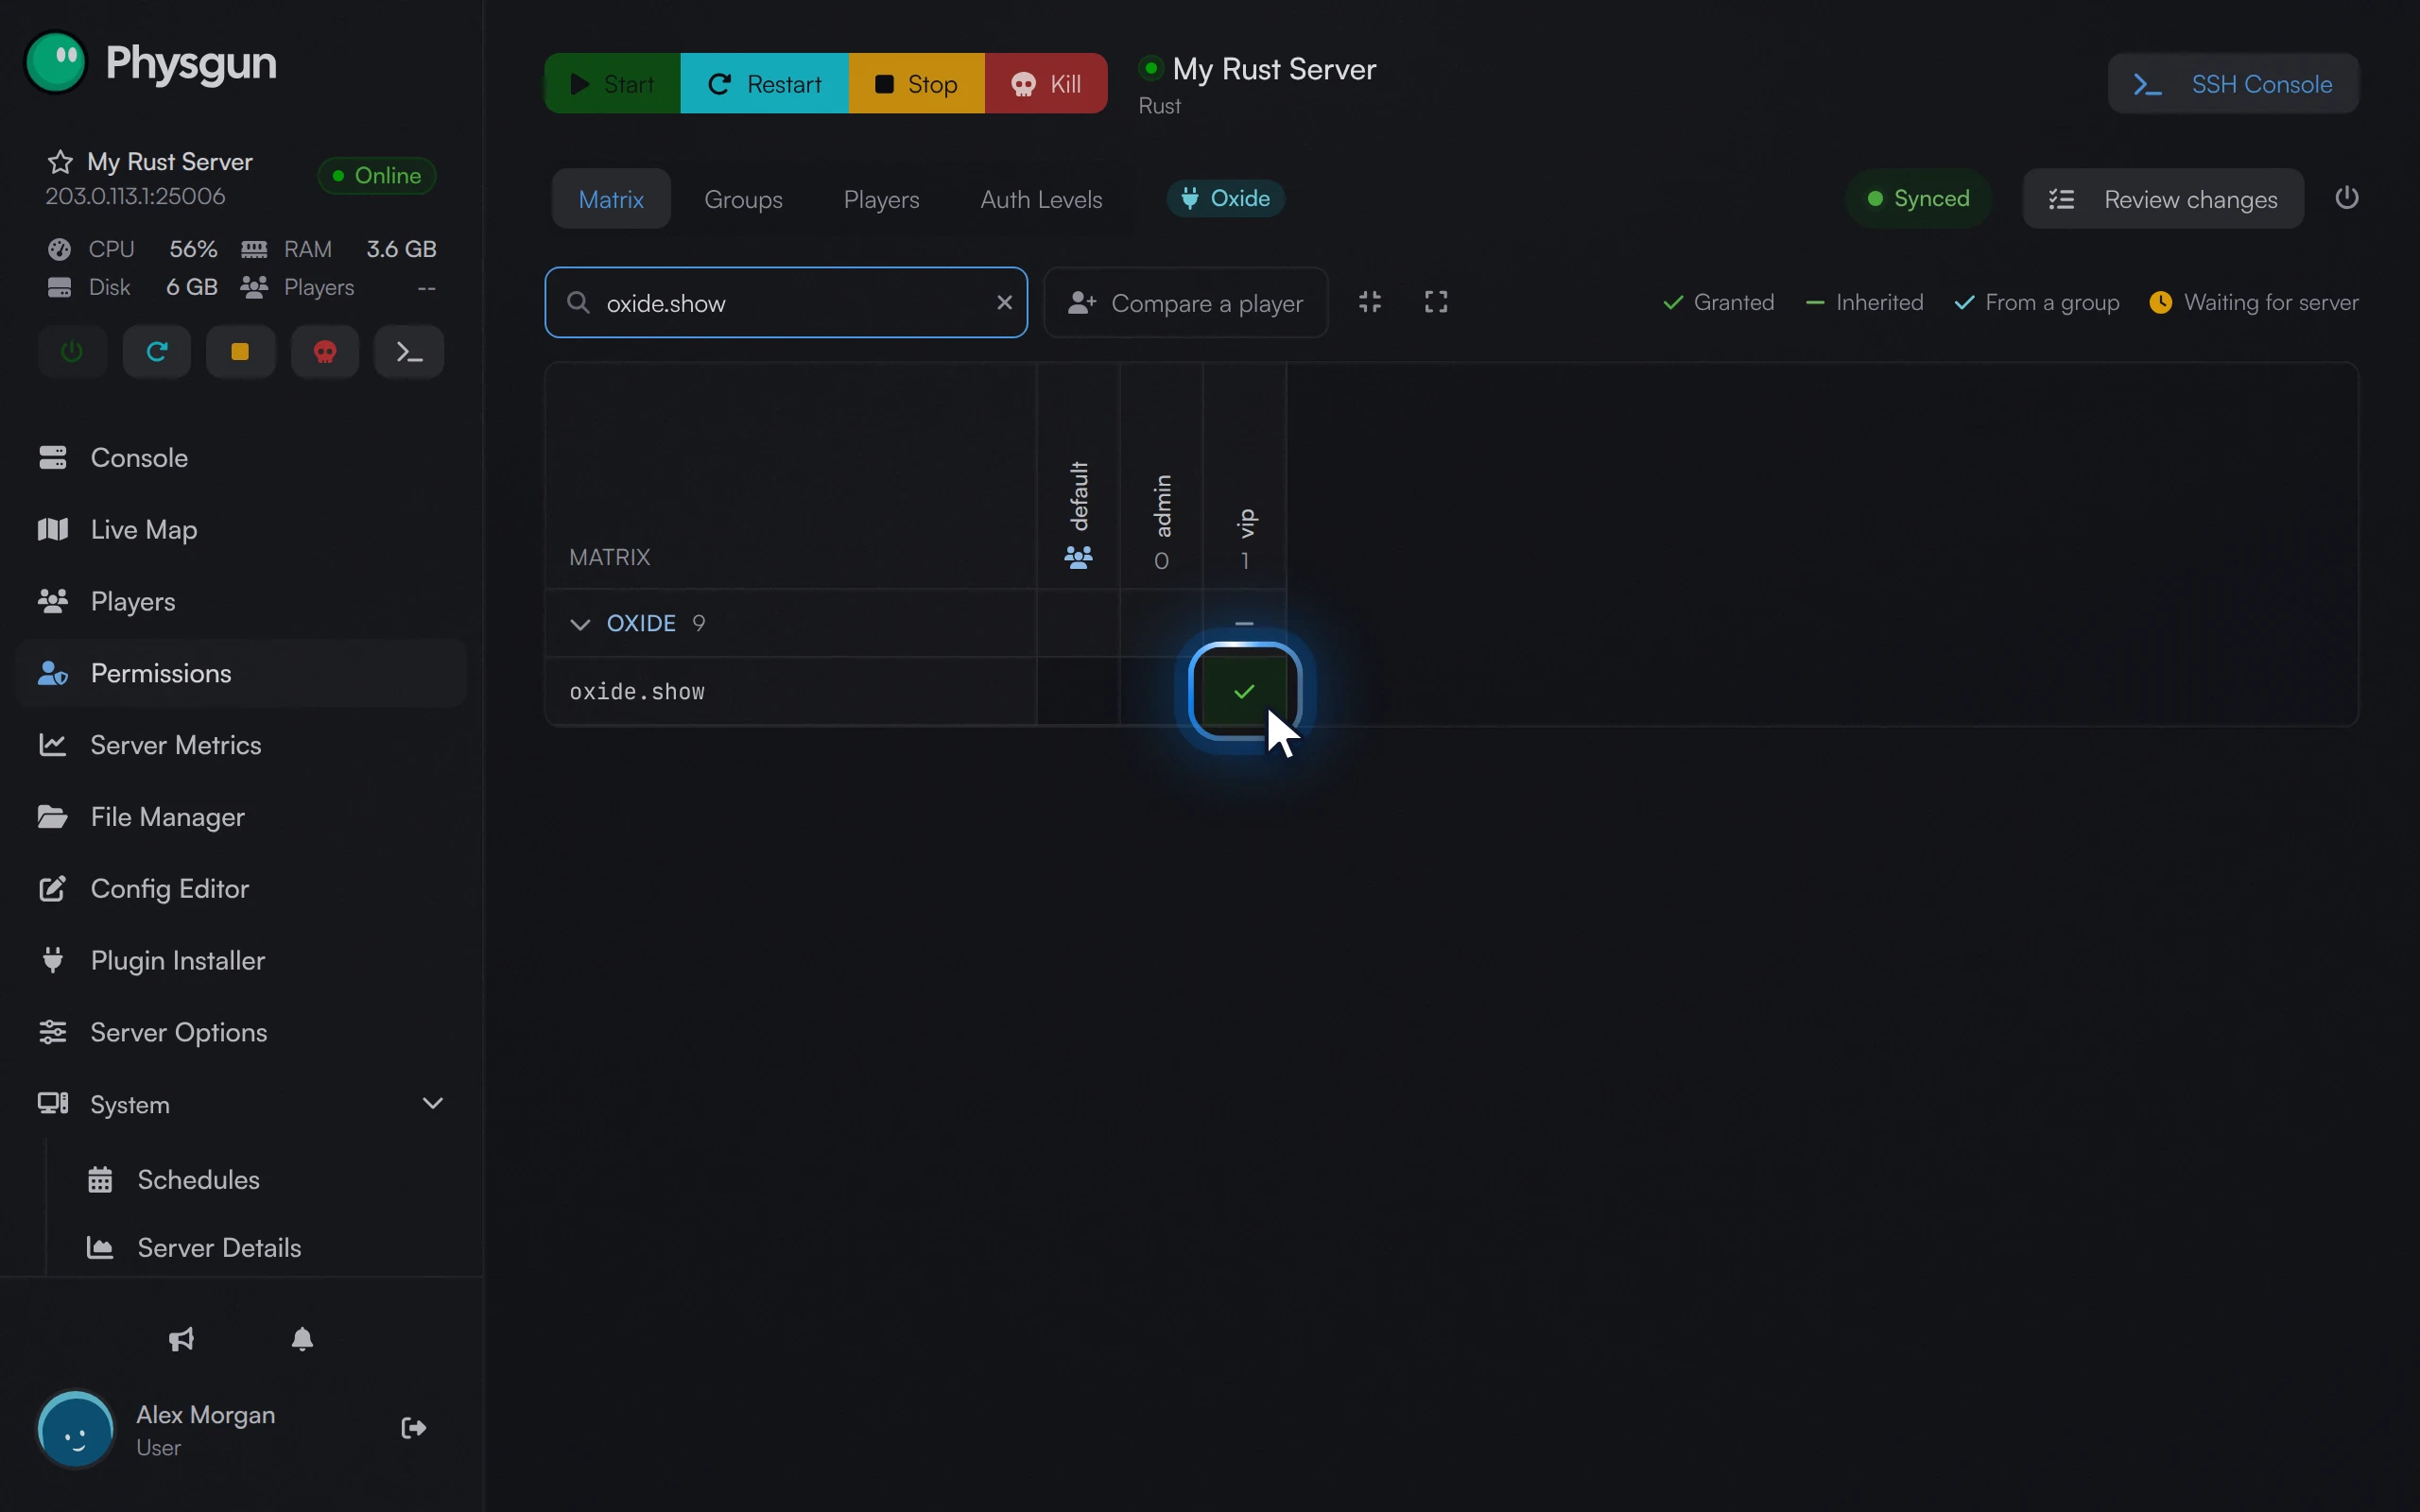 Remove it from the groupSelect the ticked cell to take the permission away.
Using the console
This is the manual way. It works on any Rust server with console access, though the Permissions page above is the quicker route on Physgun. Type the commands in the panel Console. Anything you change here shows up on the Permissions page after you reload it in your browser.
Owners and moderators
ownerid 76561198979425569 "Anthony" "server owner"
moderatorid 76561198074425791 "Lunaversity" "moderator"
server.writecfg
The two names in quotes are only labels for you. Taking admin away works the same way: run removeowner or removemoderator with the SteamID64, then server.writecfg. Admins are stored in server/rust/cfg/users.cfg, where rust is your server identity, one line per player in the same format as the commands.
Oxide groups and permissions
| What you want | Command |
|---|---|
| Create a group | oxide.group add vip "VIP" |
| Inherit from another group | oxide.group parent vip-plus vip |
| Delete a group | oxide.group remove vip |
| Add a player to a group | oxide.usergroup add 76561198979425569 vip |
| Remove a player from a group | oxide.usergroup remove 76561198979425569 vip |
| Grant to a group | oxide.grant group vip oxide.show |
| Grant to one player | oxide.grant user 76561198979425569 oxide.show |
| Revoke from a group | oxide.revoke group vip oxide.show |
| List groups or permissions | oxide.show groups or oxide.show perms |
| Check a group or player | oxide.show group vip or oxide.show user 76561198979425569 |
After every change, run oxide.show group vip: it lists the group’s players and permissions, so you know it worked. Oxide keeps groups in oxide/data/oxide.groups.data and players in oxide/data/oxide.users.data. Download both from the file manager before a wipe or a big plugin update, and you’ll never have to rebuild your groups from memory.
Carbon
Carbon uses the same commands with c. instead of oxide.. For example, c.group add vip creates the group, c.usergroup add 76561198979425569 vip adds a player, c.grant group vip followed by the permission name grants it, and c.show perms lists every permission. Its data is kept in the carbon/data folder.
If it does not work
- A plugin’s permission is missing: check the plugin is in
oxide/plugins(orcarbon/plugins), that the console shows it loading without errors, and that you typed the permission in lowercase. - A player does not get the permission: check the SteamID64 has 17 digits and starts with 7656, and that Review changes shows nothing left to apply.
- Admin commands do not work in the game: open
users.cfgin the file manager and check it has anowneridormoderatoridline with the right SteamID64.
With your groups in place, giving the next VIP or moderator their access takes a SteamID64 and a click on Apply.