What Is The Rust Remover Tool Plugin?
The remover tool plugin adds a simple system that allows players to remove entities like walls, doors, and deployables using a command or tool in-game.
Unlike Rust’s default system, this plugin lets:
-
Building owners remove structures long after placing them
-
Admins remove any structure or entity
-
Players remove entire buildings or connected structures
This makes it easier to fix mistakes, redesign a base, or clean up unwanted builds without wasting resources.
Installing The Rust Remover Tool Plugin
Before you install plugins, your server must have Oxide (uMod) installed.
Step 1: Download the Plugin
Download the latest version of the Remover Tool plugin from the official uMod page.
Step 2: Upload the Plugin File
-
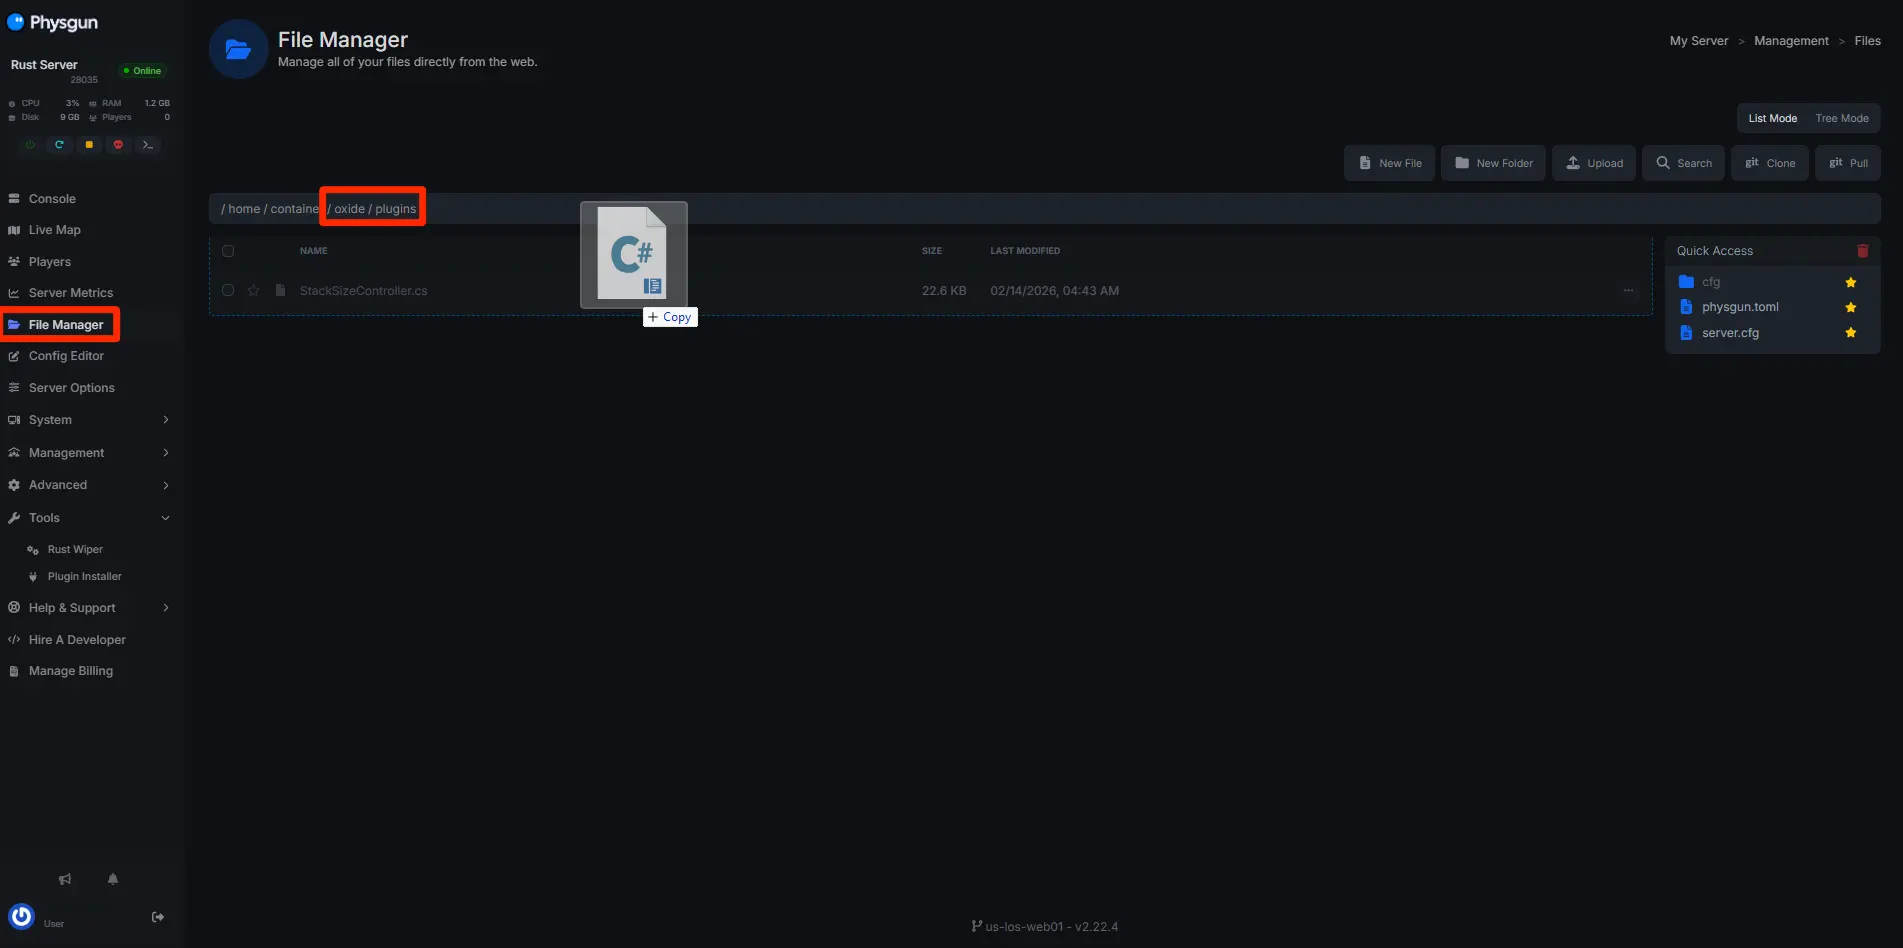
Open your Rust server files
-
Navigate to the following directory:
oxide/plugins- Upload the RemoverTool.cs file
Step 3: Restart Your Server
Restart your Rust server so the plugin can load and generate its config file.
Once installed, the plugin will automatically create a config file in:
oxide/configThis file is where all remover tool config settings are stored.
Setting Up Permissions
By default, no one can use the remover tool until permissions are assigned.
Permissions determine who can use the tool and what functionality they have.
Basic Permission Commands
Run these in your server console:
oxide.grant group default removertool.normal
oxide.grant group admin removertool.admin
Common Permissions
-
removertool.normal → Allows normal players to remove their own building blocks
-
removertool.admin → Allows removing any entity
-
removertool.structure → Allows removing an entire building
-
removertool.all → Removes all connected entities
-
removertool.external → Removes external walls
Be careful: giving advanced permissions to normal players is strongly unrecommended since they can freely remove large structures.
Using The Rust Remover Tool Plugin
Once permissions are set, players can start using the remover tool in-game.
Enable the Remover Tool
/removeThis toggles the tool on. While enabled, you can remove entities by interacting with them.
Disable the Tool
/removeRun the command again to turn it off.
Useful Commands
/remove admin- Enables admin mode (remove any entity)
/remove structure- Removes an entire building
/remove all- Removes all connected building blocks
/remove external- Removes external walls
/remove time- Enables the remover tool for a certain amount of time
These commands allow quick removal of walls, doors, stone walls, wood walls, and other entities depending on permissions.

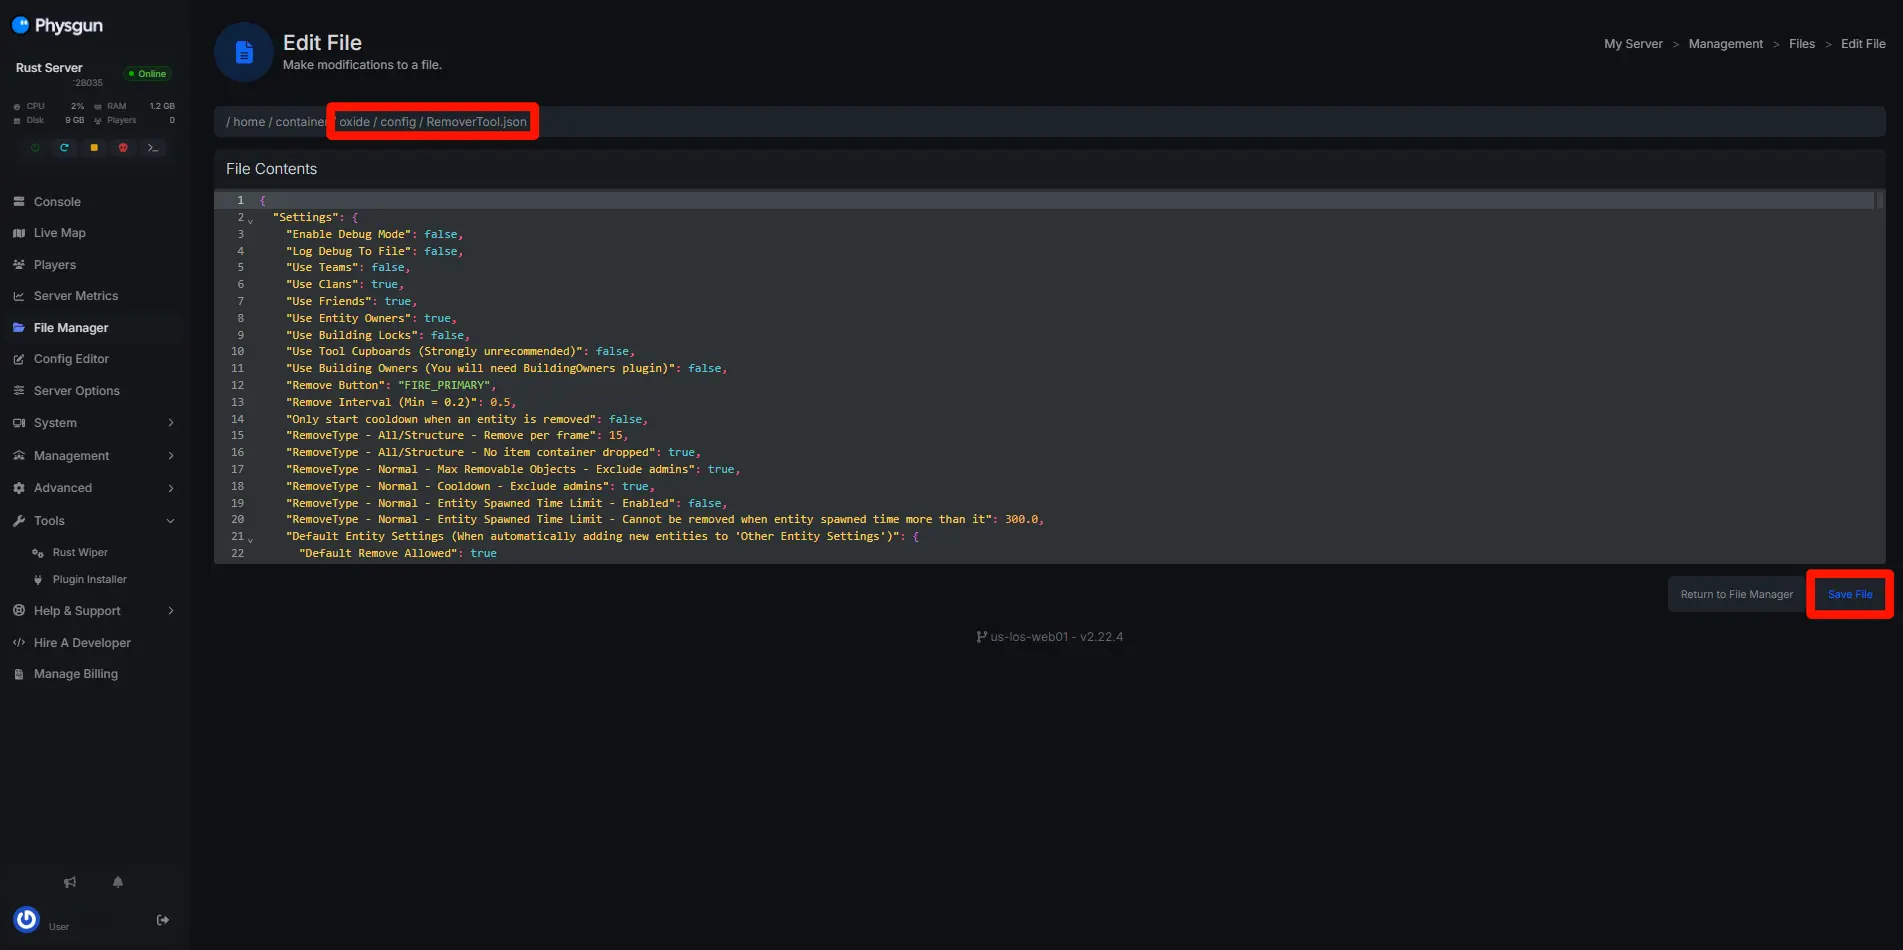
Configuring The Remover Tool (RemoverTool.json)
The RemoverTool config is where you control how the plugin behaves.
Locate the Config File
/oxide/config/RemoverTool.jsonOpen this file to adjust settings like:
-
Remove interval
-
Max removable objects
-
Allowed entity types
-
Refund percentages
-
Tool cupboard requirements
Creating A Balanced Remover Tool Config
-
Enable removal only for building owners
-
Add in-game costs for removal
-
Disable removing tool cupboards
-
Limit structure removal to admins
-
Require cupboard access
This creates a balanced way to let players fix mistakes without breaking the game.
Tips For Server Owners
-
Always use the latest version of the plugin
-
Keep your config updated after changes
-
Avoid giving powerful permissions to normal players
-
Test settings before going live
-
Combine with raid-block plugins for extra protection
Final Thoughts
The Rust remover tool plugin is one of the most useful plugins you can install on a Rust server. It allows players to fix mistakes, rebuild efficiently, and manage their structures without frustration.
With proper permissions and a well-designed remover tool config, you can create a smooth, fair, and balanced building experience for your server.