If you’re running a Rust server, keeping it fair and cheat-free is one of your biggest challenges. Admin Radar is a free Oxide plugin that gives server administrators a powerful in-game overlay, showing player locations, health, distance, and dozens of other entity types in real time.
Want to run Admin Radar on your own server? Physgun’s Rust server hosting includes one-click Oxide installation so you can add this plugin in seconds.
The plugin allows admins to monitor, control, and manage the server more effectively, and helps detect cheaters by providing real-time information on suspicious activity.
In this guide, we’ll walk you through everything you need to know — from installing the plugin and granting permissions, to using commands, adjusting radar range and speed, and customizing your filters through the in-game toggle UI.
The Rust admin radar plugin features a user-friendly graphical interface that enables admins to quickly change radar filters and settings. The Rust Admin Radar plugin is widely regarded as a must-have cheater-catching and information-gathering tool among the Rust admin community.
What Is the Rust Admin Radar Plugin?
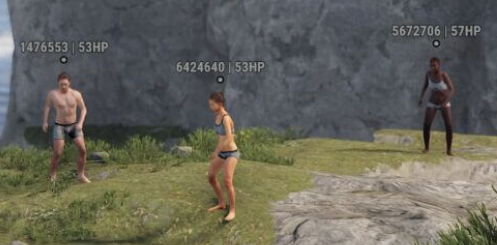
Rust Admin Radar (often called Admin Radar) is an Oxide/uMod plugin for any Rust server that gives server admins a real-time on-screen radar.
The main purpose of the admin radar plugin is to help detect cheaters and manage player activity. Admins can see distant players, view online players boxes, track dropped loot, and even inspect crate contents, bag count, and authed count on tool cupboards. Features like arrows and indicators (such as where a player is looking) make identifying suspicious behavior easier.
Admins can toggle radar, apply radar filters (such as showing only online players), and use the quick toggle UI for fast adjustments. The built-in user interface supports things like previous filters, extended information, and customizable display options such as color hex codes, height offset, and player information text size.
Overall, Admin Radar gives admins powerful tools to monitor the game world view, enforce rules, and keep the server fair, while still allowing control over what is shown, how it’s displayed, and who has access.
How To Install Rust Admin Radar
Follow these steps to install the Admin Radar plugin on your Rust server:
-
Install Oxide (uMod): Make sure your Rust server has Oxide installed before adding any plugins.
-
Download the Plugin: Download the Admin Radar plugin from the uMod website.
-
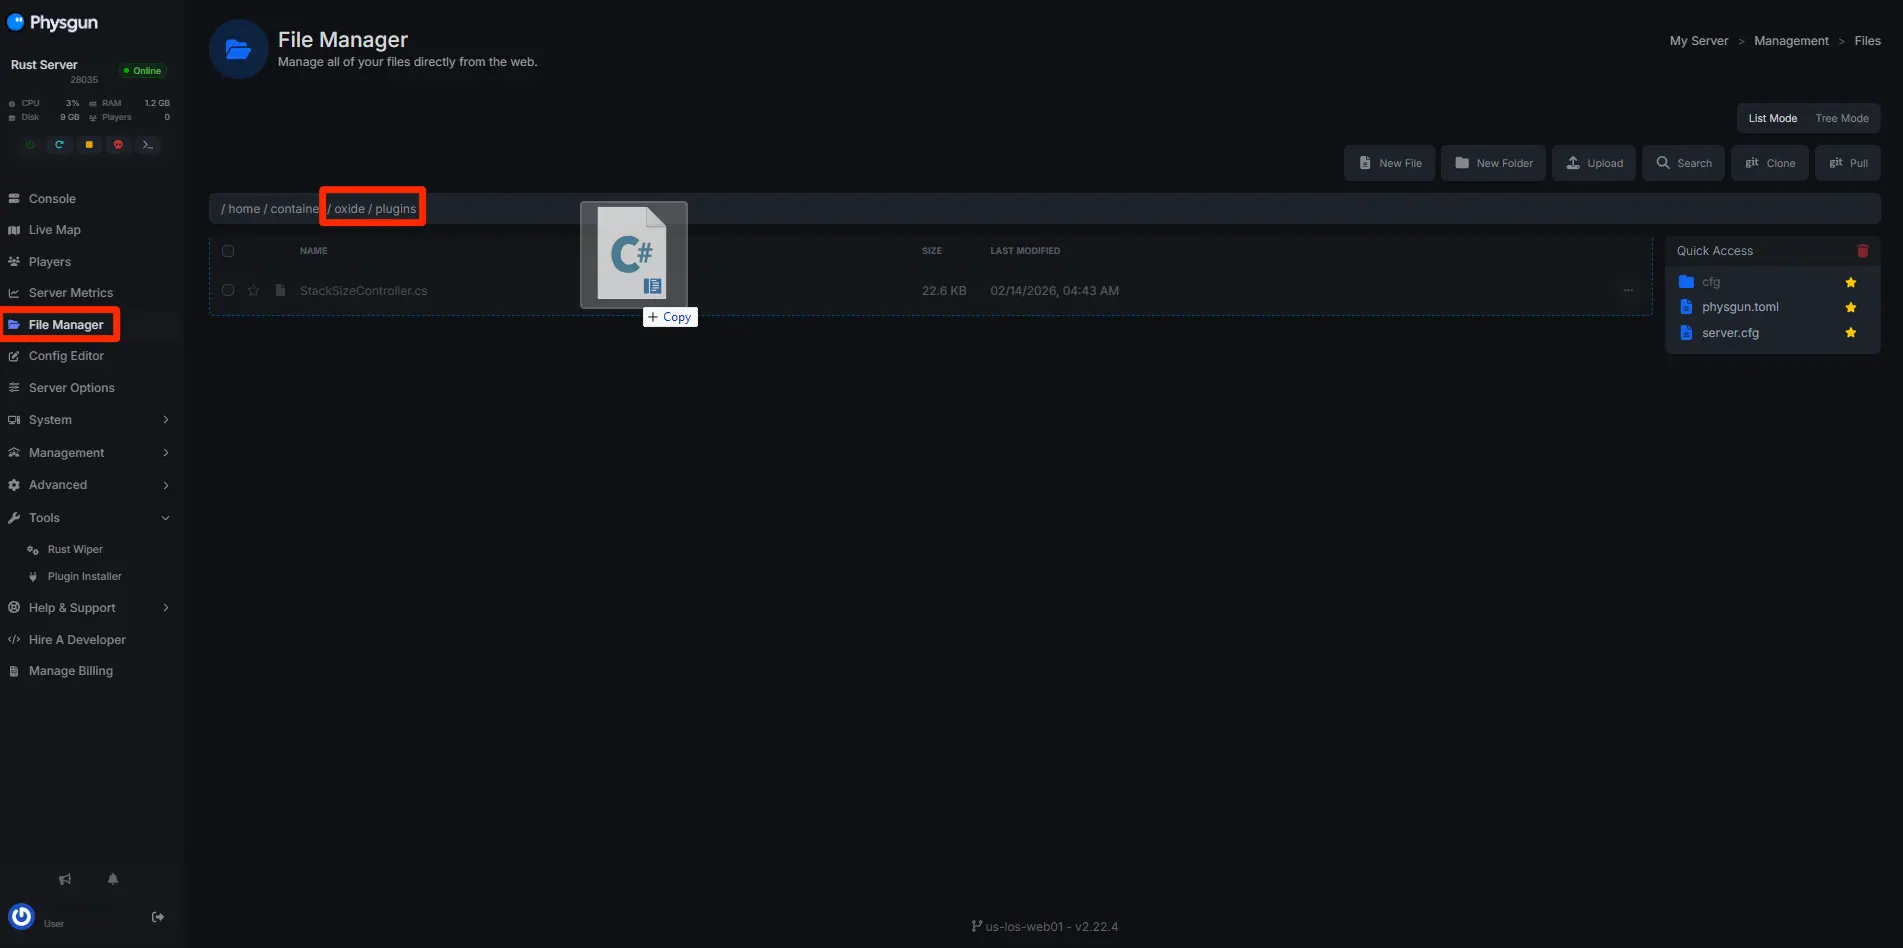
Upload the Plugin File: Go to your server files and navigate to /home/container/oxide/plugins, then upload the AdminRadar.cs file.
-
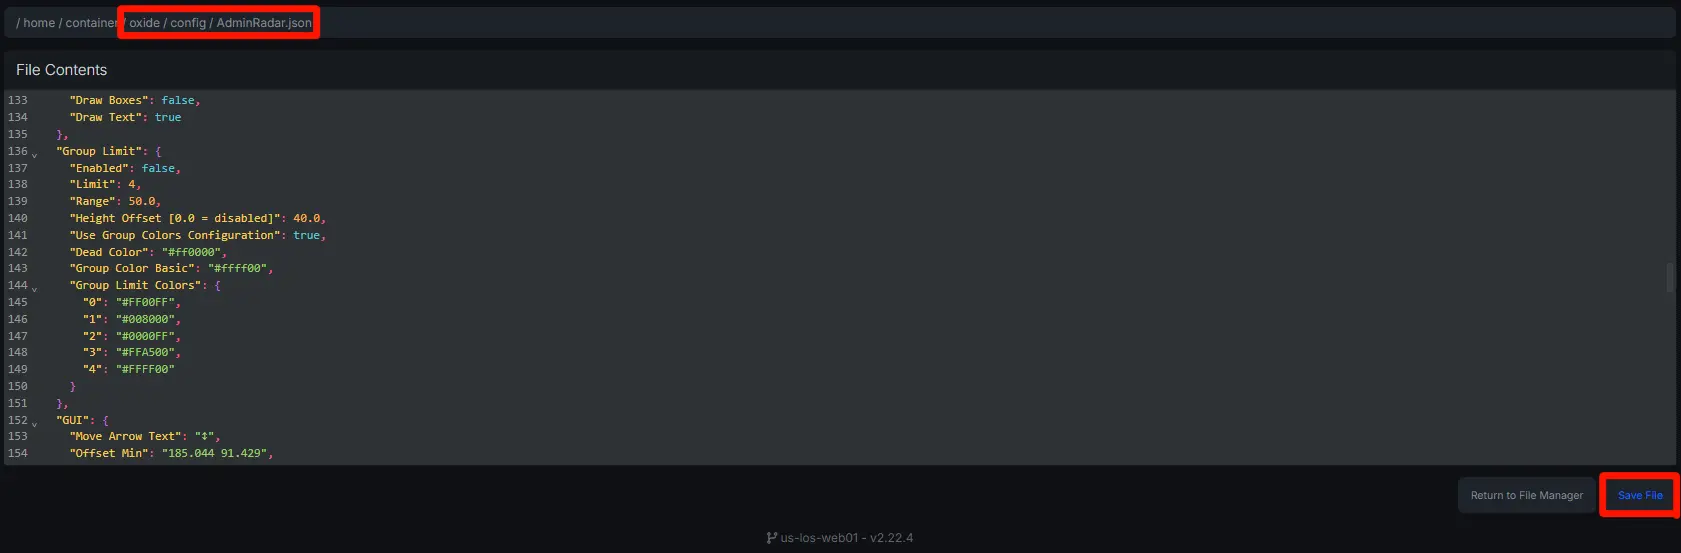
Configure the Plugin: Open the AdminRadar.json file in /oxide/config and adjust the settings to match your needs. You can then enable or disable tracking for players, vehicles, and items, and include or exclude specific entities like “bradley apc” or arrows. Be careful not to break JSON formatting.
-
Reload the Plugin: Run the following command in your server console:
o.reload AdminRadar -
Grant Permissions: Allow admins to use the radar with this command:
oxide.grant USERNAME/STEAMID adminradar.allowed
Notes:
-
To update the Admin Radar plugin, it is best practice not to uninstall the mod, as you do not need to alter the JSON file.
-
Removing the Admin Radar plugin is as simple as deleting AdminRadar.cs from your plugins folder.
-
You can disable the Admin Radar plugin temporarily by using the oxide.unload AdminRadar command.
-
It is recommended to reload the Admin Radar plugin after making changes to its configuration by typing o.reload AdminRadar in the console.
How To Customize Rust Admin Radar
The Admin Radar plugin is highly customizable through its configuration file oxide/config/AdminRadar.json. You can quickly adjust what the radar shows, how it looks, and how it performs by editing this file.
Tracking Settings
You can control what the radar tracks by enabling or disabling options in:\
- Core Tracking (players, sleepers, loot, NPCs, etc.)\
- Additional Tracking (helicopters, Bradley, vehicles, events)
To customize this, simply set values to `true` or `false` depending on what you want to see.
Colors
You can change how everything appears using hex color codes in the Color-Hex Codes section.
This lets you customize colors for:
-
Players (online, sleeping, dead)
-
NPCs and animals
-
Vehicles and events
-
Loot and containers
Example:
-
#ff0000 = red
-
#00ff00 = green
Distance And Range
The Drawing Distances section controls how far away entities are visible.
You can adjust distances for:
-
Players
-
Loot and containers
-
NPCs and animals
-
Vehicles and events
Higher values show more but can impact performance.
Visual Style
In Drawing Methods, you can change how the radar displays information:
-
Show text labels
-
Draw boxes around entities
-
Show arrows for players
You can enable or disable each option to match your preference.
In-Game UI (GUI)
The GUI section controls the in-game radar menu
You can:
-
Show or hide toggle buttons
-
Change button positions
-
Adjust button colors
This helps simplify the interface for admins
Extra Information
The Options section lets you display additional data such as:
-
Item contents in containers
-
Resource amounts
-
Tool cupboard and bag info
-
Custom tracked entities
You can also limit how much information is shown to keep the screen clean.
Performance & Behavior
The Settings section controls how the radar behaves.
You can adjust:
\
- Default radar range \
- Refresh/update speed \
- Auto-disable timers \
- Text size for labels \
- Maximum active filters per user
Lower refresh times update faster but use more resources.
Permissions & Access
You can control who uses the radar by:
-
Restricting access to specific Steam IDs
-
Limiting by admin level
-
Using Oxide permissions
This ensures only trusted users can access radar features.
Additional Features
Other customizable features include:
-
Group limit detection (highlight large teams)
-
Admin status indicators (vanish, noclip, etc.)
-
Voice detection (show nearby talking players)
By adjusting all of these settings, you can make Admin Radar as simple or as detailed as you want.
Key Takeaways
Admin Radar is a must-have plugin for any Rust server owner. It provides full visibility of player activity and helps you quickly detect cheaters or suspicious behavior.
Once installed and customized properly, it becomes one of the most powerful tools for keeping your Rust server fair, balanced, and under control.