
If you’ve ever wanted to run a Rust server your way, you’re in the right place. Learning how to make a Rust server gives you full control over your world, player slots, plugins, and every server setting that shapes the experience. Running your own server means you have complete control, customization, and performance benefits compared to third-party hosting. You can host on your own computer or use Rust server hosting for stronger hardware and better stability.
This guide walks through the complete server setup process so you can:
-
Install the Rust dedicated server software
-
Configure ports, public IP, and port forwarding
-
Edit config files and launch Rust properly
-
Start a Rust server using an easier method (on Physgun)
Making A Rust Server Through Physgun
Physgun offers Rust server hosting that lets you deploy a dedicated Rust server in just minutes. Instead of paying for player slots, Physgun provides raw hardware resources, so you can scale your server as your community grows. All plans include DDoS protection, automatic backups, NVMe disk space, plugin support, full RCON access, and more.
To make a Rust server through Physgun:
-
Sign up and order a Rust plan: You can do this through the Physgun Billing Port or game hosting page and select a Rust server plan. Complete the checkout and your server will be automatically deployed! No need to manually download or configure anything.

-
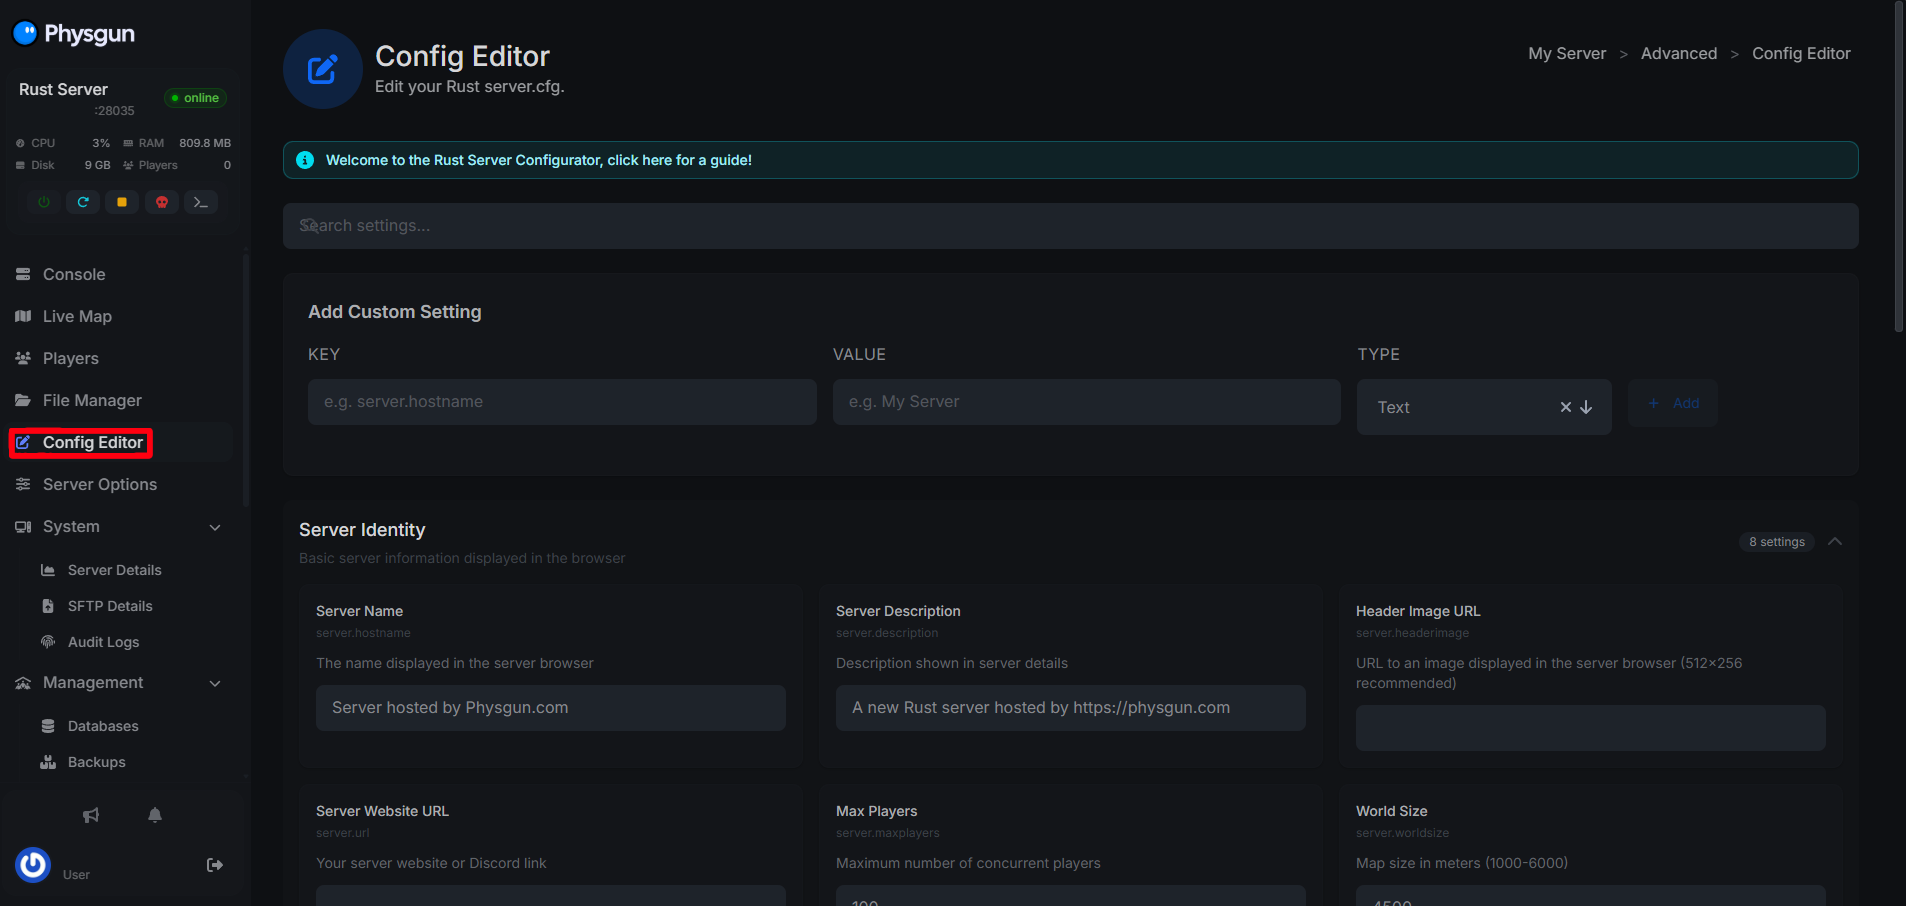
Login to the Gamepanel: After deployment is finished, head over to the Physgun GamePanel. there, you will see your Rust server ready to manage. Physgun’s modern gamepanel allows you to click to change settings like the hostname or max players, without ever touching the config files!
-
Modify Server Settings: With the Server Options and Config Editor, you can update your Server Name (Hostname) and Max Players (slots). These can either be typed into the settings tabs, or you can directly edit/upload the config files.
-
Find IP Address and Ports: At the top left of the Physgun GamePanel, you can find your server’s IP and Port (for example 123.45.67.89:28015)
-
Install Mods: Installing Rust mods through the Physgun panel is super simple! Follow our guide here.
That’s it! You can now modify, start, join, and play your server however you please!
Need help with your Rust server through Physgun? Contact our support team 24/7!
Making a Rust Server On a VPS for Rust Server Hosting
Running a dedicated Rust server on a VPS or Linux system requires manual setup but gives you complete control over the process.
To create a Rust Server on VPS or self-hosting:
- Find the system requirements for your Rust server.
- You can do this easily by using our Rust Resource Calculator to find the optimal performance-to-price ratio.
- Create a new user on your VPS:
sudo add user rust
sudo usermod -aG sudo rust
su - rust
This helps keep your root user and machine safe and secure. 3. Install the dependencies required for SteamCMD and Rust dedicated server:
sudo dpkg --add-architecture i386
sudo apt update
sudo apt install wget tar lib32gcc-s1 lib32stdc++6 screen- Create a new folder and download SteamCMD:
cd ~
mkdir ~/steamcmd
cd ~/steamcmd
wget https://steamcdn-a.akamaihd.net/client/installer/steamcmd_linux.tar.gz
tar -xvzf steamcmd_linux.tar.gz
Run SteamCMD with the command:
./steamcmd.sh- Once you are running SteamCMD, you can then download the Rust Dedicated Server. At the Steam> prompt, use:
login anonymous
force_install_dir /home/rust/rustserver
app_update 258550 validate
quit
The command ‘app_update 258550 validate’ will download approximately 10GB of server files to the /home/rust/rustserver directory.
- Now, we can create the server start script. Navigate to your server folder and open/edit the start.sh file:
cd ~/rustserver
nano start.sh
This file should look something like:
#!/bin/bash
./RustDedicated -batchmode -nographics \
+server.port 28015 \
+server.level "Procedural Map" \
+server.seed 12345 \
+server.worldsize 4000 \
+server.maxplayers 50 \
+server.hostname "My Rust Server" \
+server.description "A Rust Server" \
+server.identity "myserver" \
+rcon.port 28016 \
+rcon.password "YourRconPassword"
Modify the entries in this file to your liking, then save it, exit the file and make it executable:
chmod +x start.sh- Run your Rust server using screen so the server keeps running after you logout. This is the ‘server run’ process—use the appropriate command or script to start the server:
screen -S rust
./start.sh-
To detach from screen, you can use CTRL + A then D
-
If you need to return to the server console later, use screen -r rust in the terminal.
On your server’s first run, it will:
-
Generate config files
-
Create the world
-
Build the procedural map
This can take several minutes depending on your systems specifications.
- Configure your ports and firewall using UFW:
sudo ufw allow 28015/tcp
sudo ufw allow 28015/udp
sudo ufw allow 28016/tcp- If you are setting this up on a self-hosted server, make sure to port forward on your router for both the server port and RCON port so players outside of your network can connect to your server.
- Edit your server’s config files. You can do this by running:
nano /home/rust/rustserver/server/myserver/cfg/server.cfg- In this file, you can edit server password, gameplay settings, server name/description, and more. You can create a server.cfg file in your rust/server/server.identity/cfg/ folder to set various server configurations that the server reads at startup.
- Connect to your Rust server in game using the IP address of your VPS or machine!
-
You can use the console command client.connect IP:port to join your server. If your server does not appear in the server list, players can still connect using this command if they know your public IP.
-
You can also connect to your Rust server using ‘localhost’ if the server is running on the same machine as the game client.
-
Need help connecting to your Rust server? Check out our guide on How to Join a Rust Server!
For server management, use the users command in the server console to list current players and retrieve their SteamIDs for assigning roles or permissions. You can add yourself as an administrator using the ownerid command followed by your SteamID, and assign moderator status with moderatorid. After assigning ownership or moderator status, you must use the writecfg command and have the player log out and back in to receive permissions.
Now that your server has started and is configured, you can install a mod or two, invite friends, and do whatever you’d like! The use of Oxide is recommended for adding essential plugins to your Rust server.
- Need help installing mods? Check out our guide: How to Add Plugins to Rust Server
Note: If you ever need to update your Rust server, just stop the server, then update it through SteamCMD:
cd ~/steamcmd
./steamcmd.sh
login anonymous
force_install_dir /home/rust/rustserver
app_update 258550 validate
quit
After the update completes, just restart your server. Best management practices include regular map wipes to maintain balance and using SteamCMD for server updates. Rust server hosting allows you to control player slots, server settings, wipes, mods, and performance. Hosting services like Physgun often provide optimized performance, minimal latency, maximum uptime, and full mod support, offering a more stable environment for larger player bases.