Moving your Minecraft server data to a MySQL database is a smart play for better performance and easier management. Unlike standard files, a centralized database handles information more efficiently, which is a lifesaver if you’re running a network with several plugins.
Already on a host that makes this easy? Physgun’s Minecraft server hosting includes built-in database management so you can create and connect a MySQL database directly from the panel — no external tools required.
Setting it up takes just a few steps:
- Create your database: Generate a new database and user through your hosting panel.
- Update your plugins: Switch the storage type in your plugin’s config file from flat-file to MySQL.
- Link the details: Enter your hostname, database name, and password to sync everything.
Once connected, your server will process player data faster and keep your files organized.
Why Using a MySQL Database is Better Than Standard Files
MySQL is a database software used to store data. In this case, it’s mostly used for Minecraft plugins to store user inventories, cached data, or really anything the plugin wants to store. As you can imagine, this can get very taxing on your memory and CPU if your server’s storage is absolutely packed with all of this data. This is where MySQL comes in — it offloads this important, yet cluttering, data into an external database so it doesn’t fill up your server’s storage.
How to Create a MySQL Database for Your Minecraft Server
Setting Up a MySQL Database on Your Physgun Game Server
-
Open up your Physgun Minecraft server panel.
-
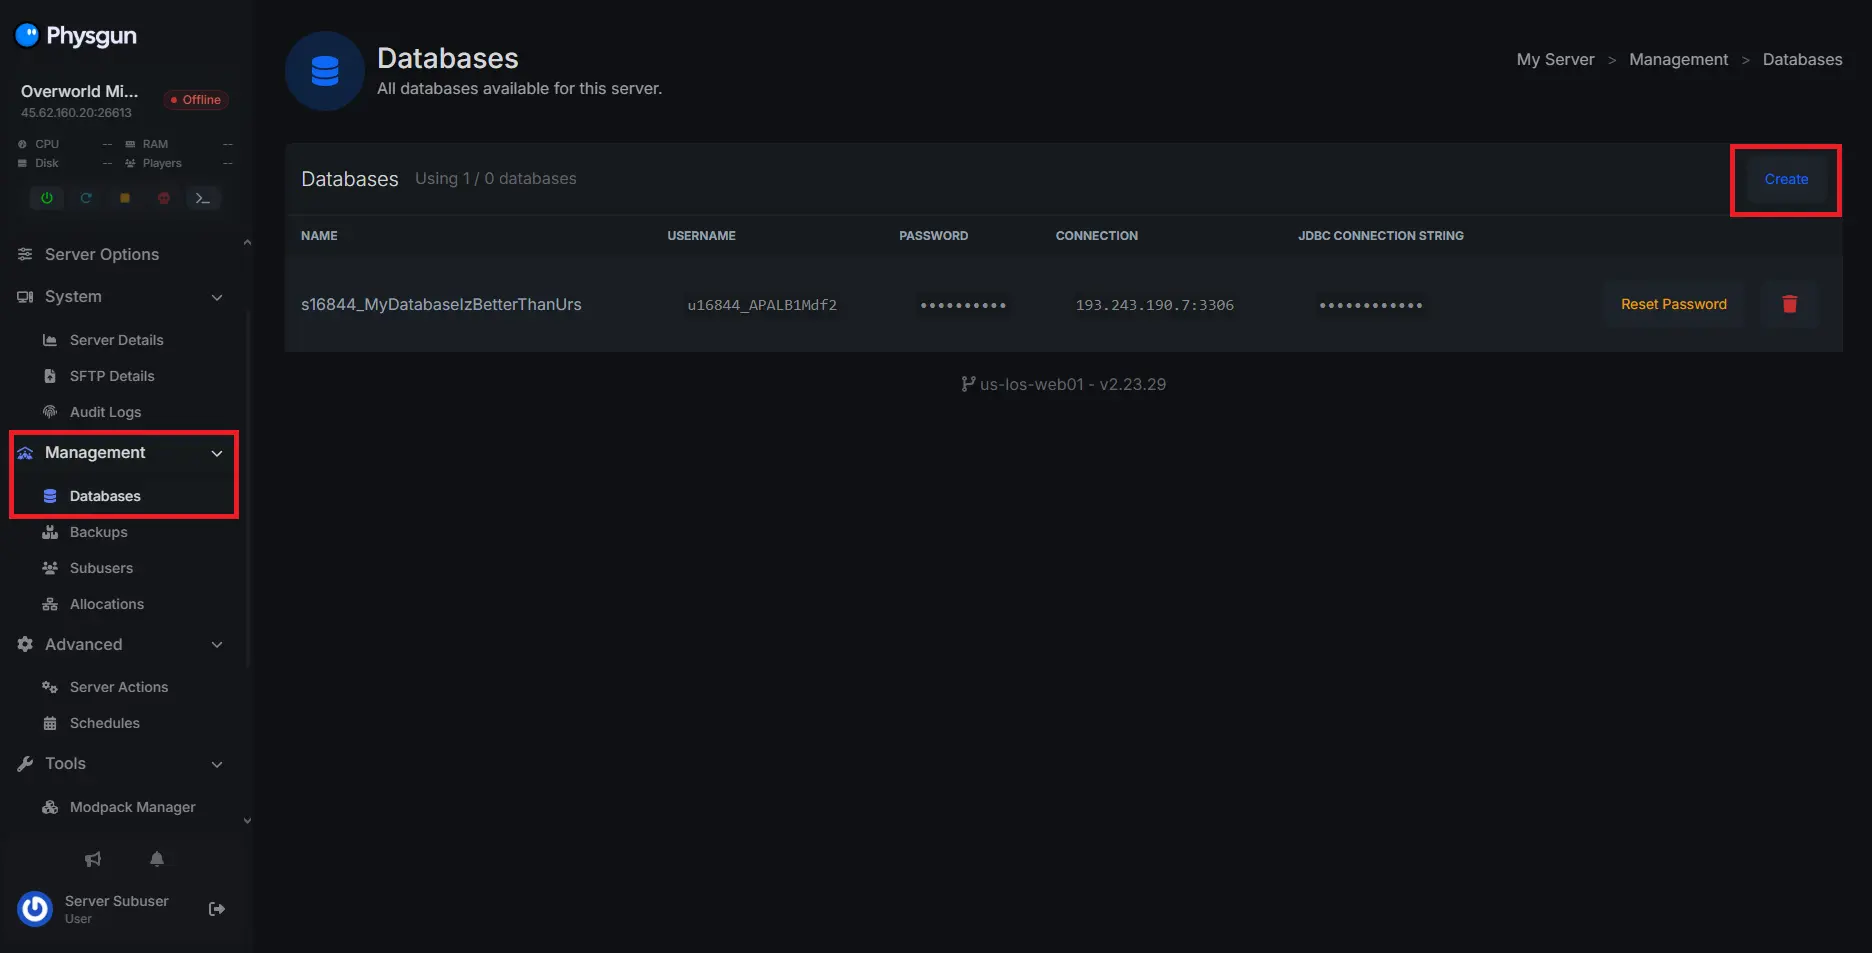
Navigate to the Management tab, and select Databases.
-
From here, click Create to start creating a MySQL database.
-
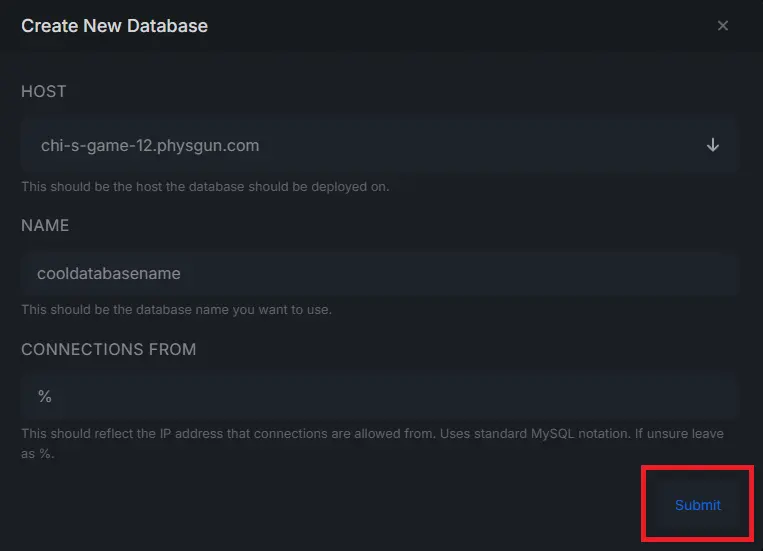
You’ll be given 3 options:
- A dropdown menu labeled Host — normally, you should only have one option here.
- A spot to name your database — feel free to name it whatever you’d like, just make sure there are no spaces.
- A box that says Connection From — you shouldn’t touch this unless you know what you’re doing. We recommend keeping it as
%.
-
Click Submit once you’re done.
That’s it! Your MySQL database is now set up and ready to use.
Manually Installing and Setting Up a MySQL Database
This guide assumes you’re using Windows, though Linux isn’t much different.
-
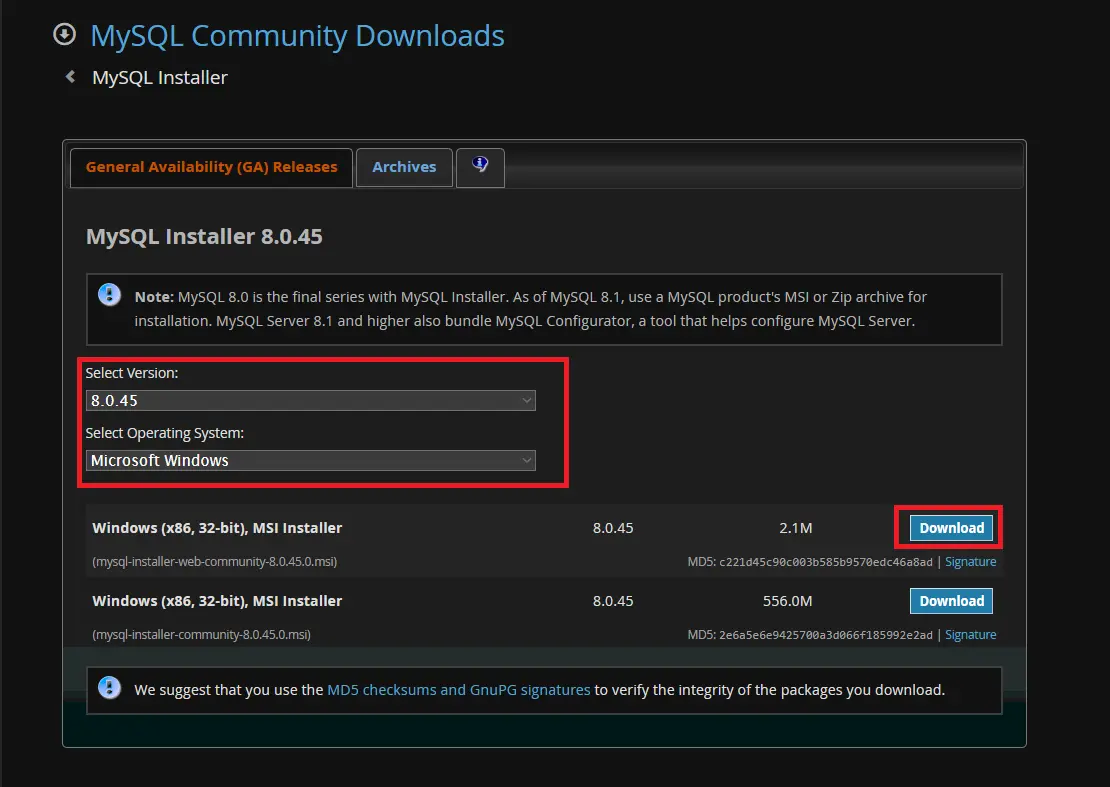
Visit the MySQL website.
-
Select the latest version of MySQL and your operating system — for this guide, we’ll be using Microsoft Windows.
-
Click the Download button on the top option (
mysql-installer-web-community.msi).
-
Open the Microsoft Installer file you downloaded.
-
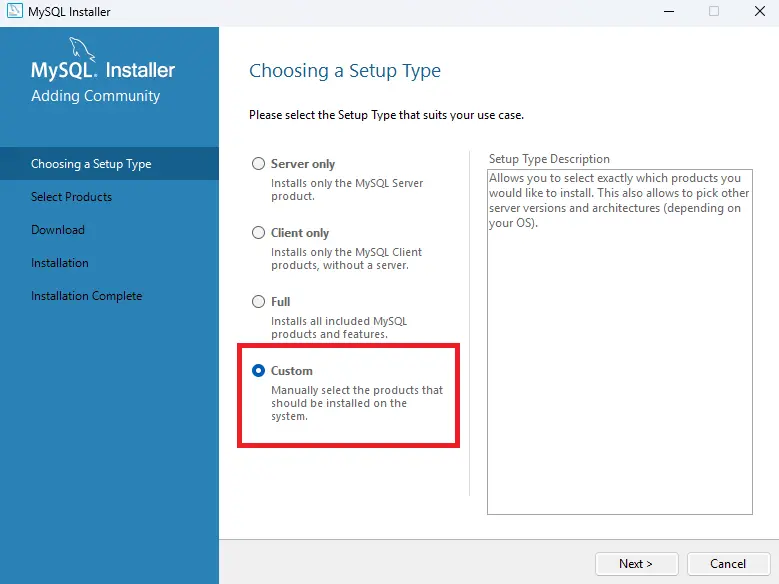
When prompted to select a Setup Type, choose Custom, then click Next.
-
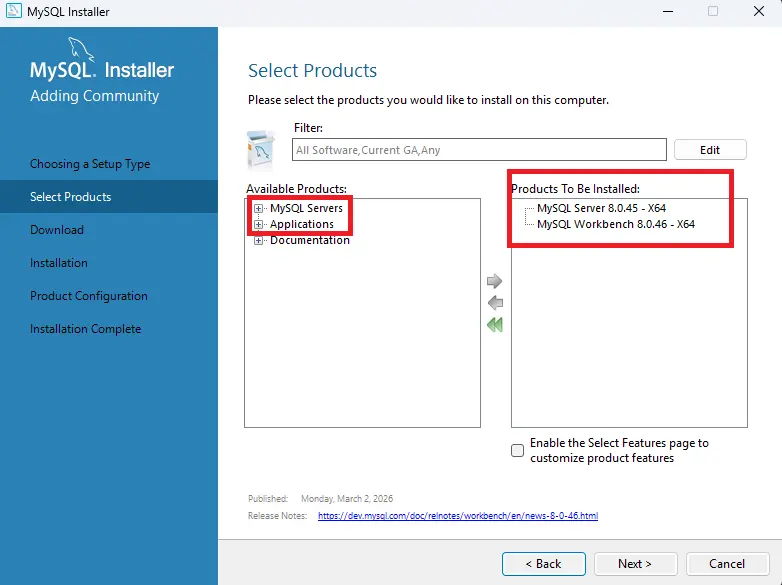
Under Available Products, open the MySQL Servers tab and select the latest version. Then go to the Applications tab and add the latest version of MySQL Workbench as well.
-
Click Next, then Execute to install. Once complete, click Next twice.
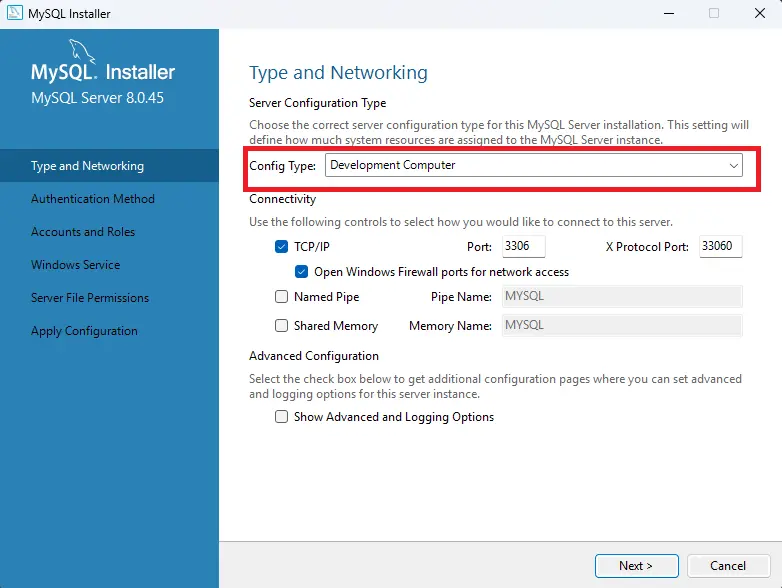
- The installer will ask you to select a Config type based on your system:
- Development Computer — minimal memory usage, good if other apps run on the same machine.
- Server Computer — medium memory usage, for web/application servers.
- Dedicated Computer — uses all available memory, for dedicated database machines.
-
Review the remaining settings and note any changes. Click Next.
-
Select Use Strong Password Encryption for Authentication, set a database password, and click Next.
-
Under Windows Service, make sure Start the MySQL Server at System Startup is checked. Click Next.
-
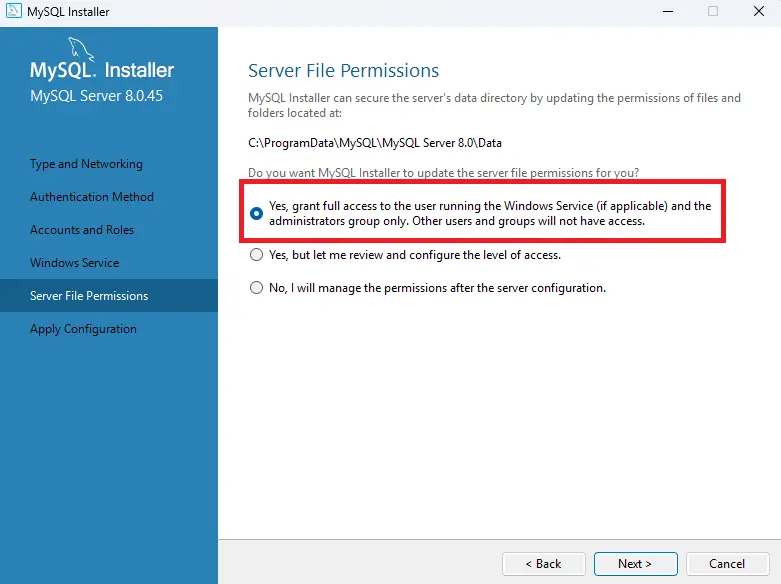
Grant the installer the permissions it requests, click Next, then Execute, then Finish twice.
- MySQL Workbench should open automatically. Click your server, enter your credentials, and you’re in.
Updating Your Minecraft Server Plugins to Use a MySQL Database
This works with both a Physgun-hosted database and a manually installed one.
-
Open your server’s files.
-
Navigate to your mods or plugins folder.
-
Open the
config.ymlfile for the plugin you want to configure. -
Find the
storage-methodvariable and change its value tomysql. -
Under
data, find theaddressvariable and set the port to:3306(this is the default MySQL port, unless you changed it during setup). -
Set the
databasevariable toMySQL. -
Set the
usernamevariable toroot. -
Set the
passwordvariable to your MySQL password. -
If you changed any database settings during installation (names, ports, addresses), make sure those match here as well.
-
Save the file and restart your server.
Your plugin is now using your MySQL database.
Conclusion
Connecting your Minecraft server to a MySQL database reduces strain on your server, makes your data easier to manage, and gives you a solid foundation as your setup grows. Whether you set it up through the Physgun panel or install it manually, the core process stays the same: create the database, connect your plugins, and verify your credentials.
If you run into any issues, contact our support team or join our Discord — our community is always happy to help.