Setting up a BungeeCord server is the most effective way to evolve a single Minecraft world into a professional server network. Instead of forcing players to disconnect and re-log to try different game modes, BungeeCord acts as a proxy server that ties multiple Minecraft servers together under one IP address. This allows your community to move seamlessly between a lobby server, survival world, or creative realm using simple in-game portals or commands.
Building this network requires a few specific changes to your standard server files:
- Configure the Proxy: Download the BungeeCord JAR and edit the config file to list every server name and its corresponding port.
- Enable IP Forwarding: Set
ip_forwardtotruein BungeeCord’s config and adjust the Spigot servers to ensure player UUIDs and IP addresses are passed through correctly. - Security Settings: Since BungeeCord requires your sub-servers to run in
online-mode: false, you must use a firewall plugin to prevent unauthorized connections from bypassing the proxy.
Once these pieces are in place, you’ll have a scalable BungeeCord network ready to host hundreds of players across dozens of unique game modes.
Building a BungeeCord network means running multiple servers at once — Physgun’s Minecraft server hosting gives you the infrastructure to spin up a proxy and as many backend servers as you need, all managed from one panel.
Why a BungeeCord Proxy is Essential for Connecting Multiple Servers
Look at major server networks such as Hypixel — they host dozens of different game modes, including individual SMP servers. They accomplish this with a BungeeCord proxy server.
Think of it like this: when you join a hub server, you’ve joined one server in the BungeeCord network. From there, you can jump to any other game mode without disconnecting and reconnecting. The proxy redirects you to the correct backend server seamlessly.
This is done not only for convenience, but for optimization too. It prevents critical problems caused by large influxes of players joining and leaving, keeping your network stable as it grows.
Changing Your Backend Server to Spigot
In order to use BungeeCord, the servers that connect to your proxy should be running Spigot.
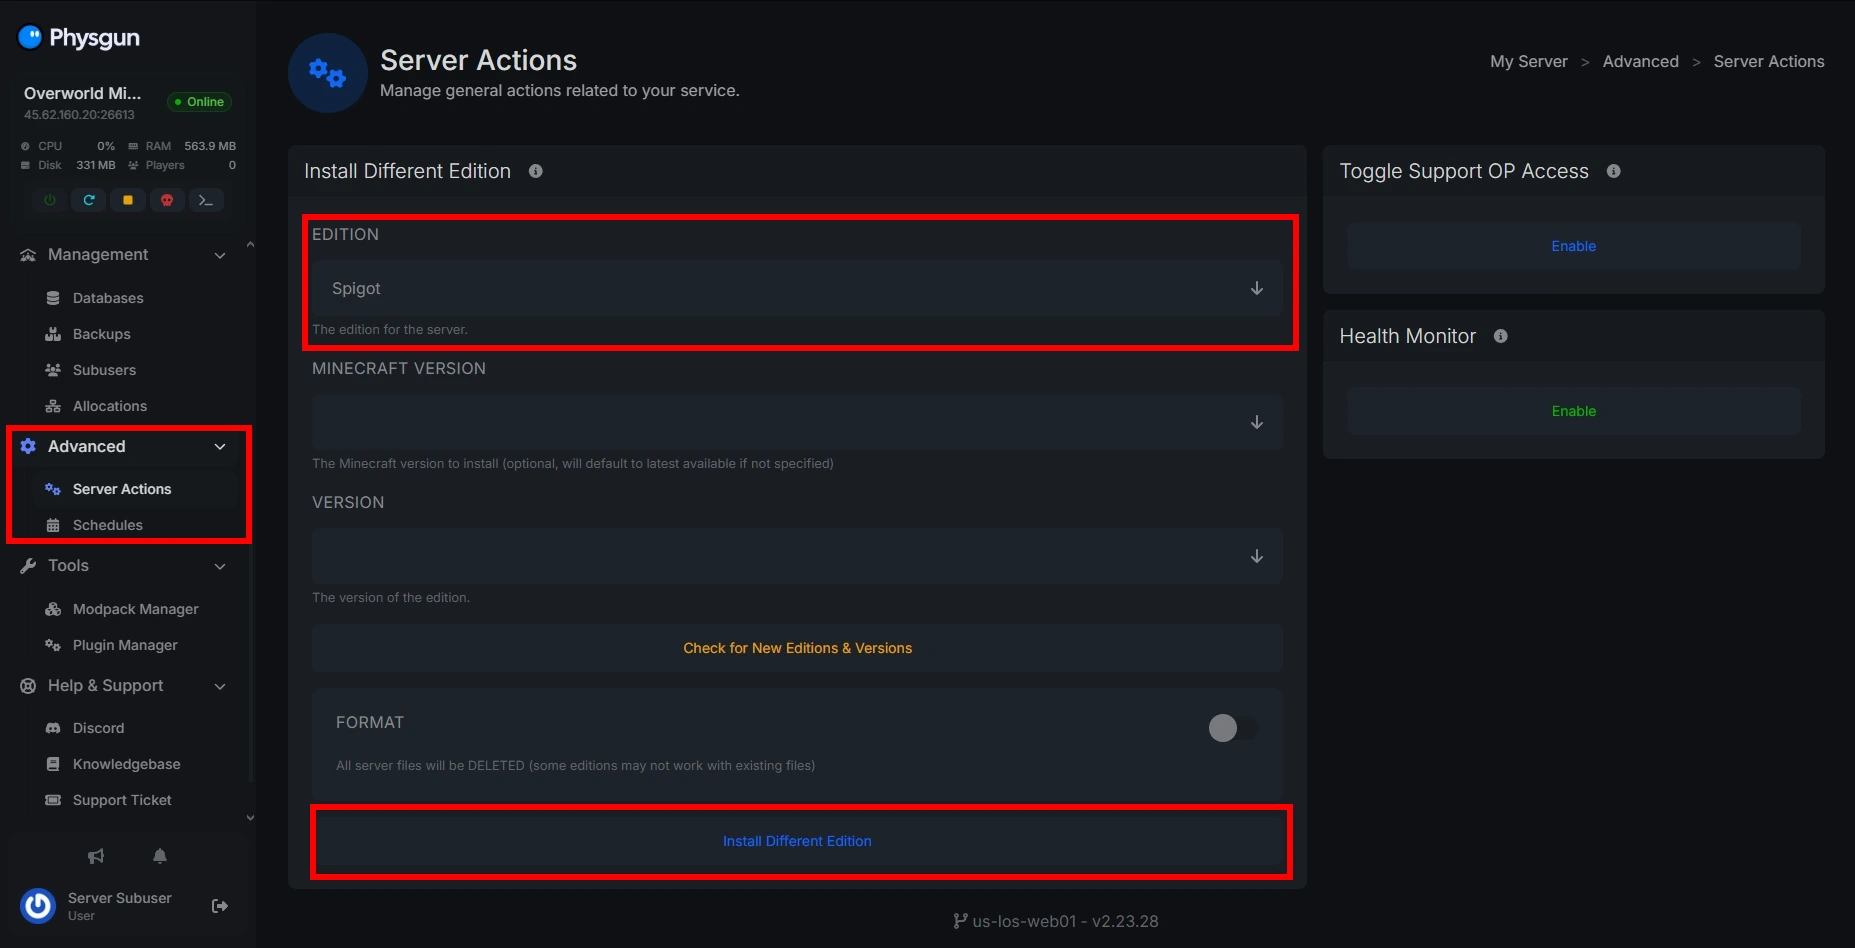
On Your Physgun Server
- Open your Physgun server panel.
- Navigate to Advanced > Server Actions.
- Click the Edition dropdown and select Spigot, then choose your desired version.
- Click Install New Version and wait for it to complete.
- Start your server — you’re done!
Manually
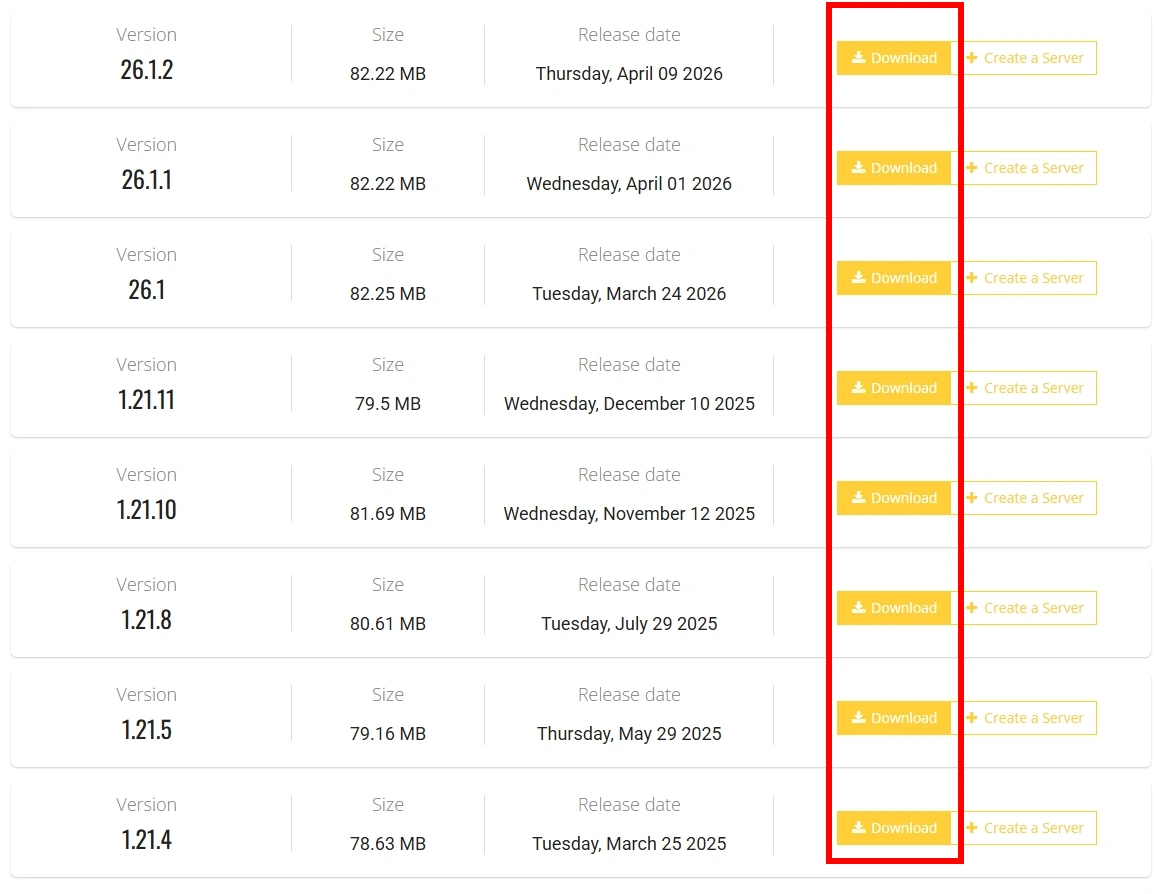
- Visit the Spigot download page.
- Click Download on the version you want to use.
- Click the file name when the “You’re about to download” prompt appears.
- Save the downloaded spigot.jar file. If it’s named something like
spigot-1.21.1.jar, rename it tospigot.jar. - Add it to your server’s main folder (where your
server.jarlives) and open your batch file. - In the batch file, change
-jar server.jarto-jar spigot.jar. - Run your server. If prompted about the EULA, open
eula.txtand seteula=true, then start again.
Setting Up Your BungeeCord Proxy
Downloading the BungeeCord JAR (Manual Only)
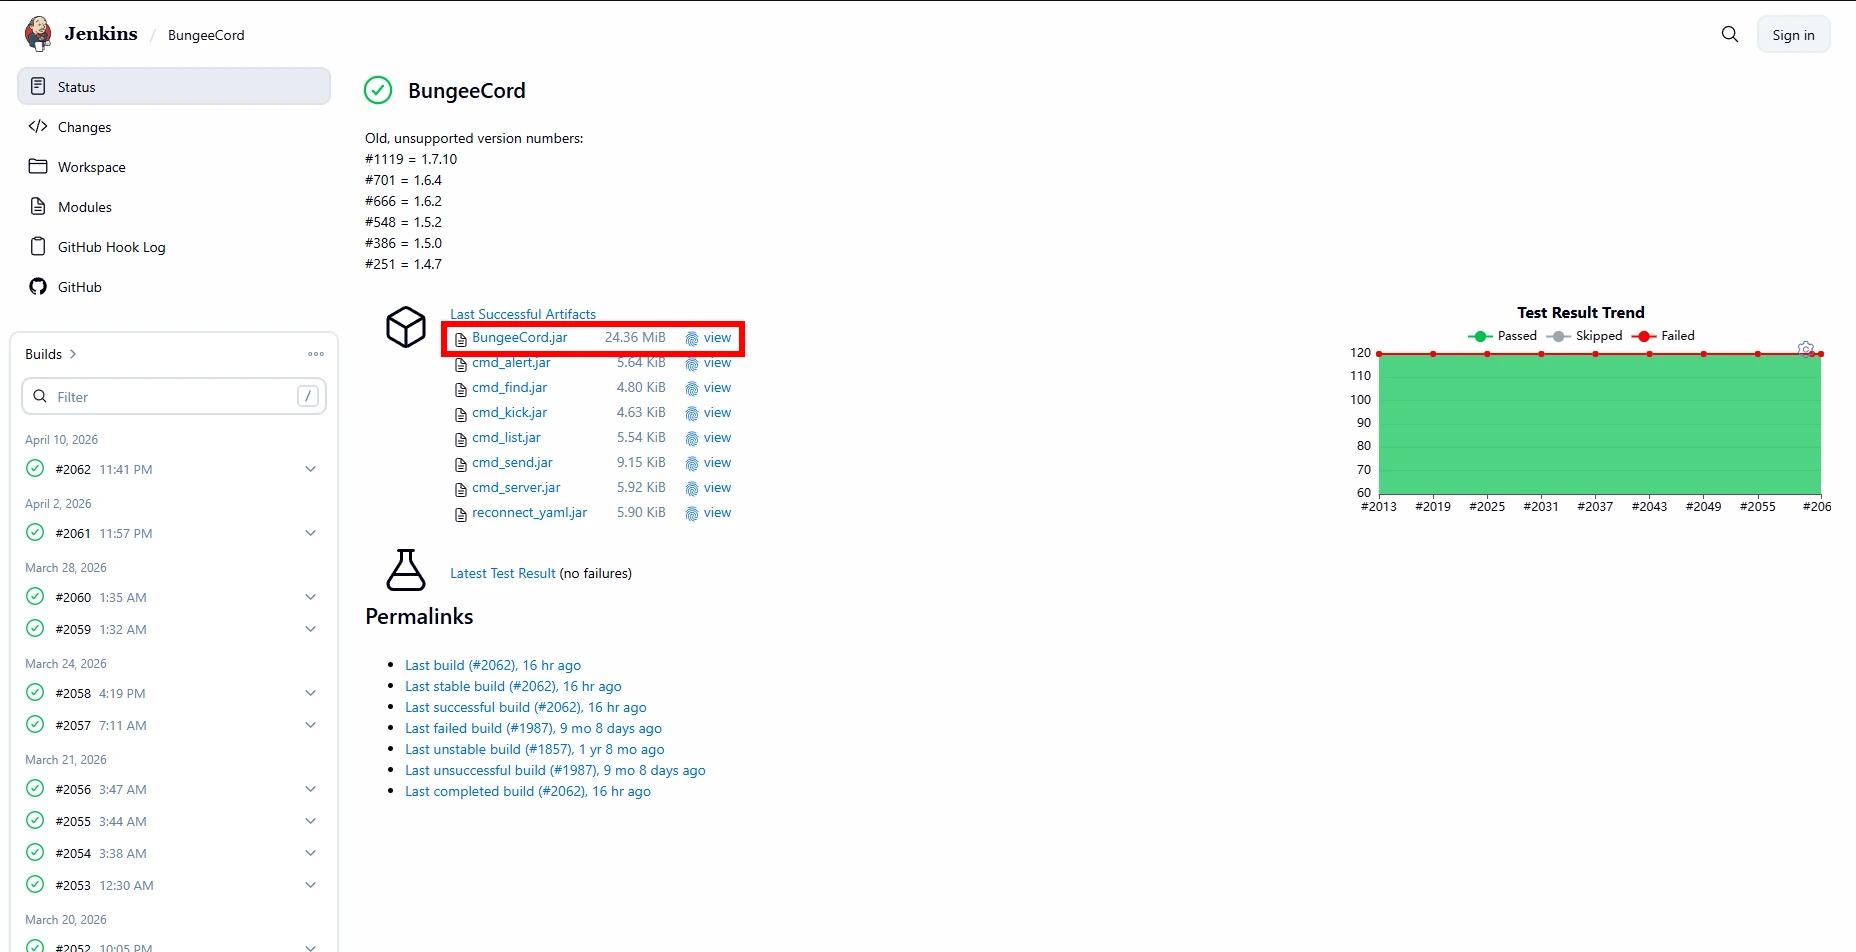
- Visit the SpigotMC Hub page.
- Click Enter under Jenkins.
- Select BungeeCord.
- Download the latest BungeeCord.jar.
BungeeCord only works on Minecraft 1.8 and above.
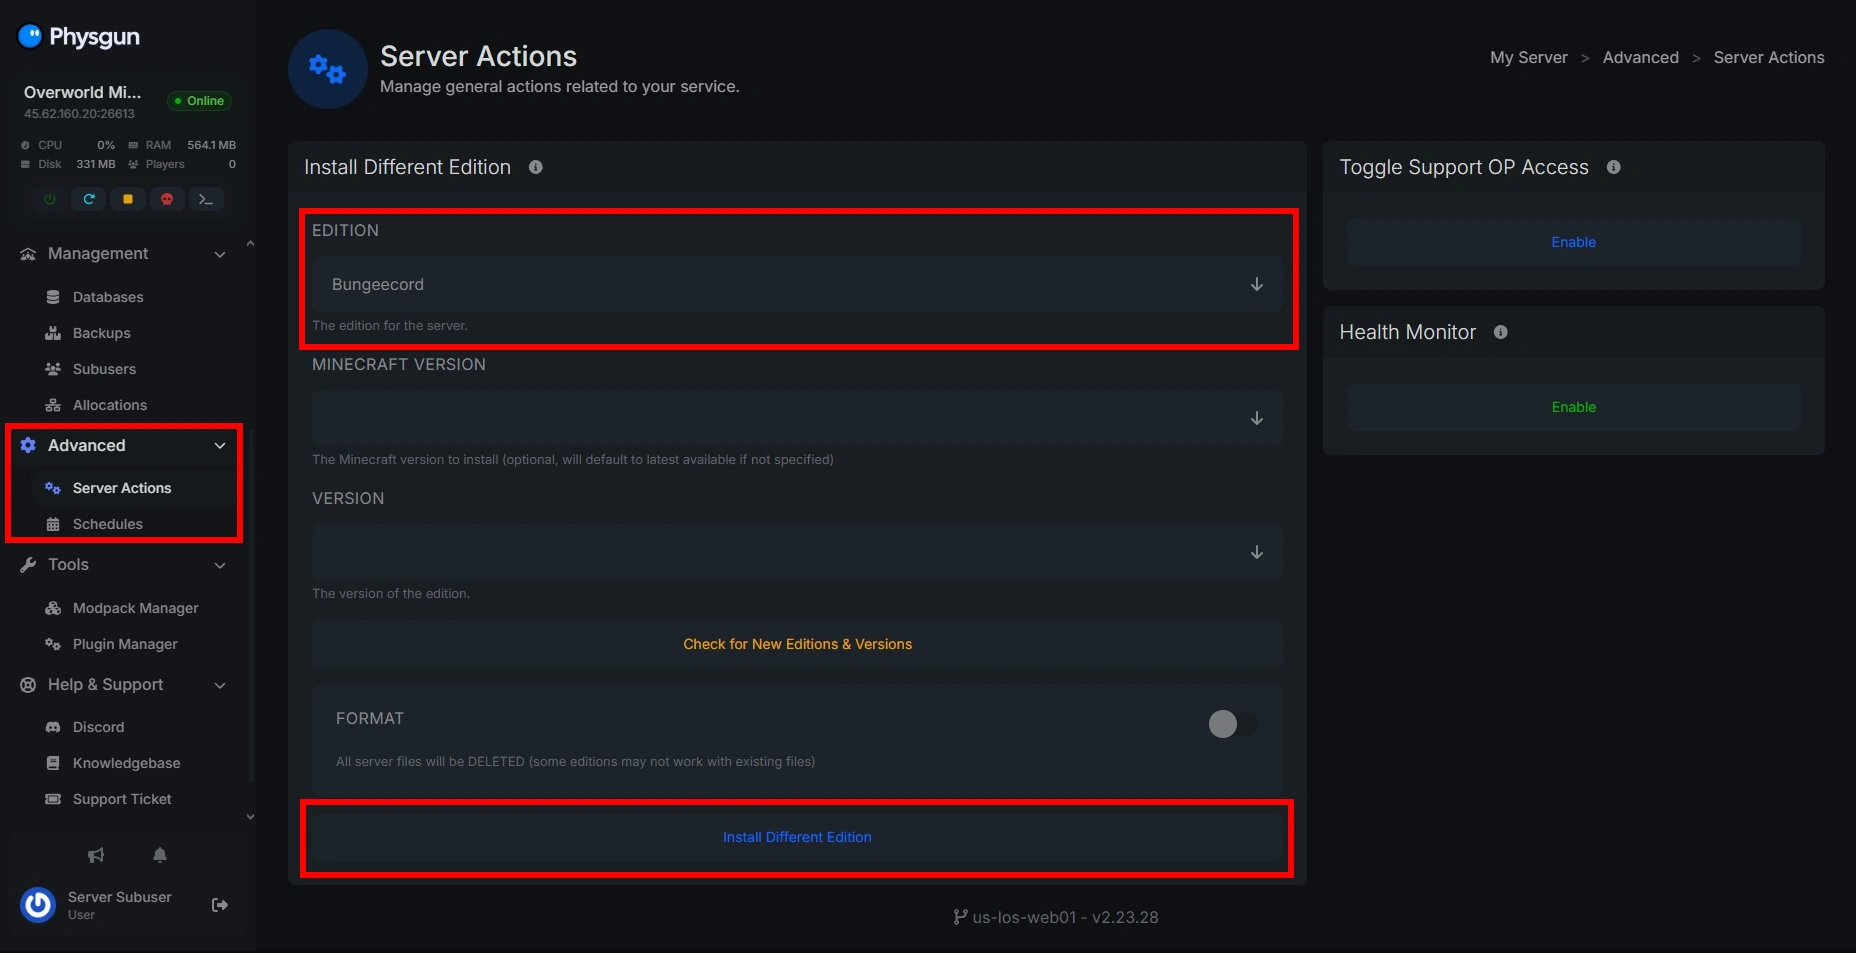
On Your Physgun Server
- Open your proxy server panel.
- Navigate to Advanced > Server Actions.
- Click the Edition dropdown and select BungeeCord, then choose your version.
- Click Install New Version and wait.
- Start the server — BungeeCord is now running.
Manually
- Open your proxy server’s files.
- Upload the BungeeCord.jar you downloaded into the server’s main folder.
- Rename it to match your existing server JAR filename (usually
server.jar) and replace the old file. - Start the server — it’s now running as a BungeeCord proxy.
Configuring the BungeeCord Config File
Open config.yml in your proxy server’s main directory and update the following:
ip_forward: trueaddress: 0.0.0.0:1234 # Your Spigot server's IP and portSave the file and restart your proxy server.
Configuring Your Spigot Backend Server
- Open your Spigot server’s files.
- Open server.properties and set:
online-mode=false
enforce-secure-profile=false- Open spigot.yml and set
bungeecordtotrue. - Open bukkit.yml and set
connection-throttleto-1. - Restart your Spigot server.
Critical Security: Protecting Your Backend
When running a public BungeeCord network, anyone who knows your Spigot server’s IP can connect to it directly and bypass your proxy restrictions. A firewall plugin such as BungeeGuard prevents this.
Installing BungeeGuard
Install BungeeGuard on both your BungeeCord proxy and every backend Spigot server.
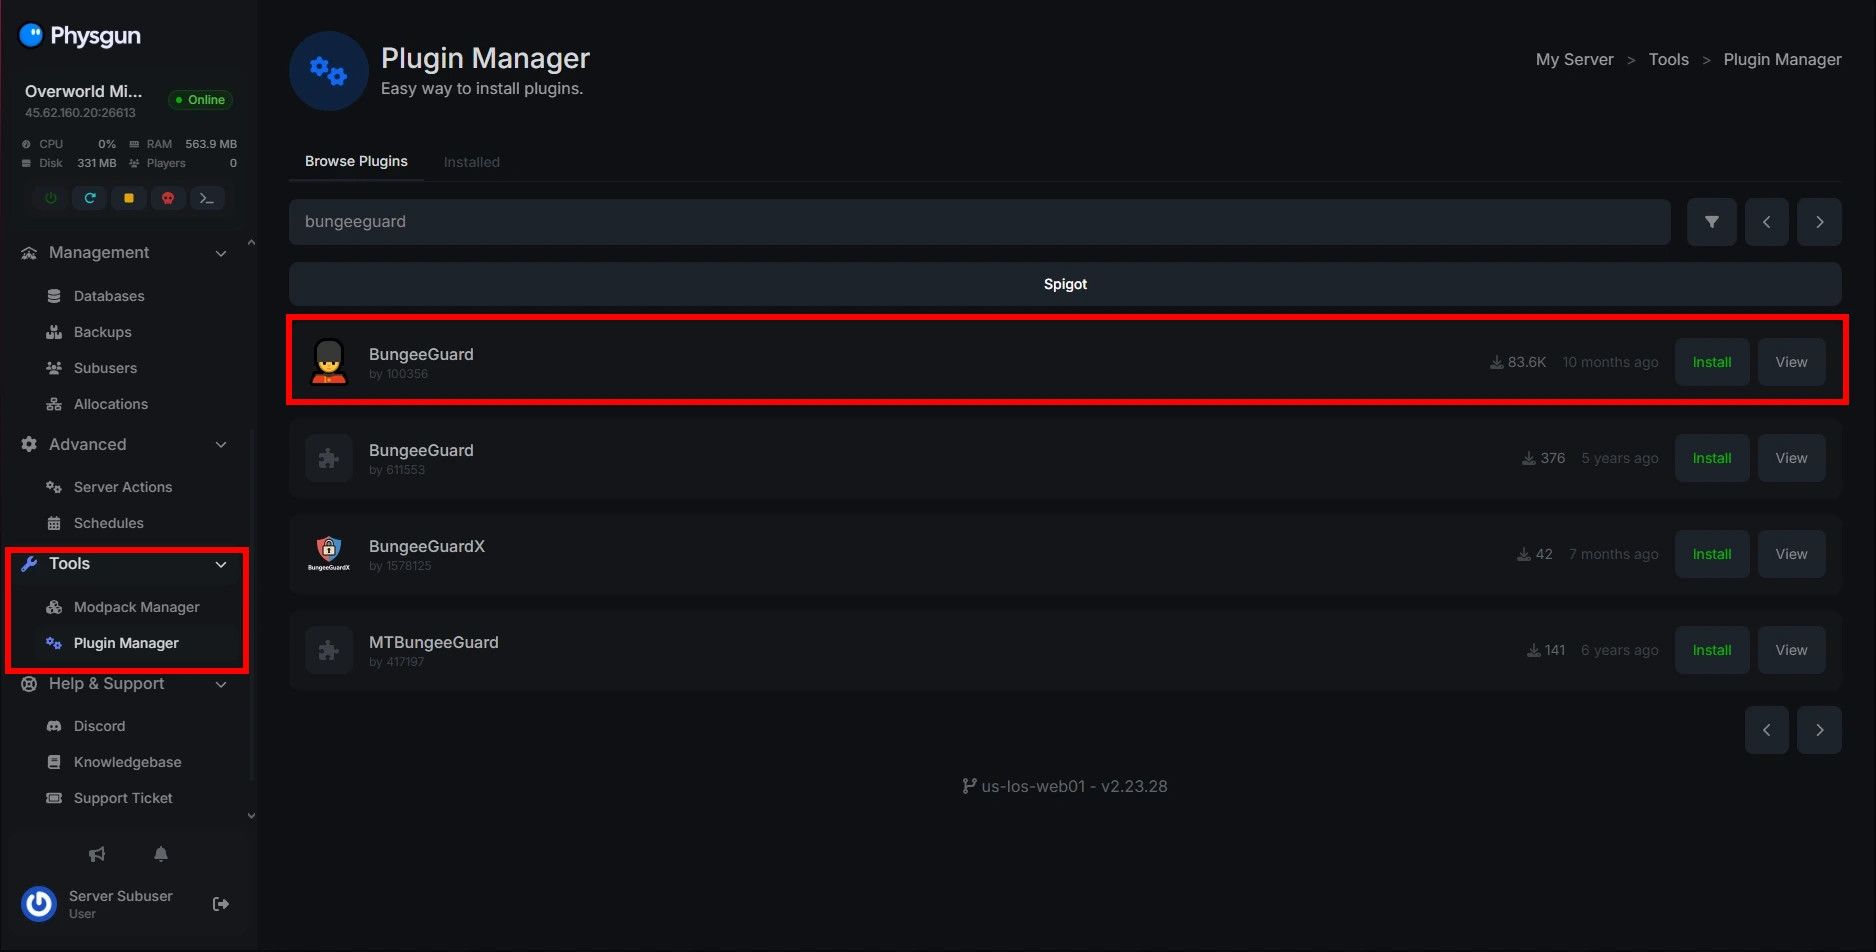
On Physgun:
- Open your server panel.
- Go to Tools > Plugin Manager.
- Search for BungeeGuard and click Install.
- Restart the server.
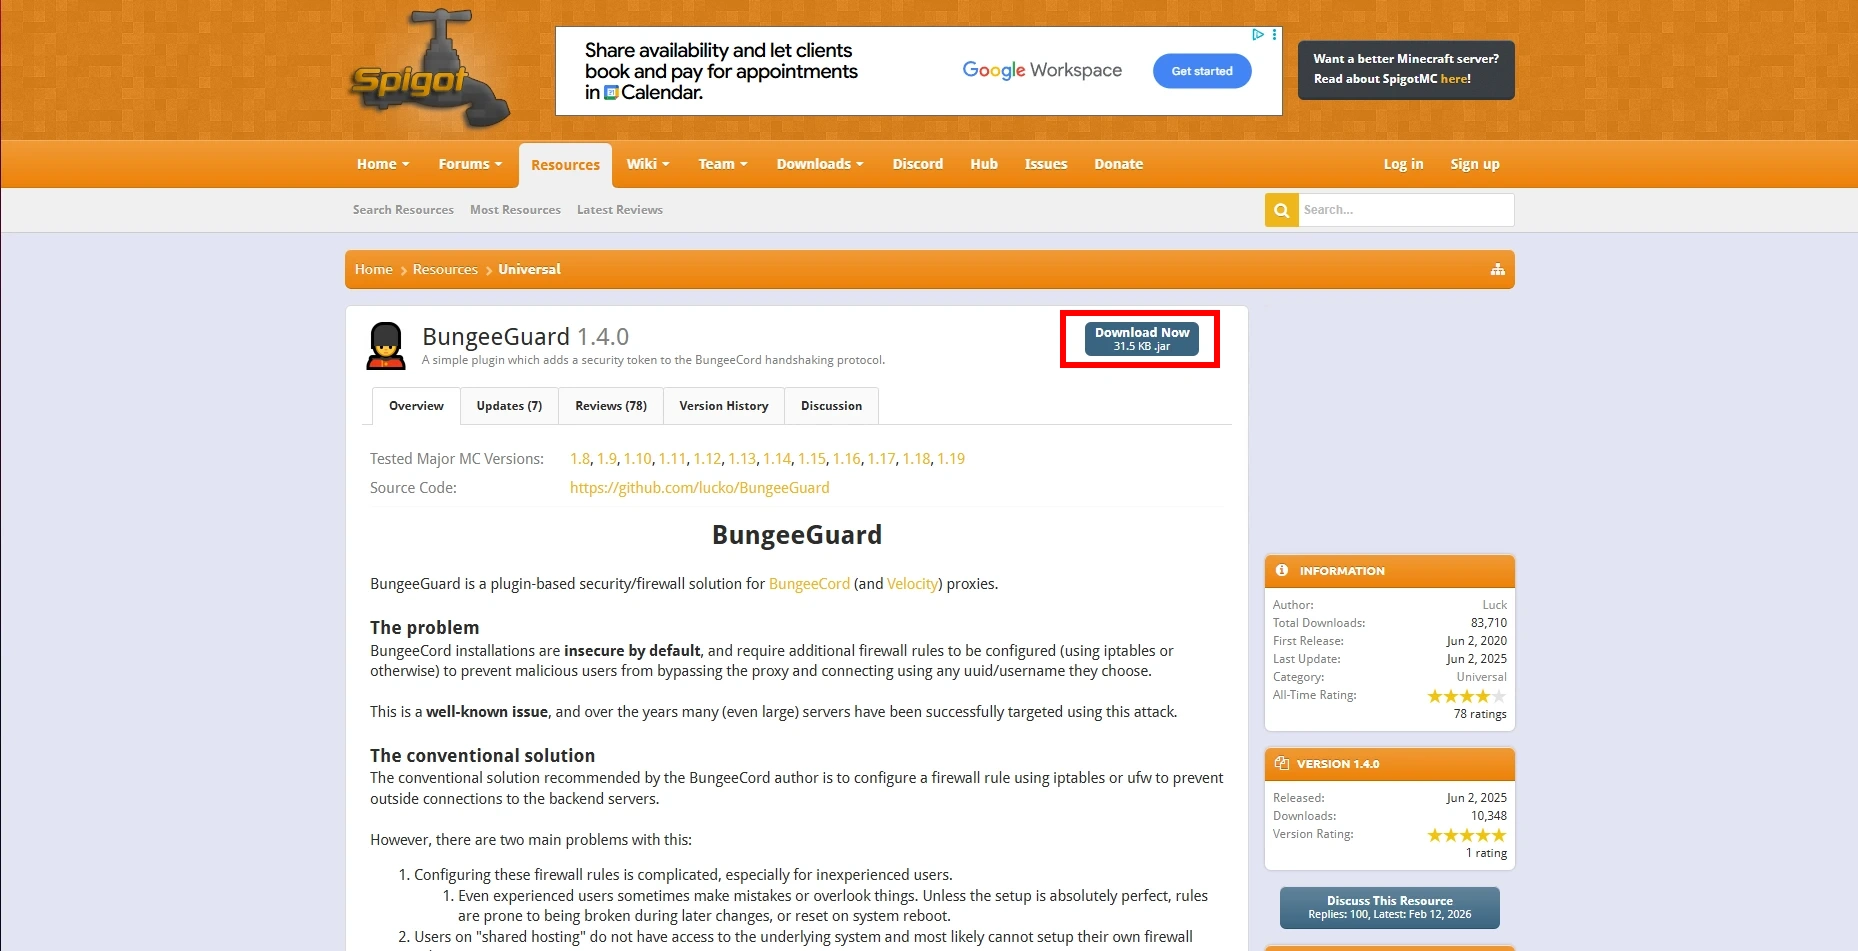
Manually:
- Download BungeeGuard from the SpigotMC page.
- Upload the JAR to the plugins folder on each server.
- Restart each server.
Setting Up Your BungeeGuard Token
- Open your proxy server’s files and navigate to plugins/BungeeGuard/token.yml.
- Copy the token string next to the
tokenvariable. - Open your backend Spigot server’s files and open config.yml in the main directory.
- Paste the token under the
allowed-tokensvariable.
Repeat this for every backend server in your network.
Adding Multiple Servers to Your BungeeCord Network
Once your additional Spigot servers are set up, configured, and secured with BungeeGuard, return to your BungeeCord config.yml and add each server to the servers block:
servers:
  lobby:
    address: 0.0.0.0:1234
    motd: '&1Lobby'
    restricted: false
  survival-server:
    address: 1.1.1.1:1234
    motd: '&1Survival'
    restricted: false
  another-server:
    address: 2.2.2.2:1234
    motd: '&1Another Server'
    restricted: false
Give each server a unique name and fill in the correct IP address and port. Restart the proxy after saving.
Conclusion
Your BungeeCord network is now fully set up and ready to handle multiple servers under a single unified experience. By configuring your proxy, enabling IP forwarding, and securing your backend with BungeeGuard, you’ve transformed a standard Minecraft server into a scalable, professional-grade network.
If you run into any problems, feel free to reach out on our Discord or browse the Help Center for more guides.