
Creating a TF2 server lets you control gameplay, add custom maps, and manage your own community. This step-by-step guide explains how to install the server software, configure server settings, and launch a dedicated server using SteamCMD and command line tools.
You will learn how to:
-
Install Team Fortress 2 dedicated server content
-
Configure ports, firewall, and server IP
-
Launch the server using the developer console
-
Add custom content and custom maps
-
Connect players through the server browser
You will also learn how to automate server startup using a batch file, set up a static IP address for your server computer, and configure port forwarding to allow external players to connect.
Follow along and you can run your own Team Fortress server in minutes.
How To Make a TF2 Server Using Physgun Hosting
Physgun hosting is the fastest and most simple way to get a TF2 server up and running. Once you checkout, your server will be instantly deployed and once its initial setup is complete, you can do whatever you please with it, all at the click of some buttons.
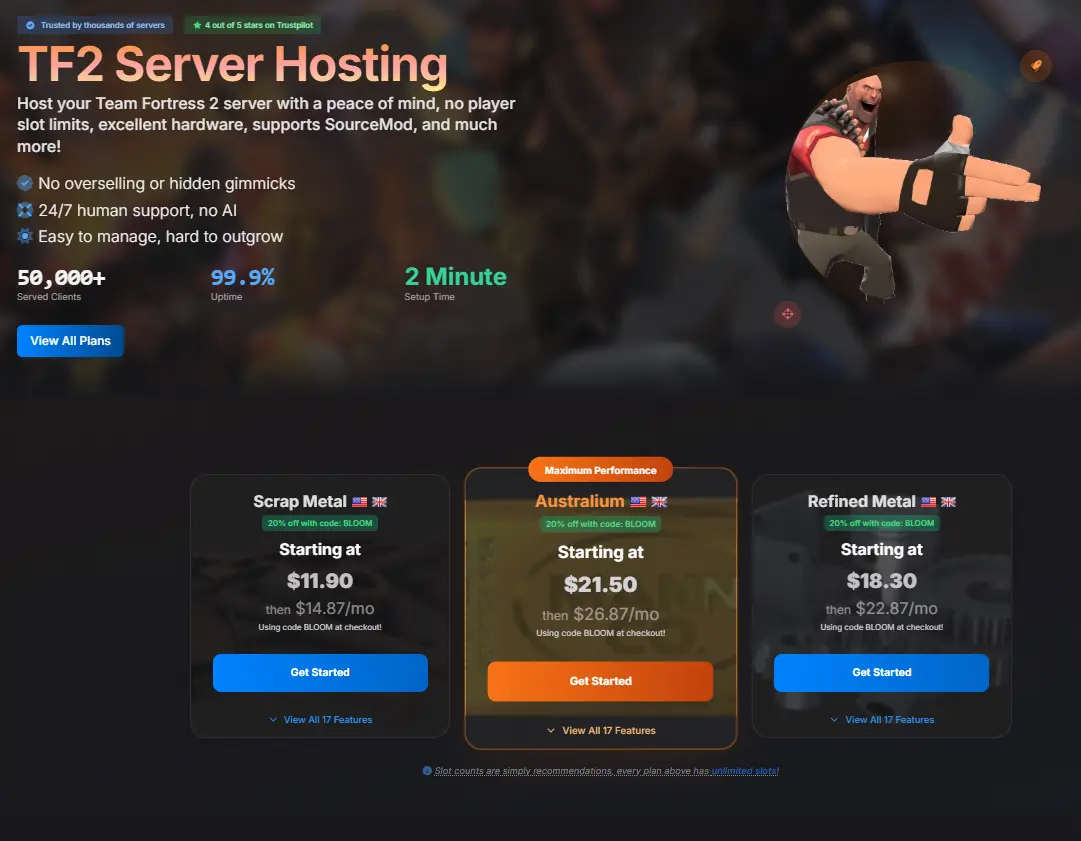
To setup a TF2 Dedicated Server using Physgun Hosting:
-
Sign up for a Physgun account, select a TF2 server plan that fits your needs.
-
Choose your server’s location then checkout.
-
Navigate to the Physgun GamePanel to modify things like your server.cfg, player slots, and more. You can edit the server.cfg file using the built-in text editor provided in the GamePanel.
-
Start your server and connect using the IP and Port allocated.
- You can find your Physgun TF2 Server’s IP address at the top left of the game panel once you select your server.
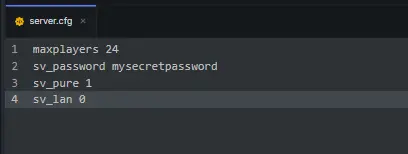
For example, your server.cfg file in the tf\cfg directory might look like this:
maxplayers 24
sv_password mysecretpassword
sv_pure 1
sv_lan 0
These settings allow you to set the maximum number of players, control custom content from clients, set a password for private servers, and restrict the server to LAN only.
Physgun hosting removes the need to manage SteamCMD, firewall rules, or VPS-level maintenance, making it the fastest way to get a private or public server up and running.
How To Install TF2 Dedicated Server on a VPS
Before you begin, ensure your hardware meets the minimum requirements: a processor with at least 2.4 GHz, 8GB of RAM (16GB recommended for optimal performance), and at least 20GB of free storage space. A stable internet connection is required.
To install a TF2 Dedicated Server onto a VPS or self-hosting:
-
Create a user and login to it for the server. This helps with security on your VPS.
sudo add user tf2server
sudo usermod -aG sudo tf2server
su - tf2server
Note: It is recommended to use a separate, dedicated user account for installing and running game servers to avoid security risks.
-
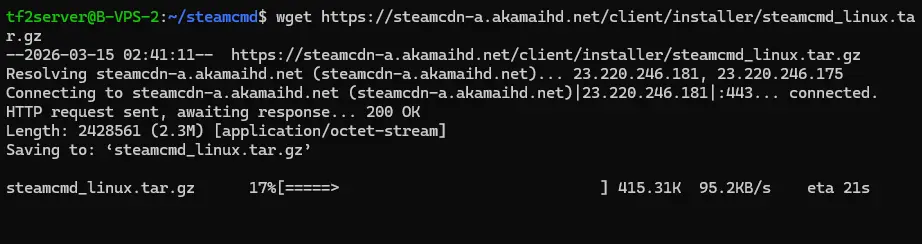
Create a directory for SteamCMD and download it. The installation directory should not be inside an existing TF2 or Valve directory. Use the cd command to change to the current directory where you want to install SteamCMD:
cd ~ mkdir ~/steamcmd cd ~/steamcmd wget https://steamcdn-a.akamaihd.net/client/installer/steamcmd_linux.tar.gz tar -xvzf steamcmd_linux.tar.gz -
Install the dependencies required for SteamCMD and the TF2 Dedicated Server:
sudo dpkg --add-architecture i386 sudo apt update sudo apt install wget tar lib32gcc-s1 lib32stdc++6 screen -
Install the TF2 dedicated server content using SteamCMD. To run SteamCMD, you can double click the exe file on Windows or run the shell script on Linux. You will need to log in with a Steam account (or use anonymous for public servers). Run SteamCMD with the following command:
./steamcmd.sh
login anonymous
force_install_dir ./tf2
app_update 232250 validate
quit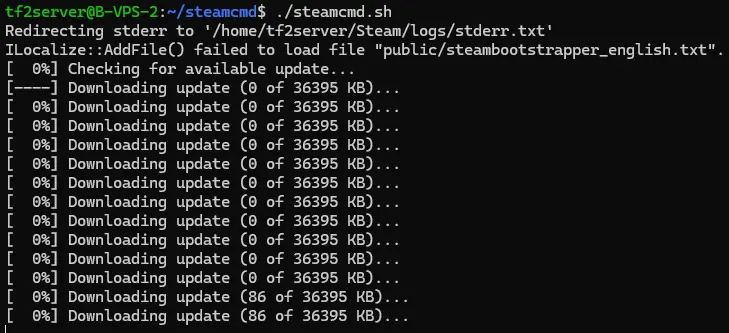
-
Once the server is finished installing, make sure to configure your firewall and open ports using UFW. The required ports for Team Fortress 2 server are UDP 27015 for game traffic and TCP 27015 for remote management. The default port range is typically 27000-27050:
sudo ufw allow 27015/udp comment 'TF2 Game traffic' sudo ufw allow 27015/tcp comment 'TF2 Remote management' sudo ufw allow 27020/udp comment 'SourceTV (optional)' -
Create a basic launch script in the /tf2 directory named tf2.sh. You are creating a new text file (batch file or shell script) that you can edit with a text editor. Example content:
#!/bin/sh
cd /home/tf2server/steamcmd/tf2 || exit 1
./srcds_run -console -game tf +map ctf_2fort +maxplayers 24 +sv_pure 1 +sv_setsteamaccount YOUR_STEAM_GAMESERVER_TOKEN
- Make sure to replace YOUR_STEAM_GAMESERVER_TOKEN with a valid Steam Game Server Token. You can get a GSLT from the official Steam page.
-
Make the script executable:
chmod +x tf2.sh -
You can now start your server with:
./tf2.sh -
You can also create or modify the server.cfg text file in the tf/cfg folder in your server directory to change various server settings. Be sure to save your changes before starting the server. Example:
hostname "My TF2 Server" sv_password "" // leave blank for public rcon_password "SECURE_RCON_PASSWORD" sv_cheats 0 sv_lan 0 mp_timelimit 30 mp_maxrounds 3 -
For admin tools and plugins, install MetaMod and SourceMod.
-
That’s it! You can now connect to your TF2 server in game using your server’s IP address and the ports you previously set up.
-
If your server seems lost in the server list, try connecting in the developer console from the main menu with:
connect IP:PORTReplace IP:PORT with your server’s IP address and port.
Tip: You can use launch options in the Steam client to enable the developer console (add -console to launch options), then access it from the main menu to connect to your server.
Conclusion
Setting up your own TF2 server may seem challenging at first, but following this step-by-step guide makes the process much more manageable. By selecting the right server type, configuring port forwarding, and optimizing your server with the SteamCMD tool, you can create a reliable and customizable gaming environment for yourself and other players. With your own dedicated TF2 server, you’ll have the freedom to shape your Team Fortress 2 games exactly how you want, whether you’re playing with friends or building a larger community.