Creating a private Rust server through Physgun removes all of the complexity that usually comes with setting up a dedicated Rust server. Instead of dealing with SteamCMD, batch files, port forwarding, or Windows Firewall rules, Physgun gives you instant access to a fully managed Rust server with private settings built in.
In this guide, you will learn how to make your Rust server private using the Physgun control panel, configure server settings like passwords and player slots, manage admin access, and connect using the Rust client server list or server connection window. We will also cover how to setup a whitelist using Oxide plugins, modifying config files, and ensure your private Rust server runs smoothly with full control and minimal setup time.
If there’s any steps you might get confused on or terminology you are not sure about, feel free to check out the other articles in our Rust Help Center for help on installing Oxide, setting up your Rust server, and more.
Why Should You Make Your Own Rust Server Private?
Running a private Rust server gives you full control over who can join and how the game is played. This is especially useful for:
-
Playing a tailored Rust experience for you and your friends
-
Host specific game modes or rules
-
Mod/plugin development and testing
-
Administrative testing without public interference
-
Preventing random joins from public servers
-
Progressing at your own pace without exposure to enemy raids
A private setup ensures a consistent Rust experience while maintaining full access to game settings, plugins/mods, and server files, even with a public IP port number. This is managed through server passwords, whitelist plugins, and server visibility settings.
As a prerequisite, make sure you have Oxide installed on your Rust server. You can do this easily in the Physgun Gamepanel by selecting your Rust server, navigating to Server Options in the left side nav bar, then scrolling down until you find the Modding Framework dropdown. Select Oxide from this list and restart your server.
Making A Private Server On Rust (Through Physgun)
To make a Rust server private through Physgun, you have a few options that we will cover here.
Setting A Server Password On Your Rust Server
-
Open the Physgun Gamepanel and select your Rust server.
-
Make sure you have Oxide installed on your Rust server.
-
Download and install the Authentication plugin from uMod here. You can install this plugin by putting the Authentication.cs file you downloaded into /oxide/plugins/ in your servers file manager.
-
Navigate to /oxide/config/ in the File Manager where your server’s files are.
-
Find and open the file named Authentication.json. Inside of this file you should see the following:
{
  	"ENABLED": true,
  	"PASSWORD": "changeme",
  	"PREVENT_CHAT": true,
  	"PREVENT_CHAT_PASSWORD": true,
  	"RETRIES": 0,
  	"TIMEOUT": 30
}-
Change the line that says “Password”: “changeme”. Where it says changeme, set your password you would like for your rust server. You can also change other settings in this file such as PREVENT_CHAT_PASSWORD that will stop players from being able to share your password in chat and RETRIES that will set how many times a player can try the password before being kicked from the game.
-
Restart your Rust server. That’s it! Players will now have to enter your set password to play on your Rust server.
Adding a password alone prevents most unwanted access, but what if we want to further lock the server down to make sure only people you allow can join? That’s where the Whitelist plugin with Oxide comes in!

Installing Whitelist Plugins With Oxide On Your Rust Server
-
Make sure you have Oxide enabled on your server for mod support.
-
Download the Whitelist plugin from uMod here.
-
Navigate to File Manager where your server’s files are.
-
Upload the Whitelist.cs file you download from uMod to /oxide/plugins.
-
Restart your Rust server.
-
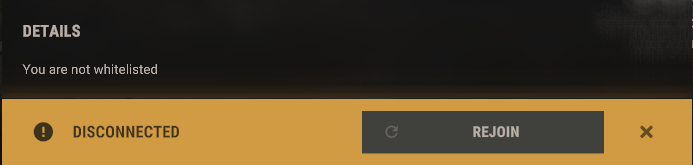
Now that the plugin is installed, we can start adding players to the whitelist so they can join your Rust server!
The Whitelist plugin uses Rust’s permission system. For adding players to the whitelist, we will need the player’s in-game name (must be exact), or the player’s SteamID. Using SteamID is recommended to avoid name conflicts.
To add a player to the whitelist, run the command oxide.grant user (name or steamid) whitelist.allow in the game server console. Once the permission is granted, the player will immediately be allowed to join the server. Using the following command examples, you can add players to the whitelist:
By SteamID: oxide.grant user 76561198000000000 whitelist.allow
by Player Name: oxide.grant user PlayerName whitelist.allow
To remove a player from the whitelist, you can use one of the following example commands with the player’s SteamID or player name:
By Player Name: oxide.revoke user PlayerName whitelist.allow
By SteamID: oxide.revoke user 76561198000000000 whitelist.allow