
Changing your Rust server name and description is one of the easiest ways to customize how your server appears to players in the Rust server list. Your server name, also referred to as the hostname, is what players see first, while the description helps explain the server’s rules, wipe schedule, or gameplay style.
In this guide, you will learn how to change the Rust server name and MOTD through your server settings, where to enter the desired text, and how those changes affect what is displayed in-game. We will also cover common issues like line breaks, saving changes correctly, and restarting the server so your updated server name and description apply without problems.
Changing The Name Of A Rust Server
To change the name of a Rust server:
-
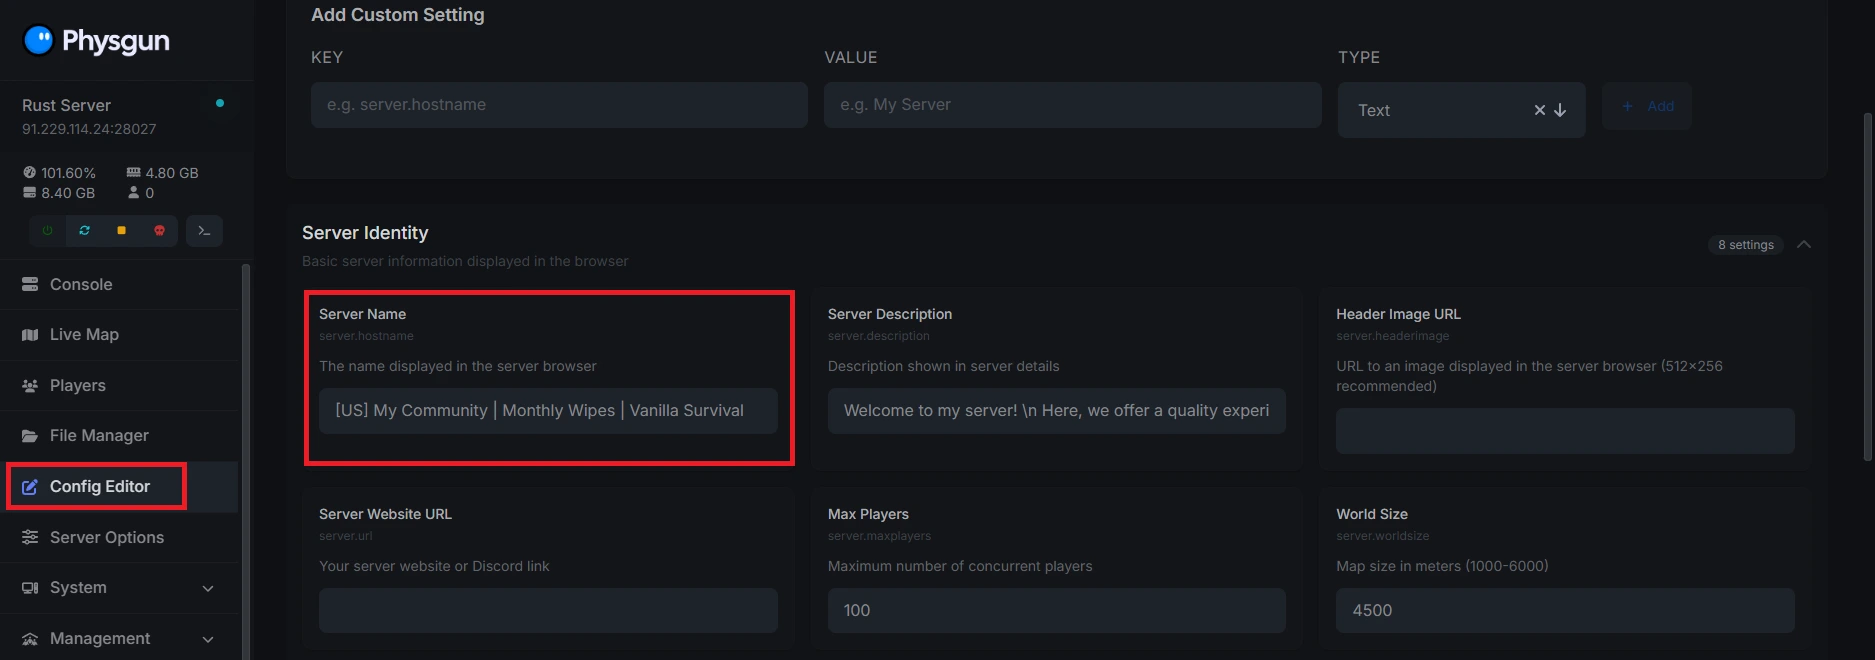
Login to your Physgun server panel.
-
Click the Config Editor tab.
-
Find the Server Name box. By default, it should say “Server hosted by Physgun.com”.
-
Replace this value with the name of your server. Make sure the name is under 60 characters; otherwise, it won’t work as intended.
-
Alternatively, you can open your server’s configuration file located in server/rust/cfg/server.cfg.
-
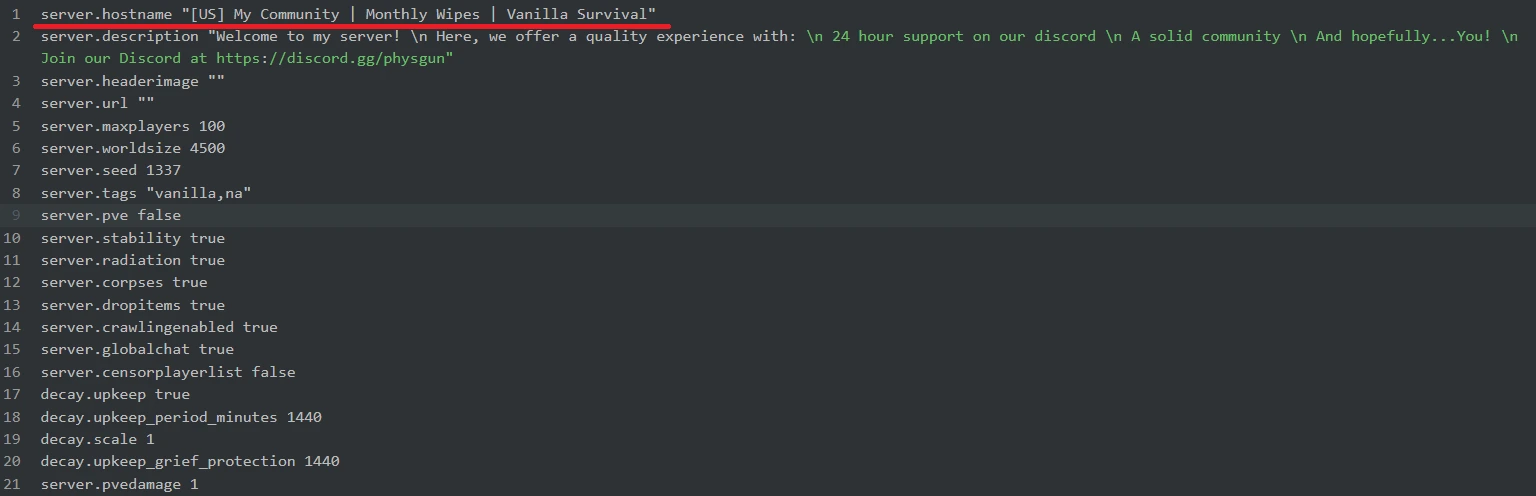
Locate the server.hostname parameter. If it’s not there, add it on a new line followed by a set of quotation marks.
-
Set the value in quotes to the name of your server.
-
Save and restart your server for the changes to take effect.
-
You’re done! On your next startup, your server should appear under the name you’ve given it.
When naming your server, it’s best to include more than just your community name. Many server owners use informative or striking keywords to attract players to their communities. For example, a common format for this would be:
[US] My Community | Monthly Wipes | Vanilla Survival

How To Change Rust Server Description
To change the server description of a Rust server:
-
Head over to your Physgun panel.
-
Return to the Config Editor tab.
-
Find the Server Description box. By default, it should say “A new server hosted by Physgun.com”.
-
Replace this value with the description you want for your server.

-
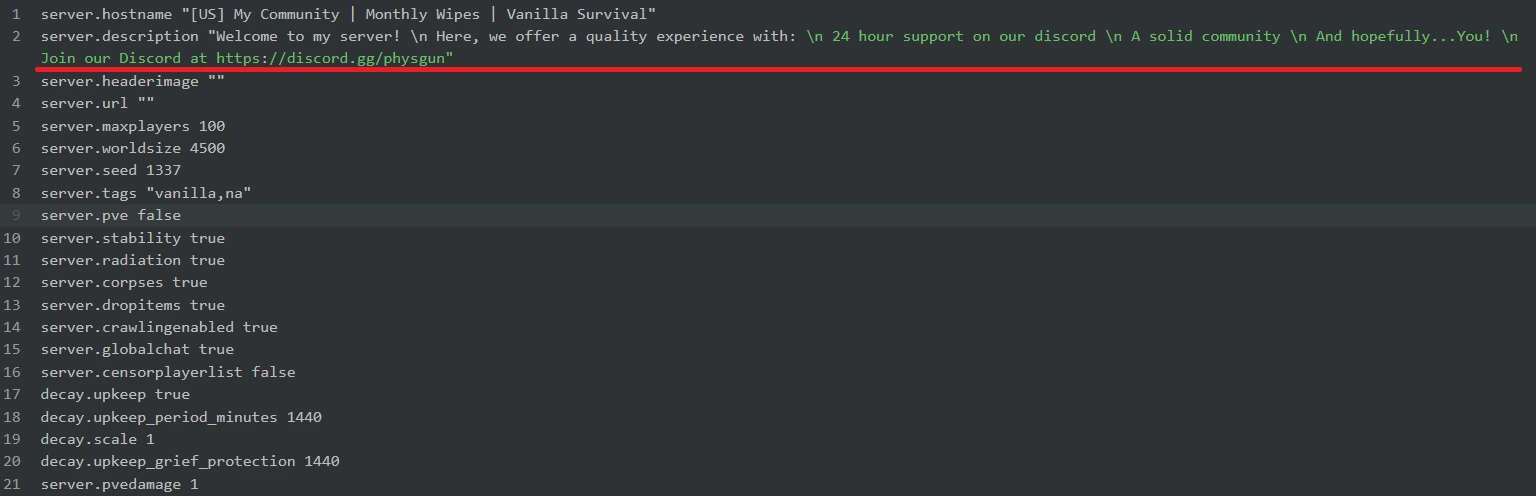
Alternatively, you can open your configuration file again and find the server.description parameter. If it’s not there, add it on a new line followed by a set of quotation marks.
-
Edit the value in quotes to match the description you want for your server.
-
Save and restart your server to apply the changes.
-
That’s it! Now, when players load into your server, they’ll see the desired description you’ve added.
When making a server description, it’s best to include a brief rundown of what your server is about, what players can expect when they join, some rules if necessary, and a greeting to make your players feel welcome. You should also link any external pages you’d like your user to follow, like a Steam community or Discord.
It’s important to note that for a description to look good, it should be clear, concise, and above all, well-formatted. A description should not be a long, one-line word salad. A proper example of a server description would be:
Welcome to my server!
Here, we offer a quality experience with:
24-hour support on our Discord
A solid community
And hopefully…You!
Join our Discord at https://discord.gg/physgun
Each line is clear and compact, and it’s spaced in a way that makes it easy to read. Unfortunately, it’s not as easy as hitting the enter key when it comes to putting a description into your file. When you want to make a line break, you have to use “\n” to do so, since the game will run each line as its own string of code and will completely break. If you wanted to use the above example for your description, you would instead have to format it like this:
"Welcome to my server! \n Here, we offer a quality experience with: \n 24 hour support on our discord \n A solid community \n And hopefully...You! \n Join our Discord at https://discord.gg/physgun"If you’ve followed all of the steps correctly, the results should look like this:
