
As a server owner, your Rust server listing is prime real estate. The Rust server description and header image are often the deciding factor for potential players scrolling through the server browser and their decision to join your server. If you want to change your Rust server description or update the header image, the process is straightforward once you know where to navigate.
In this article, you’ll learn how to change Rust server description text, format each new line correctly, and set a clean header image URL that actually displays in-game. We’ll also explain:
-
Editing the description info in your control panel or config file
-
Adding an image link that loads properly
-
Using the server console if needed
-
When to run a server restart so updates appear
Let’s make your server stand out.
Changing Your Rust Server Description Field
To change the description of your Rust server using the Physgun-hosted panel:
-
Log in to your Physgun server panel and stop your server if it’s running.
-
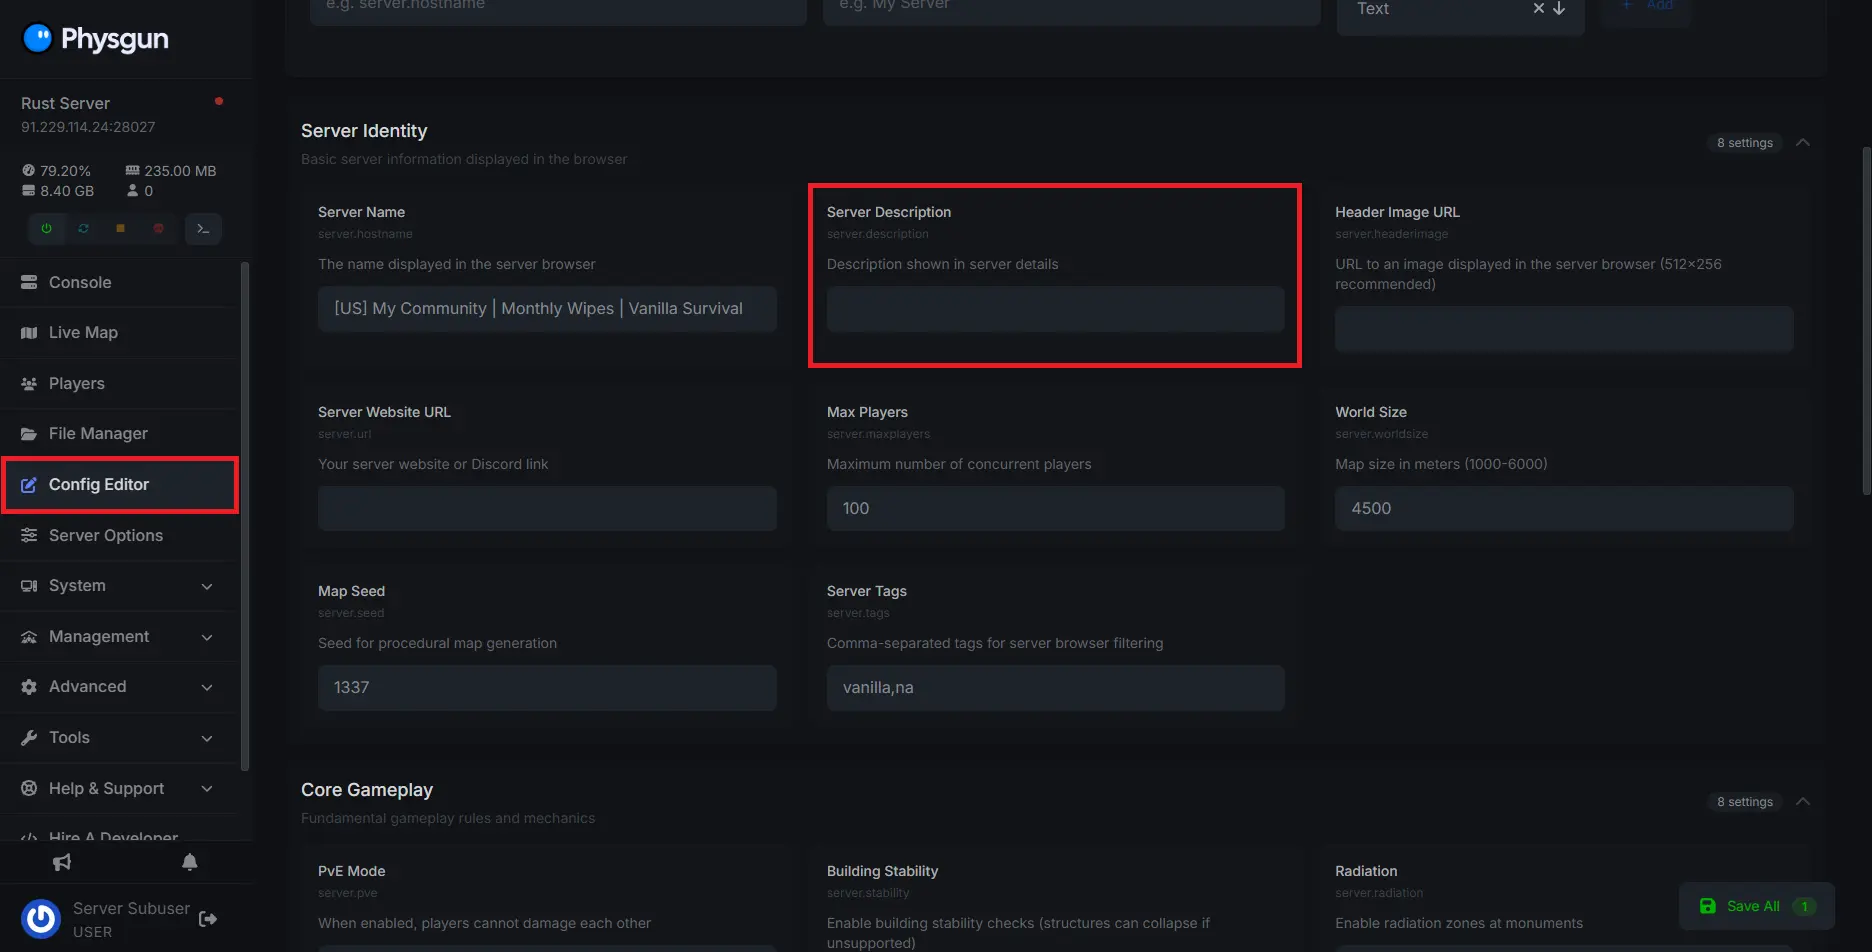
Navigate to the Config Editor tab and find the Server Description option.
-
Set the contents of this box to whatever you’d like your server description to be.
-
Restart your server or type server.readcfg into your console to apply the changes.
-
That’s it!
To change the description of your Rust server using the config file:
-
Stop your server if it’s running.
-
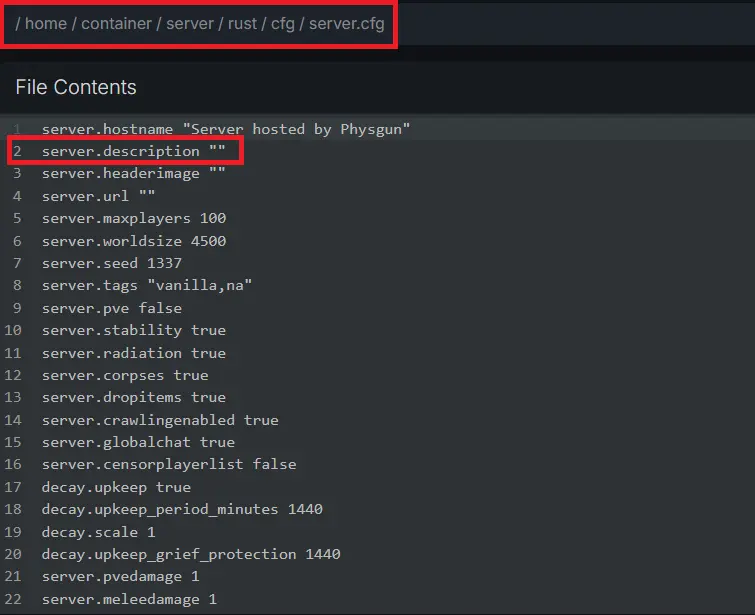
Open your server’s files, navigate to the server/rust/cfg directory, and open server.cfg.
-
Near the top of your file, you’ll find server.description. Enter your desired server’s description into the quotation marks.
-
Save and exit the file.
-
Restart your server or type server.readcfg into your console to apply the changes.
-
You’re done!
It’s important to note that to add new lines to your description, the correct method is to use “\n” before continuing the next line of your message. For example, if you set your server description to “My Server Name \n Make sure to follow the rules \n Example text”, it will look something like this:
My Server Name
Make sure to follow the rules
Example text
Changing Your Rust Server Header Image
Obtaining Your Header Image URL
To upload your image to an external site:
-
Get the image you want to use for your banner. It’s recommended that the resolution is 512x256.
-
Visit an image-sharing website. For the sake of this guide, we’ll be using Imgur.
-
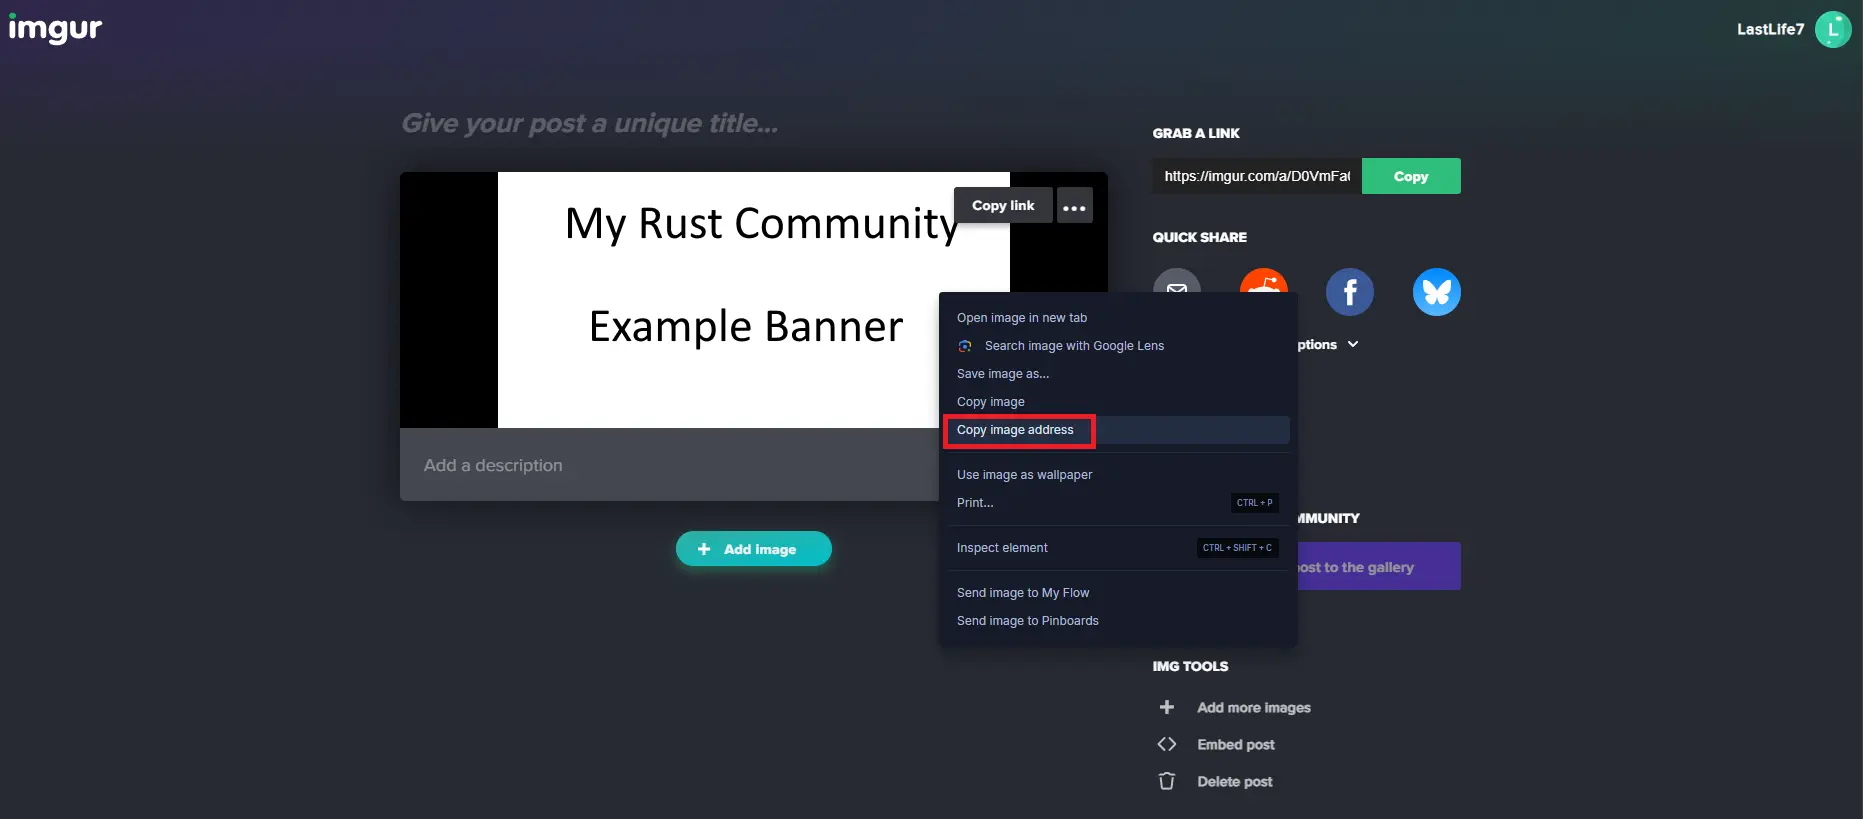
In the top left corner of Imgur, click the New Post button.

-
Paste your image into the box to upload it.
-
Right-click on your image and select Copy image address.
-
Now you have your link.
Setting Your Server’s Header Image
To change the header image for your Rust server using the Physgun-hosted panel:
-
Open your Physgun server panel and make sure your server is stopped.
-
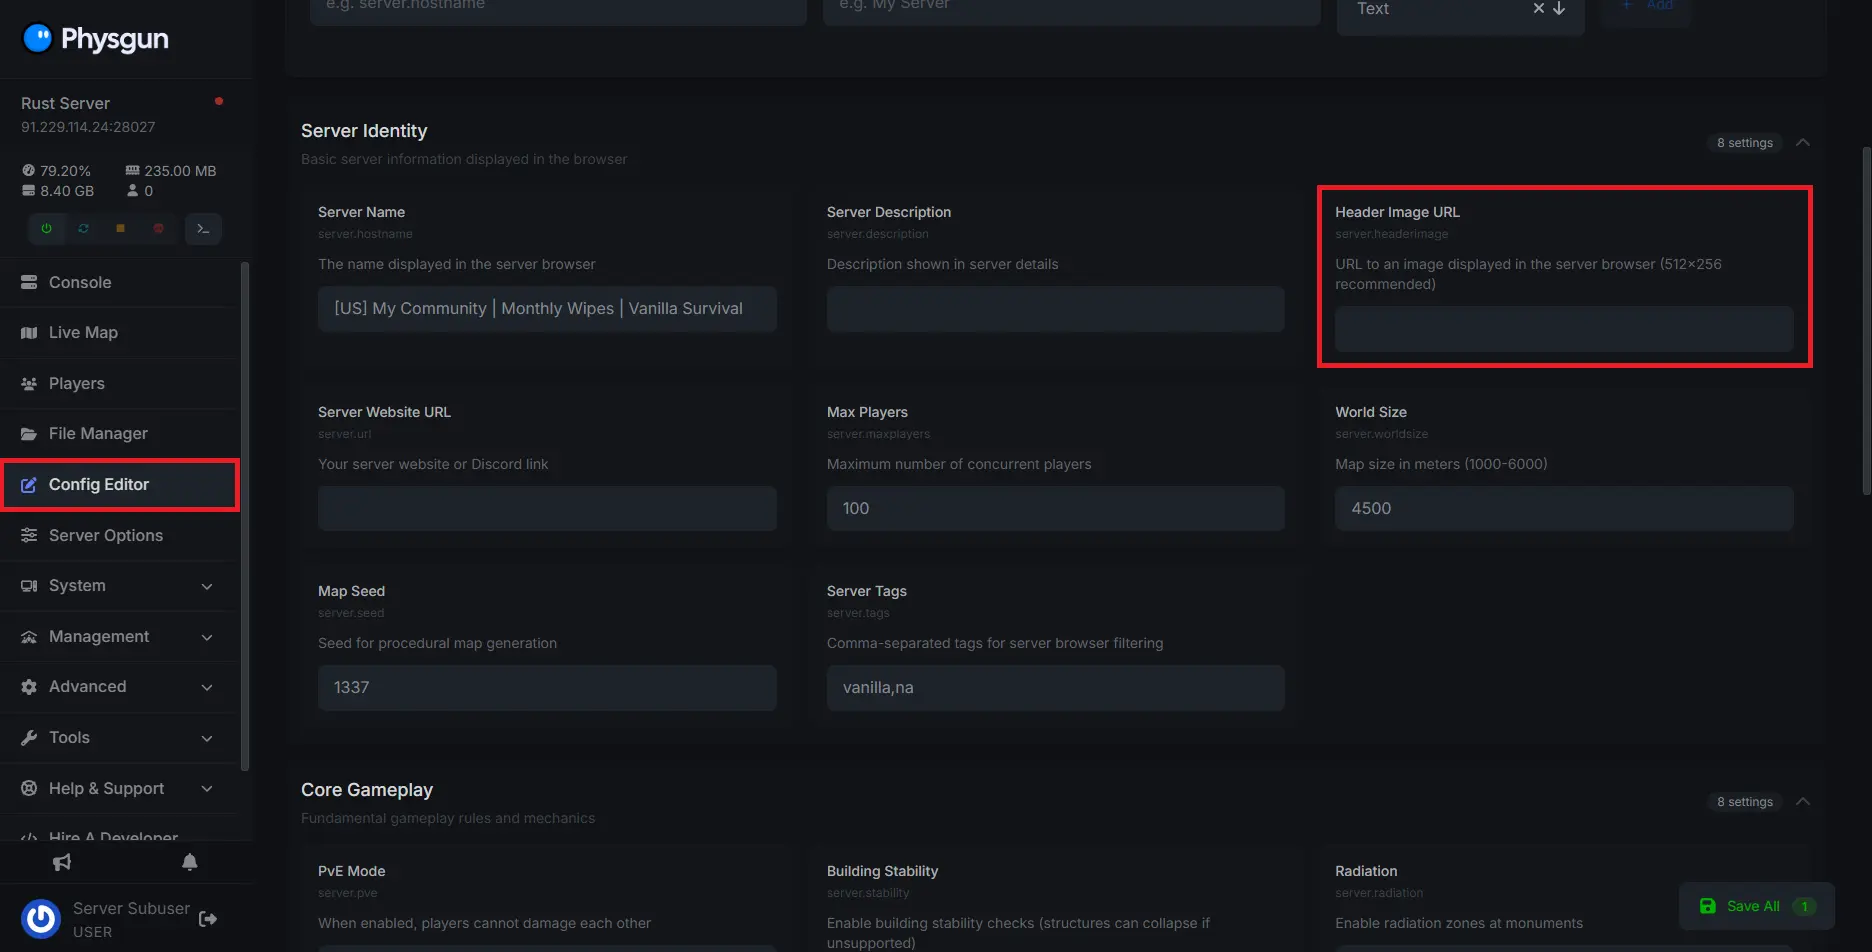
Navigate to the Config Editor tab once again and find the Header Image URL option.
-
Paste the link to your image into the box.
-
Restart your server or type server.readcfg into your console to apply the changes.
-
Your server now has a unique header image!
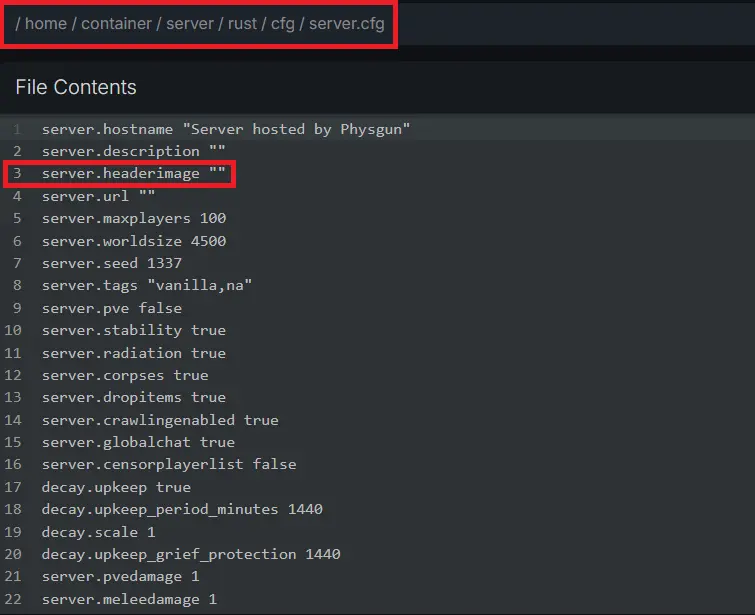
To change the header image for your Rust server using the config file:
-
Open your server’s files, navigate back to the server/rust/cfg directory, and open server.cfg.
-
Find the server.headerimage field.
-
Paste your image URL into the quotation marks.
-
Save and exit the file.
-
Restart your server or type server.readcfg into your console to apply the changes.
-
That’s all you have to do here.
If you come across issues uploading your banner, make sure the resolution is correct and that the file is a JPG or PNG.