
Running an Isle server sounds intimidating until you understand the moving parts. With the right setup, you can launch a stable Evrima server on a dedicated server or modern cloud hosting plan without constant headaches. This guide breaks down how to host a The Isle server, configure server files, and fine-tune server settings so players can reliably find your server in the browser.
You will learn how to:
-
Set up an Isle dedicated server using SteamCMD
-
Configure the configuration and .ini files correctly
By the final step, your Isle server will be live, discoverable, and ready for players.
Using Physgun’s Isle Server Hosting
Hosting an Isle server on Physgun is incredibly easy because everything you need is all in one place! Once you’ve purchased your Physgun service, it will immediately begin installing. You can access your server in the Billing Portal under Your Active Products/Services. Select View Details and click the Go to Panel button.
Configuring Your Physgun Game Server Panel
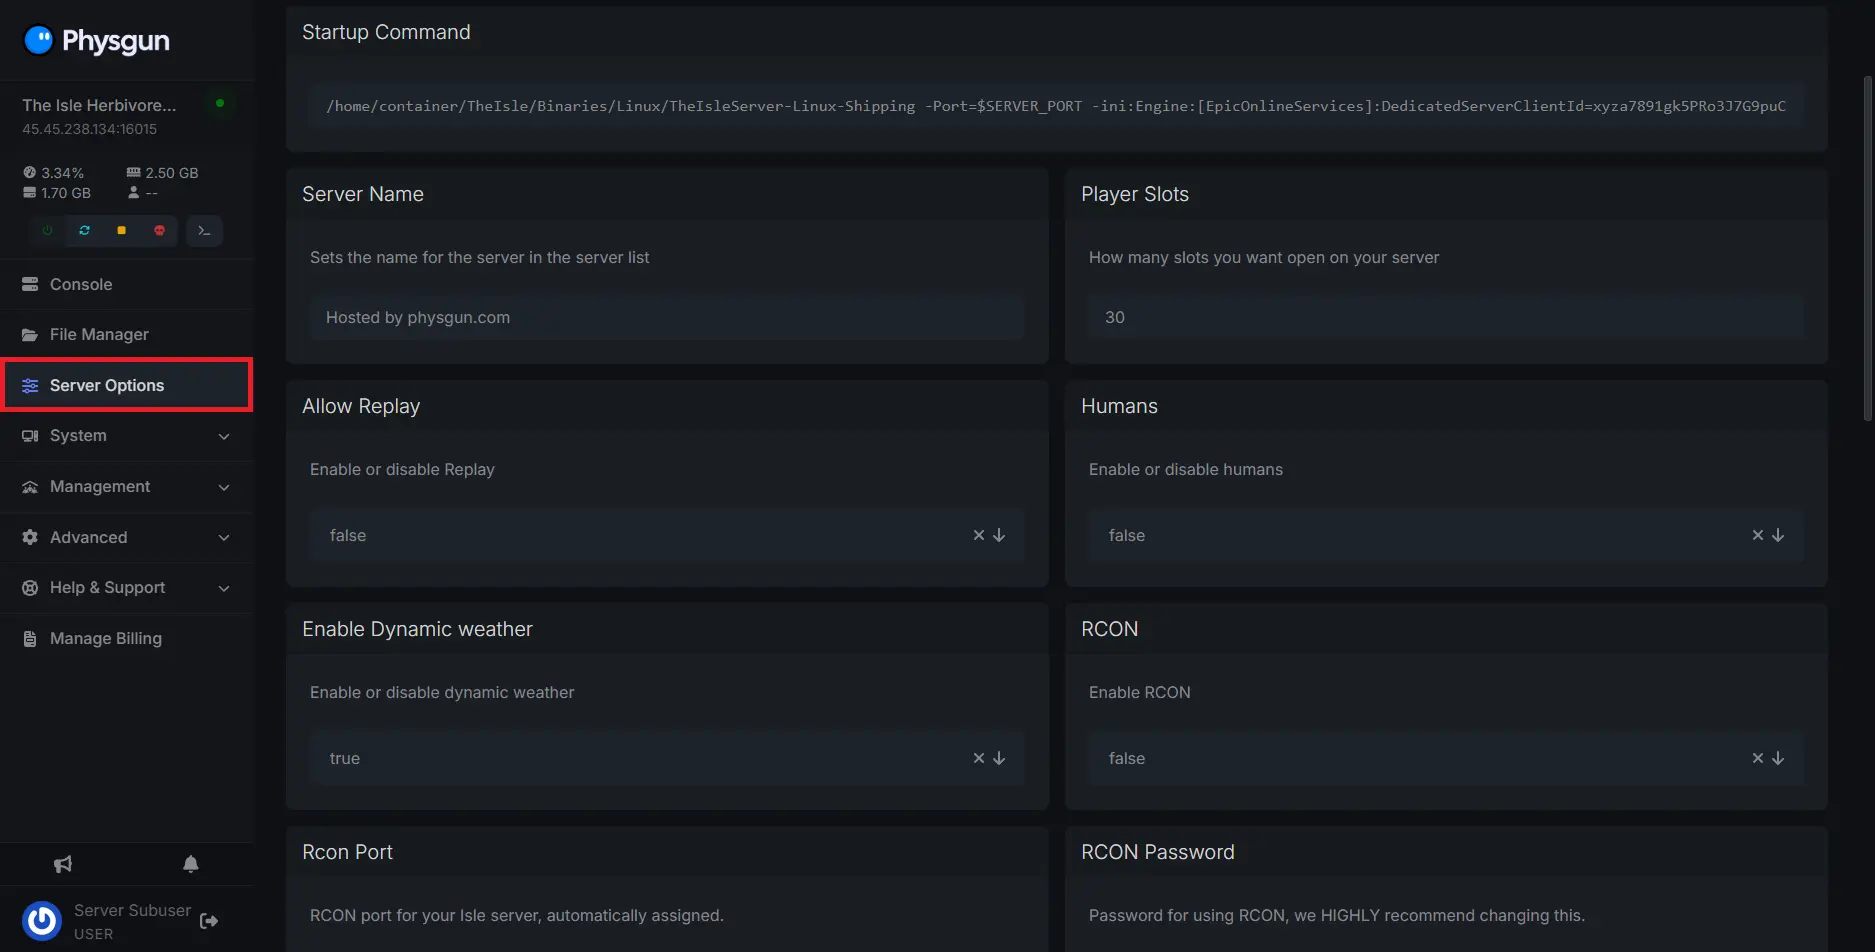
When you first load up your Physgun panel, you’ll be brought to your server’s console, where you can input prompts into the command line and start or stop your server whenever you need to. You’ll notice a list of tabs on the left-hand side. To begin configuring your server, select the Server Options tab.
Once you’re in the Server Options tab, you’ll see several boxes with different configuration options. The first setting you’ll see is the Server Name option. This will determine how your server will appear in the server browser. Set this value to the name you want your server to have, then restart or boot up your server to apply the changes. Now you can do this for any other settings you find here!
In this tab, you can also find options to set up RCON, change weather settings, whitelist-lock your server, enable or disable global chat, and more. Take the time to play around with these settings to make sure everything functions exactly the way you want it.
Additional Game Configuration
While the most common configuration options are integrated directly into your Physgun panel, more in-depth configuration will have to be done in your Game.ini file. Open the File Manager tab and navigate to the TheIsle/Saved/Config/LinuxServer directory. This is where you’ll find your configuration files.
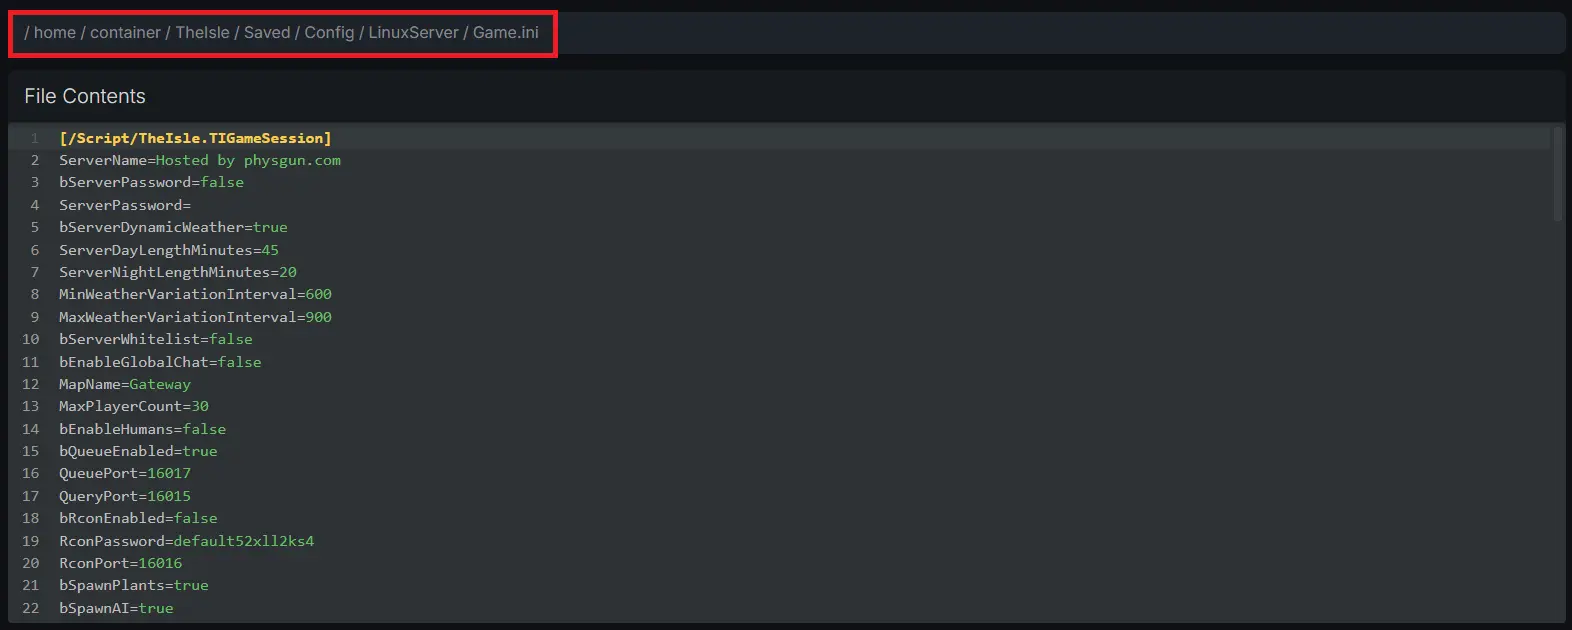
In this file, you can assign admins, disable or enable mutations, change mass migration settings, enable or disable classes, and configure the options already available in your panel if you prefer working in a file editor rather than the server panel.
That’s it! Now you know the basics of modifying your Physgun Isle server. Once everything is to your liking, you can find your server in the server list and start playing.
Using A Dedicated Server Hosting
If you don’t have a Physgun server plan, setting up your own server is a little more tedious. Don’t worry, because this guide will walk you through step-by-step on how to install and configure your dedicated Windows server for Isle.
Installing Your Isle Evirma Server With SteamCMD
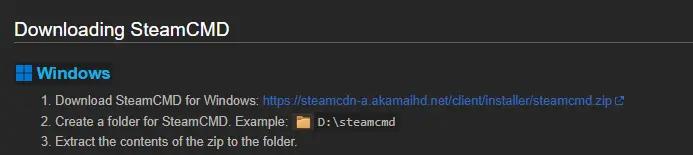
To install SteamCMD:
-
Visit the Valve Developer Community page.
-
Scroll down to the Installation section and click the link next to “Download SteamCMD For Windows”.
-
Extract the .zip file you’ve downloaded and run steamcmd.exe. Wait a moment while SteamCMD installs all of its files.
-
Now, SteamCMD should be installed on your computer.
To install your game server using SteamCMD:
-
Open up SteamCMD if it isn’t already.
-
Type “login anonymous” into the command line to quickly log into the Steam client without needing a password or other login information.
-
Once you’ve logged in, type “force_install_dir” followed by your desired server location. This will specify the install directory for your server. If possible, avoid putting this in your C Drive so it doesn’t mess with your main hard drive’s storage.
-
Next, type “app_update 412680 -beta evrima” and hit enter. This will install a server with the latest version of The Isle, using the Evrima build, to the specified directory. For your knowledge, 412680 is the app ID for The Isle.
-
This may take a while depending on your internet connection, so sit tight.
-
Once it’s done, your server will be installed!
-
Be sure to type quit into the command line to make sure it exits the application safely.
Setting Up Your Isle Evrima Server
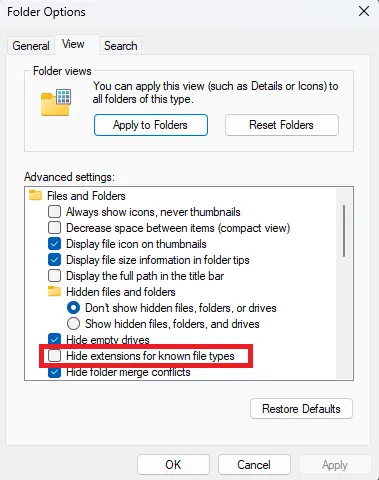
To enable file extensions:
-
In your File Explorer, select the three dots button near the top to view more settings.
-
Select Options and open the View tab.
-
Uncheck the box that’s labeled Hide extensions for known file types and click Apply, then OK.
-
Now you can properly edit your server file types, which is very important for making a server, despite being disabled by default on Windows.
To create a batch file:
-
Find an easily accessable file location that you’d like to put your batch file in. This can be in your server’s root folder, on your desktop, or wherever.
-
Create a new text document and rename it to something like start.bat. If you’ve enabled file extensions in your File Explorer, your .txt file will be changed to a .bat file.
-
Open the file in a word editing tool like Notepad, though you should download something like Notepad++ or VSCode when editing a technical file like this.
-
Paste the following contents into the batch file:
@echo off
cls
echo Protecting isle server from crashes...
title The Isle Server - Your Server Name
:TheIsle
echo (%time%) Checking for updates...
start /wait C:\steamcmd\steamcmd.exe +force_install_dir D:\IsleTestServer +login anonymous +app_update 412680 -beta evrima +quit
echo (%time%) isle server started.
start /wait D:\IsleTestServer\TheIsleServer.exe ?Port=7777?MaxPlayers=100 -log -ini:Engine:[EpicOnlineServices]:DedicatedServerClientId=xyza7891gk5PRo3J7G9puCJGFJjmEguW -ini:Engine:[EpicOnlineServices]:DedicatedServerClientSecret=pKWl6t5i9NJK8gTpVlAxzENZ65P8hYzodV8Dqe5Rlc8 | set /P "="
echo (%time%) WARNING: isle server closed or crashed, restarting in 1 minute.
timeout /t 60
goto TheIsle-
Change all of the file directories in this file to the relevant directories of your own server and SteamCMD application.
-
That’s it! Now you have an Isle server, albeit an unconfigured and local one.
Setting Up a Static IP and PC Port Forwarding on Your Private Server
Now we’re getting even more technical. If you want players to be able to see and play on your server, you’ll have to port forward your IP. Additionally, you’ll need to set up a static IP so your port-forwarded address doesn’t change all the time. If you are just looking to play on your own local server, you can skip this part.
To set up a static IP address in your system settings:
-
Open up your computer’s command prompt by hitting the Windows key and typing “cmd” into your Windows Start tab.
-
Type in “ipconfig” and hit enter.
-
Find and make note of your IPv4 Address, Subnet Mask, and Default Gateway. You’ll need these values for this.
-
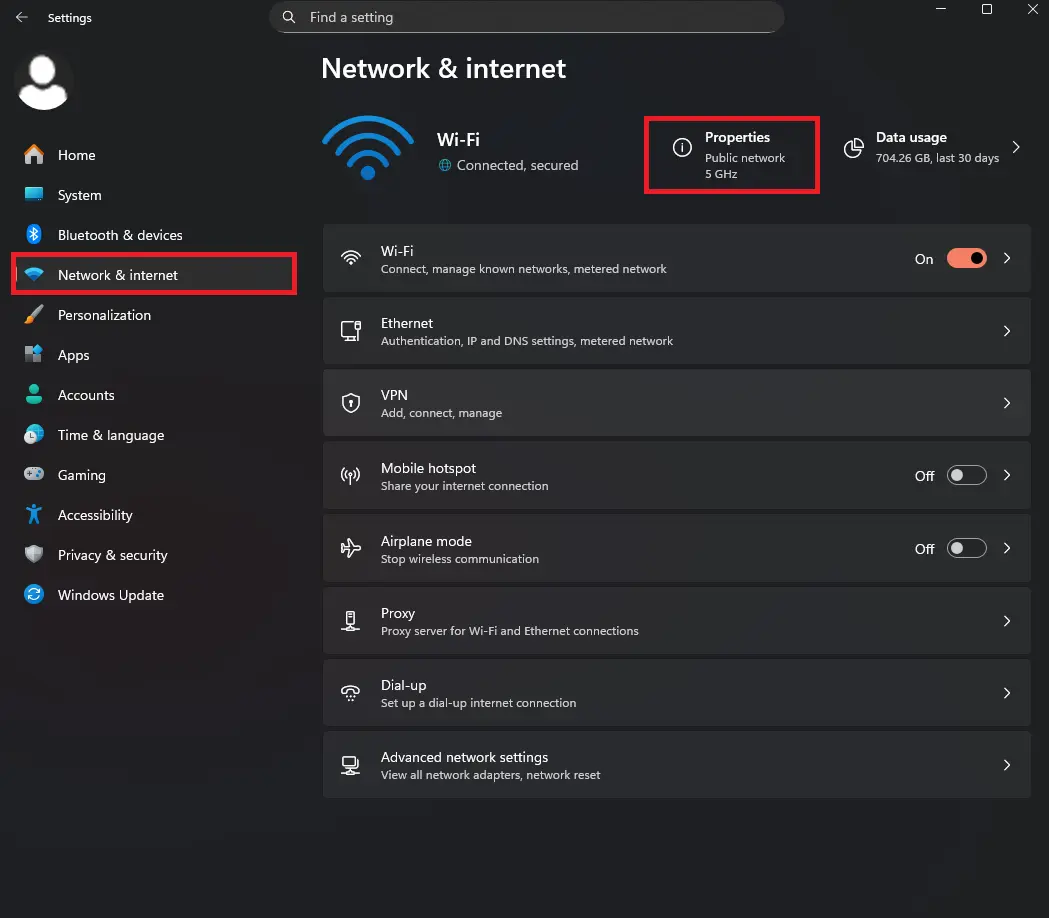
Open your system settings and select the Network & Internet tab.
-
Select Properties at the very top.
-
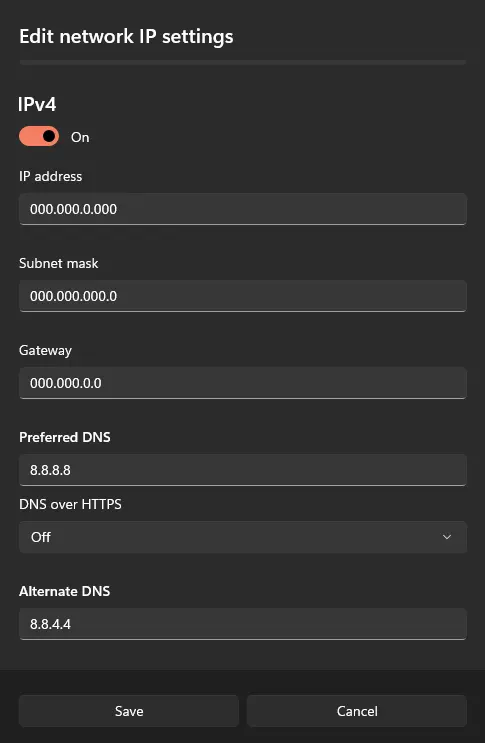
Navigate to IP Assignment and click Edit. From here, change it from Automatic to Manual.
-
Enable IPv4 and fill out the IP address, Subnet mask, and Gateway options with the information you just found in your command prompt.
-
Next, you’ll have to set up your preferred DNS server. There are tons of free public DNS server addresses online, such as Cloudflare, Quad9, or Google. For the sake of this guide, we’ll be using Google’s public DNS address.
-
For the Preferred DNS and Alternate DNS options, type in the following DNS server addresses: 8.8.8.8 and 8.8.4.4, with the first being your Preferred DNS.
Alternatively, you can set this up in your control panel rather than your system settings:
-
Open your computer’s control panel.
-
Click the Network and Internet category, followed by Network and Sharing Center.
-
Select Change Adapter Settings, then choose between Ethernet and Wifi depending on what type of adapter you’re using.
-
Right-click on your option and select Properties.
-
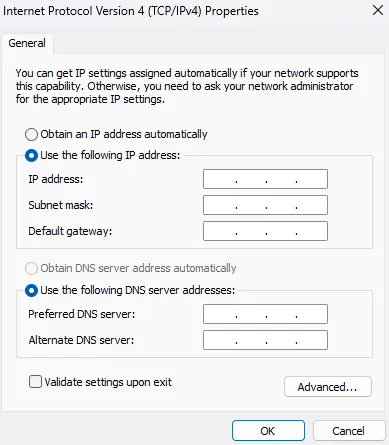
Right-click on Internet Protocol Version 4 (TCP/IPv4) and select Properties.
-
Fill out the information the same way you did in steps 7 through 9.
-
Select Validate settings upon exit and click OK.
There you have it, your static IP address is all set up!
To port forward your IP address:
-
Open your web browser and enter your default gateway into the search bar. All modems are different, so the next few steps will be less specific to cover a wider range.
-
Log in to your modem and look for an option that says WAN services or IPv4 Port Forwarding.
- If you can’t find any options for port forwarding, your internet provider may not offer support for it. If this is the case, you’ll have to use a third-party service to do so.
-
Select an option that says something like Add new port mapping.
-
You’ll be given a bunch of options to set for your mapping, such as Protocol, WAN port, LAN port, and Destination IP.
-
Make sure the Protocol is set to TCP/UDP. If this option isn’t available, make two separate ports.
-
Set your WAN and LAN ports to the range: 7777-7778.
-
Set your destination IP to your IPv4 address.
-
Save and apply your new settings. You might have to restart your modem afterward.
-
If at any point you’re lost in trying to port forward your IP, consider searching “How to port forward using [Your router name] router” in your web browser.
-
Press your Windows key to open your Start menu and search for “Windows Defender Firewall with Advanced Security”.
-
Open the application and select Inbound Rules.

-
Click New Rule and select Port.
-
Click Next and make sure TCP is selected, and select Specific remote ports. Set the port to the range you specified above.
-
Click Next and make sure Allow the connection is selected.
-
Click Next again and make sure Domain, Private, and Public are all checked.
-
Click Next one last time and set the name and description of your rule. Set it to whatever you’d like.
-
Click Finish.
-
Follow steps 9 through 14 again, but instead set the option listed in step 11 to UDP rather than TCP.
-
With that, you’re done port forwarding your Isle server! Keep in mind that if you plan on having multiple servers, each one will need its own unique port.
Modifying Your Server’s Configuration Files
The last thing you will need to do when creating your own Isle server is to set up the configuration. This is about the same as using the configuration files referenced in the Additional Game Configuration section above, but everything has to be done in the Game.ini file since you don’t have a server panel to handle it for you.
From your server’s root folder, go to the TheIsle/Saved/Config/WindowsServer folder. If you can’t find this directory, you’ll have to fully boot up your server for it to generate. From here, you can configure all of the different values to make your server ideal for your vision.
Now you know how to create and configure your very own dedicated Isle server!