
Adding addons to a GMod server is one of the fastest ways to customize gameplay, add fun features, and create a unique experience for players. Whether you want to install addons from the Steam Workshop, use a GMod Workshop collection, or upload custom addons manually, knowing the correct setup process helps you avoid missing files, broken content, or even malicious code.
In this guide, we will walk through how to add addons to a Garry’s Mod server, including how to install addons using a workshop collection, where addon files belong inside the addon folder, and how to safely upload and manage custom addons through your server’s files tab. By the end, you will know how to download addons, use a workshop ID, install custom addons from a zip file, and ensure all the addons load correctly after restarting your server.
Creating a GMod Workshop Collection
If you’re looking to add addons from the workshop to your Garry’s Mod server, you’ll first have to create a workshop collection. Doing this is super simple and only takes a few minutes! Start by opening the Steam Workshop page under the Community tab and searching for Garry’s Mod.
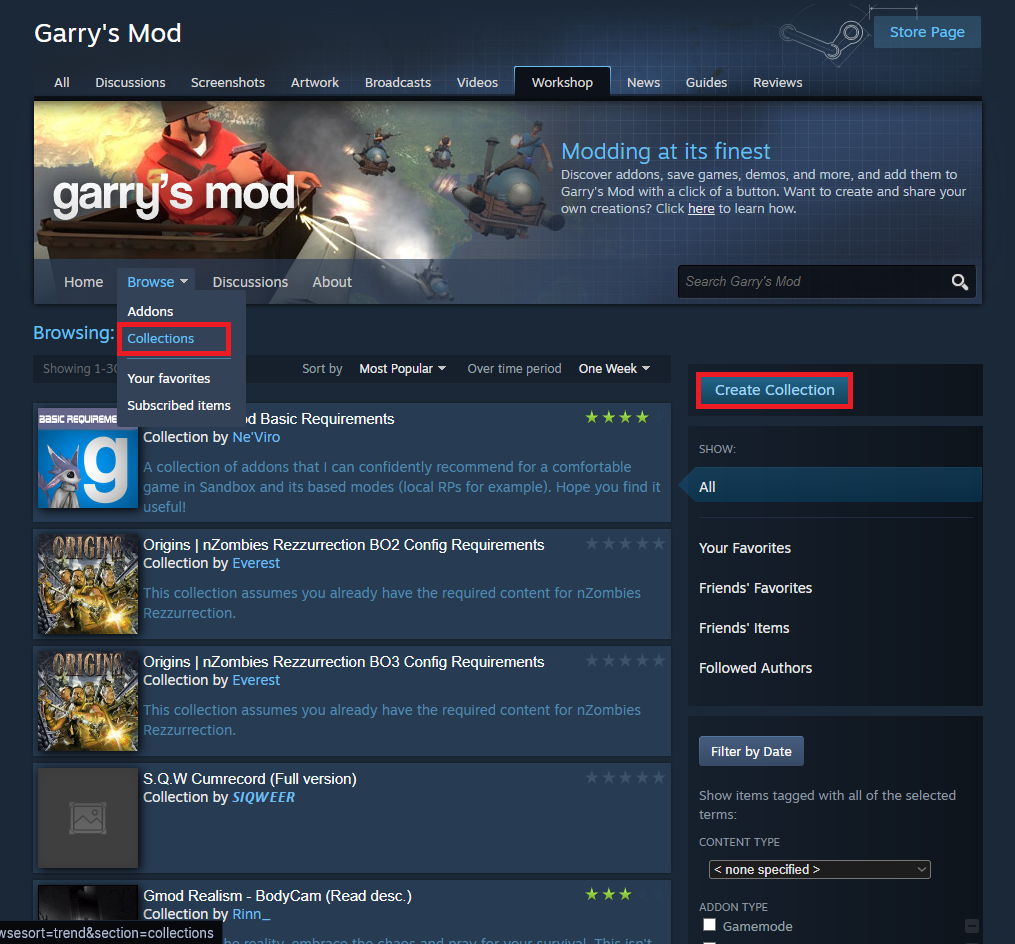
Once you’re in the GMod Workshop, hover over the Browse tab and select Collections. Click the Create Collection button on the far right.
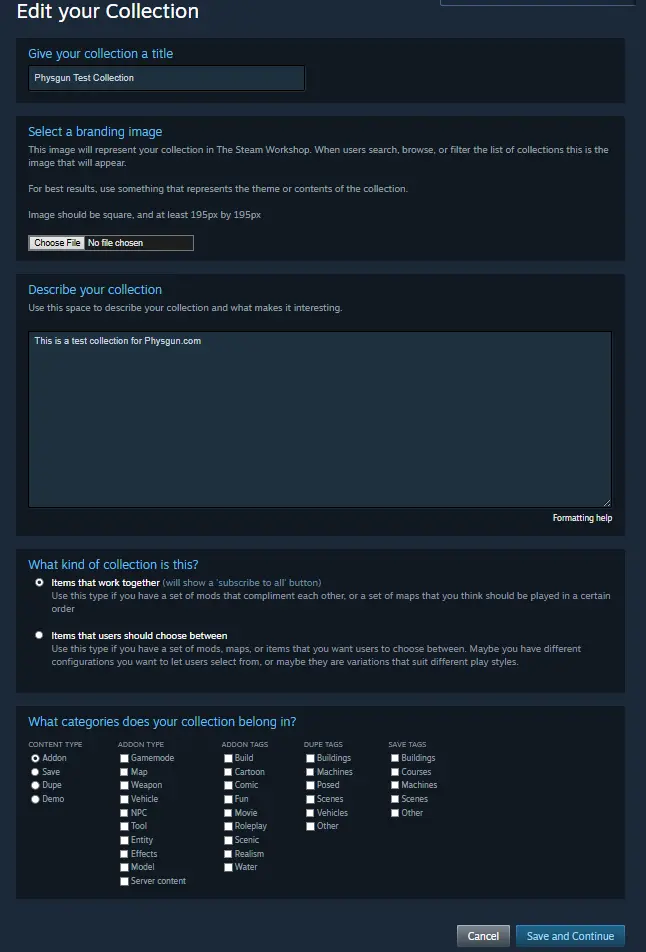
When you begin creating your collection, you’ll be prompted to give it a title, branding image, and description. You can add any details you’d like, but it’s recommended that the image be a square that’s at least 195px by 195px.
Next, you’ll see a box that asks what kind of collection you’re creating. For a Garry’s Mod server, make sure to select the option that allows items to work together if it isn’t already selected. This makes sure users can subscribe to your entire collection using the Subscribe to all button.
At the very bottom, you’ll see the option to select various tags for your collection. Choose as many as you’d like in relation to what your collection contains and is intended for. Click Save and Continue when you’re finished.
After clicking continue, you’ll be prompted to add some addons to your collection. If you don’t have all of your addons ready, that’s okay. You can always come back and edit it later, but you’ll need at least 1 to continue. When you have your addons, click Save and Continue.
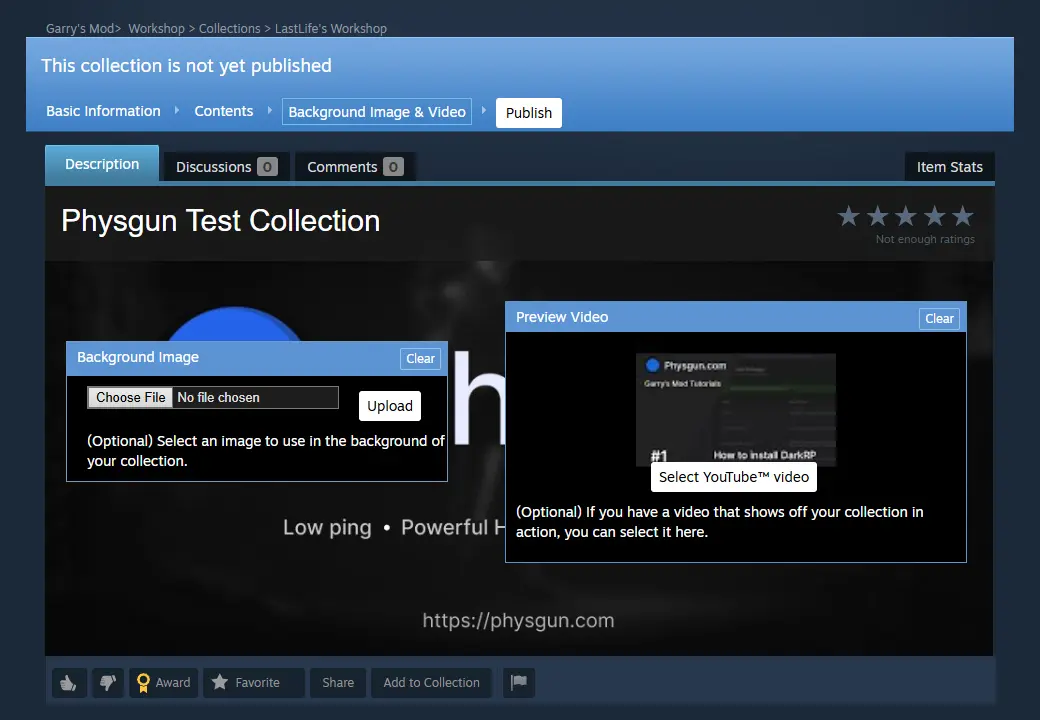
Lastly, you’ll be prompted to provide a background image and preview video. This is an entirely optional step, but it will make your collection more presentable to people who view it. Once you’re done, click Publish. You may have to wait a moment for your collection to be finalized because Steam has to check for any malicious code, links, or content that breaks the workshop terms of service.
Now you have a fully functional workshop collection! We recommend adding your collection to your favorites so it’s easy to return to the page.
Find the Steam Workshop Addons You Want
Navigating the GMod workshop is very simple as well, with most addons being separated into various categories that make your search all the more easier. Take some time to browse the workshop for the addons that suit the needs of your community. You may find them on the front page, or you’ll find a hidden gem all the way from 2015. Be careful when installing off the workshop, because it’s public and anybody could upload anything.
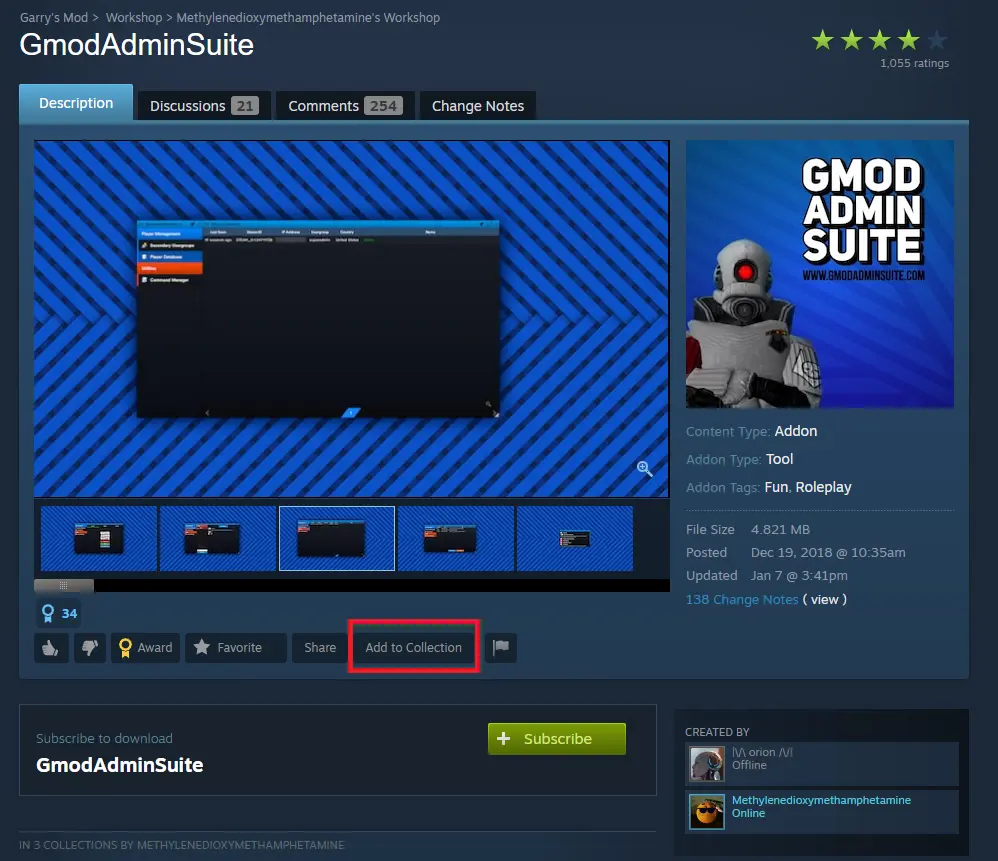
Once you’ve found the addons you’re looking for, you can add them to your collection by selecting the Add to Collection button and choosing your desired collection.
Gathering the Workshop ID
When working with addons and collections, you will find yourself needing a workshop ID at some point or another. To gather an ID from a workshop page, you’ll have to look at the page’s URL. Inside the URL, you’ll find a string of numbers that looks something like: id=1234567890. That is the ID for the addon or collection you’re looking at.

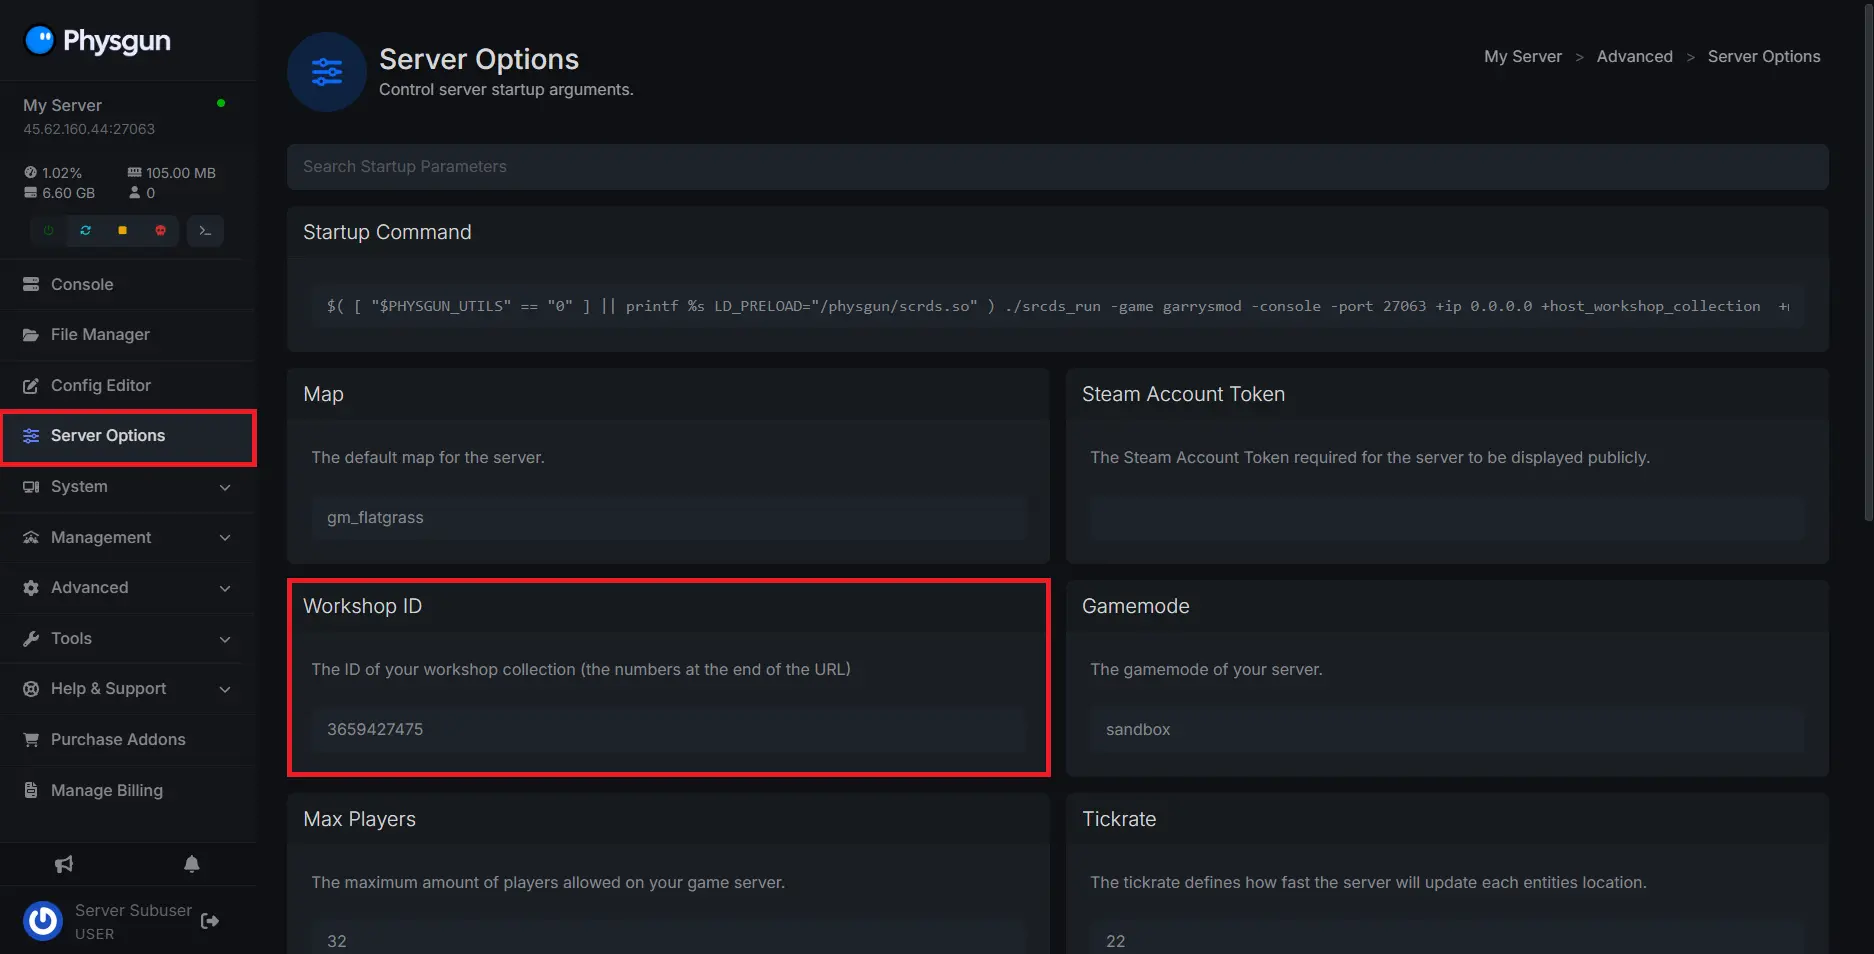
A common use for this ID is assigning your collection to your server. If you’re a Physgun client, sign in to your panel and navigate to the Server Options tab. Find the Workshop ID option and paste those numbers into the box.
If you’re not a Physgun client and are using a dedicated server, you can open up your batch file and find +host_workshop_collection. Paste the ID directly in front of this option.

Installing Custom Addons on a Garry’s Mod Server
The workshop isn’t the only way to download add-ons to your server. You can upload them straight from your computer if they’ve been downloaded from the Gmodstore or if you’ve made one yourself!
Once you’ve downloaded and extracted your addon as necessary, open up your server’s directory or file manager. Navigate to the garrysmod/addons directory in your server’s folder and drag and drop your addon into the addon folder. A common mistake people make is incorrect formatting, so make sure your addon is in a collective folder within the directory so your server can properly access and load it. Inside, you should find files such as lua, materials, data, or models, to name a few common examples.

With that, you’re done! Now you should have no issues adding addons to your Garry’s Mod server using both the server’s files and the GMod workshop.