
Bees in Rust are no joke. Stumble into a swarm near a beehive and they'll chase you down and deal serious damage before you can get clear. Getting rid of them takes a bit more than just running away. Smoke grenades are the most reliable way to disperse a swarm without taking too much damage, while a flamethrower or bee grenade can deal with beehives directly if you're geared up enough. Hazmat gear helps reduce the damage you take during the process. This guide covers the best methods for handling bees and beehives so you can farm honeycomb and honey without turning every encounter into a panic.
Immediate Escape Tactics
When bees swarm, milliseconds matter. Your primary goals are breaking aggro range and stopping stings. Two verified methods exist:
Enter Water Immediately: Submerging yourself in any body of water (ocean, river, lake) forces bees to despawn within 3-5 seconds. This is the only 100% reliable instant removal tactic. Critical nuance: You must be fully submerged; partially floating won't work. Stay underwater for at least 10 seconds to ensure despawn. Downside: Wetness debuff (-15% movement speed) and potential drowning if low on health. Prioritize shallow water near shorelines to minimize risk.
Break Line of Sight and Sprint: If water is inaccessible, sprint in a zig-zag pattern toward dense foliage, buildings, or terrain features. Bees lose aggro after 30 seconds only if they lose visual contact with you. Running in a straight line fails; swarms maintain pursuit indefinitely. Verified distance: Bees chase up to 150m from the hive. Use rocks or trees to block their path; once hidden, crouch-walk silently for 30+ seconds before moving.
Never attempt to fight a full swarm unarmed. Each sting deals 15 damage, and hives deploy 15-20 bees simultaneously guaranteeing death within 5 seconds for an unarmored player.
Equipment That Stops Bees
Strategic gear transforms bee encounters from fatal to manageable:
Hazmat Suit: The gold standard for hive interaction. Worn hazmat gear reduces bee sting damage to 0 (verified in Patch 2025.12). Essential for honeycomb farming or hive relocation. Downsides: 35% movement speed penalty and rapid durability drain (each sting consumes 0.5% suit durability). A full swarm can destroy the suit in under 10 seconds. Always carry repair hammers.
Torches: Holding a lit torch in your hand (not placed) creates a 2m "safe zone" where bees won't approach. Effective for temporary suppression during hive harvesting but useless against bee grenades. Requires free hand; cannot shoot or use tools while holding it. Duration: Torches last 1,800 seconds but must be actively held.
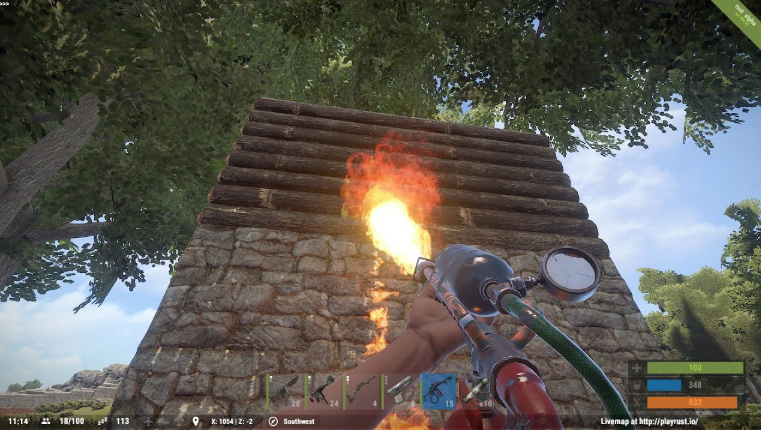
Flamethrower: A high-risk deterrent. Firing the flamethrower near (not directly at) bees causes them to scatter for 5-8 seconds. Critical warning: Direct hits destroy bees but also ignite nearby hives/trees, potentially causing wildfires that trap you. Only recommended for open-field escapes with clear retreat paths.
Smoke Grenades For Temporary Suppression
Smoke grenades offer a tactical window for escape or hive access:
Dispersion Mechanics: Throwing a smoke grenade creates a 10m radius cloud. Bees within the cloud immediately stop attacking and wander aimlessly for 12-15 seconds (Patch 2024.08 adjustment). This provides crucial time to retreat or harvest honeycomb.
Critical Limitations: Smoke does not kill bees or prevent new spawns from hives. Duration is fixed; bees resume aggression the moment the smoke clears. Never rely on smoke near hives; use it only while moving toward water or cover.
Optimal Pairing: Combine smoke with water access. Example: Throw smoke while sprinting toward a river. Bees are suppressed during your dash, then water removes them upon entry. Avoid using smoke in forests; reduced visibility increases collision risk with new hives.
Dealing With Bee Grenades
Bee grenades deploy instant, localized swarms require specific counterplay:
Effect Mechanics: Detonation releases 8-12 bees that aggressively target the nearest player within 8m. Unlike hive bees, these persist for 45 seconds regardless of line of sight. Direct hit = instant swarm aggro.
Safe Throwing Distance: Minimum 15m to avoid self-aggro (Patch 2025.03). Below 12m, thrower becomes primary target 80% of the time. Always throw downhill or with wind direction to maximize distance.
Accident Prevention: Never equip bee grenades while near hives, campfires, or in tight spaces. Unequip them before entering forests. Accidental detonation (e.g., while opening a loot crate) is a top cause of player deaths.
Using Bee Grenade Offensively
Deploy bee grenades strategically for base defense or PvP:
Baiting Tactics: Lure enemies toward hives by faking retreats, then throw bee grenades at their feet. Bees from the grenade and disturbed hives create overwhelming pressure. Works best in forest biomes with clustered hives.
Base Defense Timing: Throw grenades over walls only when attackers are stationary (e.g., hacking a door). Moving targets >10m from hives won't trigger chain reactions. Ideal for funneling enemies into kill zones with pre-placed hives.
Escaping Bee Grenades
If caught in a grenade swarm:
Immediate Action: Sprint perpendicular to the thrower's position; never directly away (bees pursue fastest in straight lines).
Water Priority: Reach water within 5 seconds. Submersion is the only guaranteed stop.
Hazmat Fallback: If water is distant, equip hazmat while running. Damage stops instantly, but durability drains rapidly. Exit swarm ASAP.
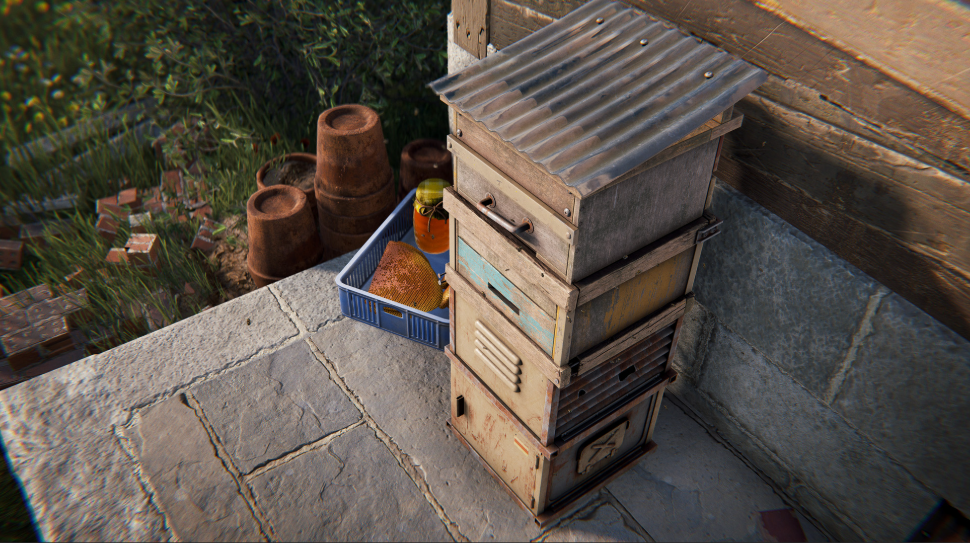
Beehive Nucleus And Hive Management
Hives contain a "nucleus" (core object) dictating behavior:
Nucleus Placement: Always spawns 1.5m above ground level inside the hive model. Harvesting honeycomb requires interacting with the nucleus, not the hive mesh. Disturbing the nucleus (e.g., hitting hive) triggers swarms.
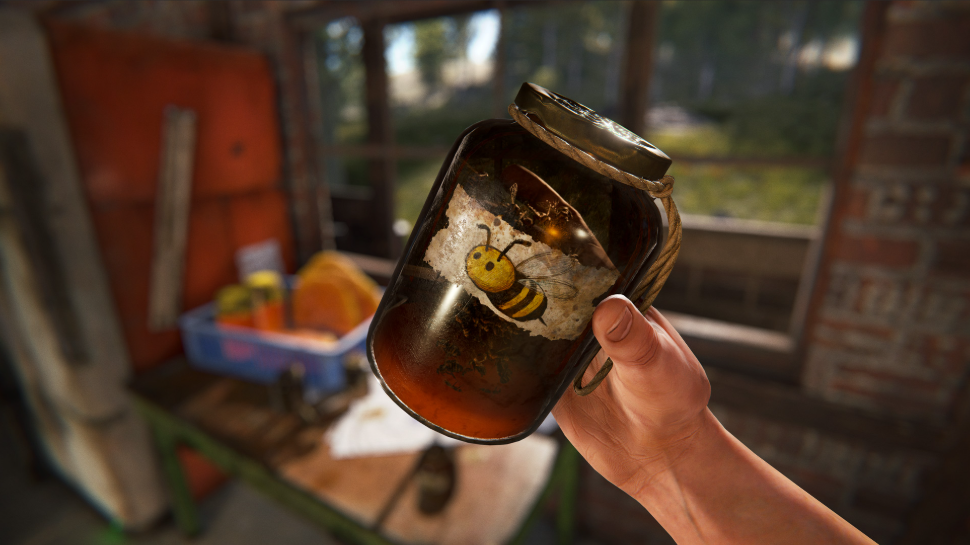
Safe Harvesting: Equip hazmat suit before approaching. Stand directly under the hive and press E minimizes movement that agitates bees. Harvest yields 1-2 honeycombs per 30-minute cycle (server time).
Torch Backup: If no hazmat, hold a lit torch while harvesting. Reduces swarm chance by 70% but doesn't eliminate risk.
Farming, Crafting, And Prevention
Proactive hive management prevents disasters:
Crafting Recipe: Bee Grenade = 2x Cloth + 1x Honeycomb + 5x Metal Fragments. Farm honeycombs responsibly; never harvest more than 3 hives consecutively without a 10-minute cooldown (swarm respawn timer).
Placement Safety: Keep hives >50m from your base perimeter and >30m from paths. Avoid clusters; spaced hives prevent chain-reaction swarms.
Inspection Routine: Check hives weekly for "agitated" visual effect (rapid particle pulses). Agitated hives spawn 2x more bees, harvest immediately with hazmat.
Base Design To Avoid Or Exploit Bees
Architectural choices turn bees from threats into weapons:
Forest Avoidance: Build bases in plains/desert biomes where hives are rare. If in forests, clear all trees within 100m of your foundation.
Bee Trap Bases: Intentionally place 5-6 hives around weak entry points (e.g., doorless windows). When enemies breach, they trigger swarms that weaken them for turrets. Must use elevated walkways to avoid self-triggering.
Defense Layering: Pair hives with flamethrower traps. Swarms force enemies into kill zones where flames scatter bees and ignite attackers.
Admin Tools And Server Options
Server admins can adjust bee behavior:
# Key ConVars (oxide/config/server.yml)
bee.swarm_duration 30     # Default: 30 seconds
bee.damage_per_sting 15   # Default: 15 damage
bee.hive_cooldown 1800    # Honeycomb respawn (seconds)
Use bee.removeall in console to instantly clear all active swarms. Critical: Test changes on local servers first; altering bee.damage_per_sting below 10 breaks game balance per Facepunch guidelines.
Step-By-Step Troubleshooting Guide
Scenario 1: Swarmed in Open Field (No Hazmat)
Sprint toward nearest water (prioritize over loot).
If >20m from water, throw smoke grenade behind you while running.
Submerge completely for 10+ seconds.
Exit water, check health, and repair gear.
Scenario 2: Hive Interaction Gone Wrong
Immediately equip hazmat suit (if inventory accessible).
Harvest honeycomb only if suit is >50% durability.
If suit fails, sprint to pre-scouted water point.
Post-escape: Repair suit or craft new torch.
Post-Escape Checklist
Heal if below 50 HP
Repair hazmat suit (if used)
Loot dropped items only if no hive within 50m
Mark location for future avoidance
FAQs
Q: Do bees attack animals?
A: No; wolves/bears ignore swarms. Use this to distract bees in emergencies.
Q: Can bee grenades destroy hives?
A: No; they only deploy bees. Explosives (C4, rockets) destroy hives but guarantee massive swarms.
Q: Why do bees sometimes not spawn?
A: Server tick lag or hives beyond 300m render distance. Always assume hives are active.
Mastering Rust's bees demands respect for their lethality and creativity in counterplay. Prioritize water access, never skip hazmat for hive work, and turn environmental threats into strategic assets. With these tactics, you'll transform a common killer into a controlled resource, or a weapon against your enemies.