
Fishing in Rust is one of the most underrated ways to get food, scrap, and steady value early in the game. If you're playing on PC and want to know how to fish in Rust efficiently, you need to understand fishing mechanics, bait types, line tension control, and the best fishing spots across rivers, fishing villages, and the ocean shore.
In this guide, you’ll learn:
How to fish in Rust using a fishing rod, using bait like worms or grubs, and proper cast timing.
How to catch fish by watching for a bite, using your line, and reeling without letting the line snap.
Where to find a fishing spot in rivers, ocean water, or near fishing villages.
What fish in Rust you can catch, where you can catch them, and how much they sell for.
How to cook raw fish at a campfire for food, or sell certain fish for scrap.
The fastest way to turn fish into profit.

What Can You Get From Fishing In Rust?
Fishing provides several benefits at any point in a wipe. Whether you're fresh into the new wipe or well settled in its final days, fishing will never become a dated method for progression.
An Easy Food Source
Fish restores a good amount of hunger and hydration when cooked, and comes in abundance. If you’re tired of chasing animals with a bow and wasting arrows, fishing is a decent and reliable alternative.
It’s especially useful early wipe when wood tools and primitive gear are all you have. All you need is your rod and a campfire!
A Fast Way to Get Scrap
Certain fish can be sold at Fishing Villages for scrap. This makes fishing one of the safest ways to generate scrap without running contested monuments or fighting geared guys roaming the map.
If you get lucky with some rare catches, you can walk away with a serious scrap haul.
Low-Risk Progression
You don’t need guns, keycards, or elite crates. Just a rod, bait, and patience.
You can even drop into a server late wipe and use fishing to catch up without constantly having to fight.
What You Need To Fish In Rust
To get started, you only need a couple of things:
Fishing Rod (craftable early-game item)
Bait (worms, grubs, fish, meat, etc.)
Access to a fishing spot (river, ocean, dock)
Optional but helpful:
Campfire (to cook fish)
Safe zone access (Fishing Village or Bandit Camp)
Small base near water for quick storage
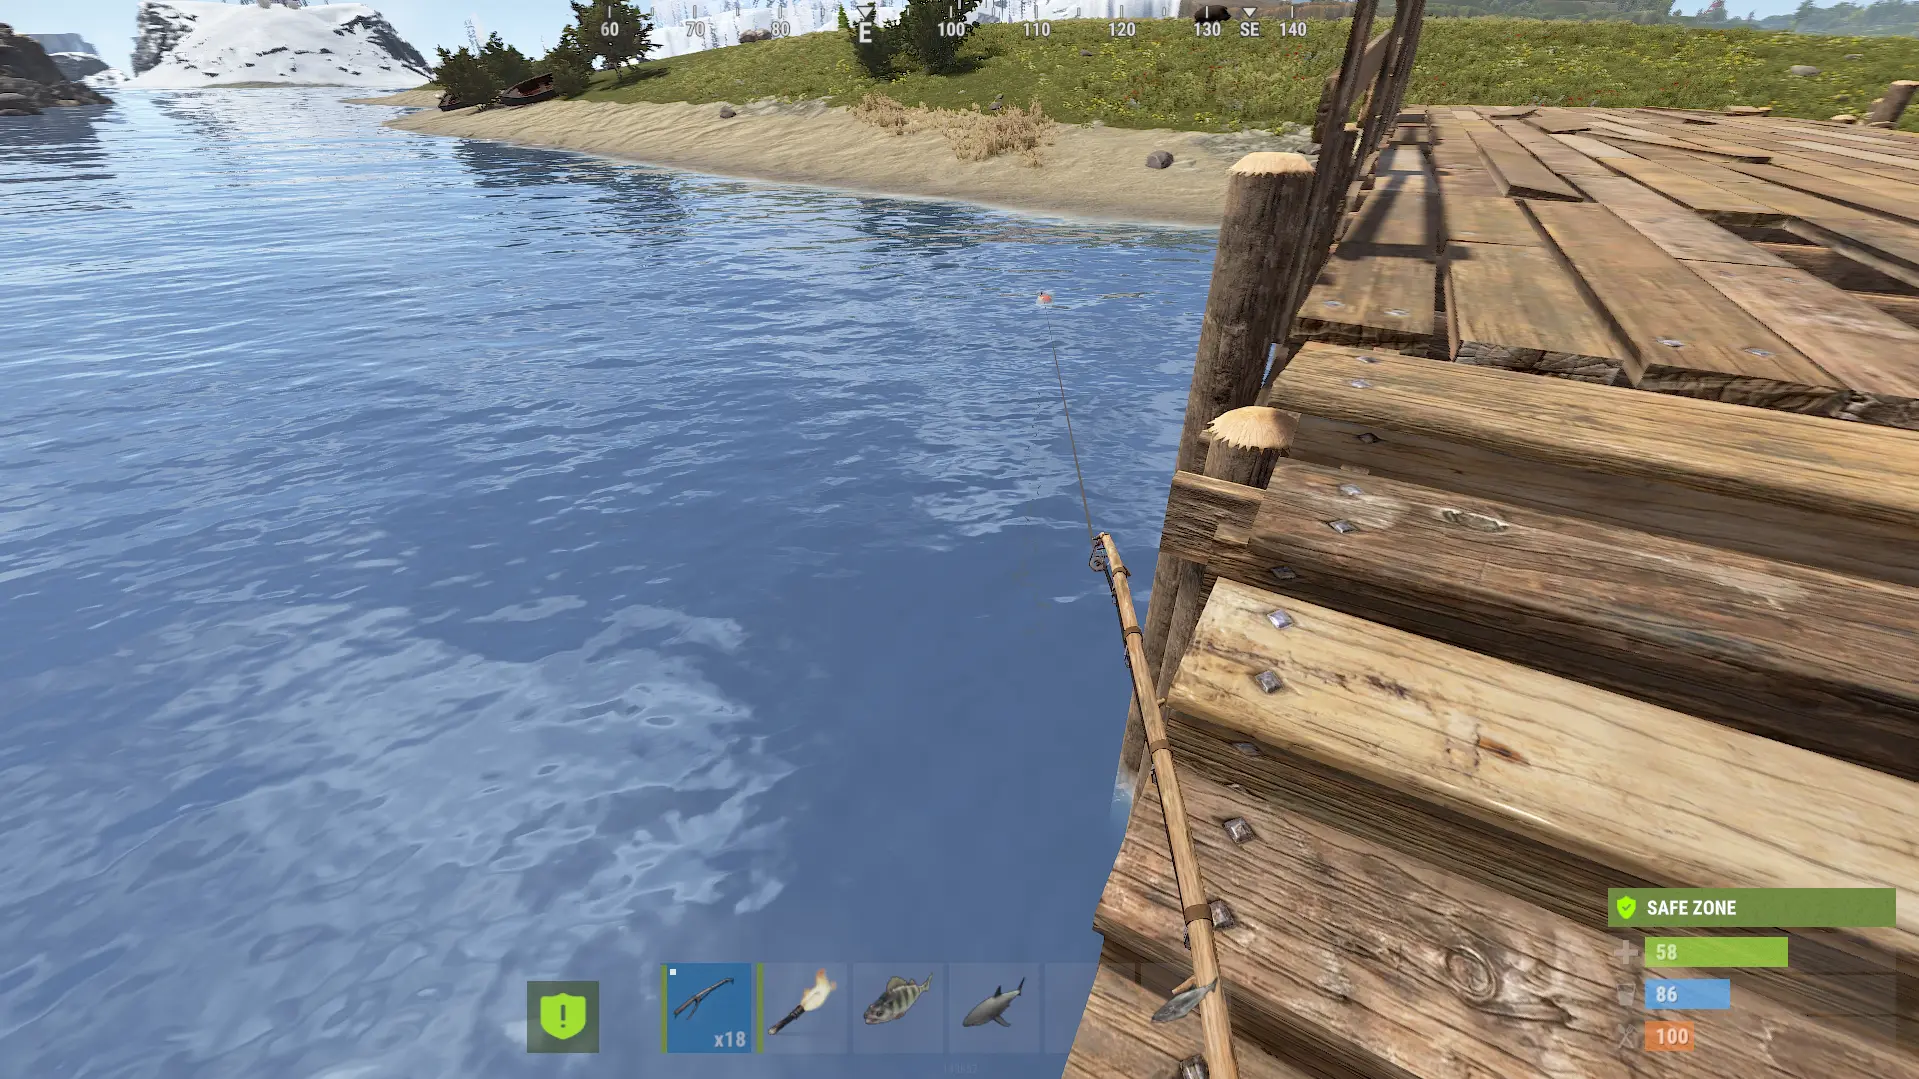
The fishing rod is simple to use, but mastering line tension and movement control is what makes the difference between landing your first fish and watching it snap the line.
How To Reel In Fish In Rust
Understanding line tension is the most important mechanic.
Step 1 - Cast
Left-click to cast. The farther you cast into deeper water, the better the fish table you can expect.
Step 2 - Wait for the Bite
The rod will dip underwater. That’s your sign.
Step 3 - Hook the Fish
Click once when the bobber dips to set the hook.
Step 4 - Manage Line Tension
This is where most players mess up.
Reel only when the fish is NOT pulling hard.
If the line turns red, stop reeling immediately.
Move your aim opposite the fish’s movement to reduce strain.
Be patient. Don’t panic.
If you constantly hold the reel, you’ll tire the line, and it will snap. Fishing in Rust is more about patience than speed. It can feel tricky at first, but once you understand tension control, it becomes second nature.
Best Fishing Spots In Rust
Choosing the right fishing spot makes a huge difference in what you catch.
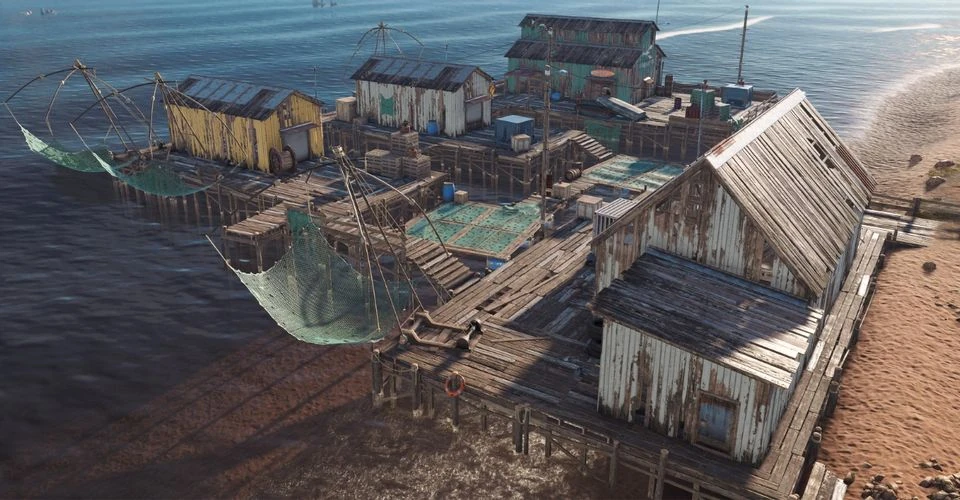
Fishing Villages
Why Fishing Villages Are Good:
1. Safe Zone Protection
Fishing Villages are full safe zones. Players cannot use weapons without being killed by NPC guards. This makes them ideal for:
Solo players
Early wipe progression
Risk-free scrap farming
2. Direct Access to Deep Water
The docks extend into deep ocean water, which improves the chances of catching:
Salmon
Orange Roughy
Larger trout
Small sharks (with long casts and high bait)
3. On-Site Fishing Vendor
You can immediately sell fish for scrap without traveling. This drastically reduces risk and increases efficiency.
Fishing Villages are the safest and most consistent fishing method in the game.
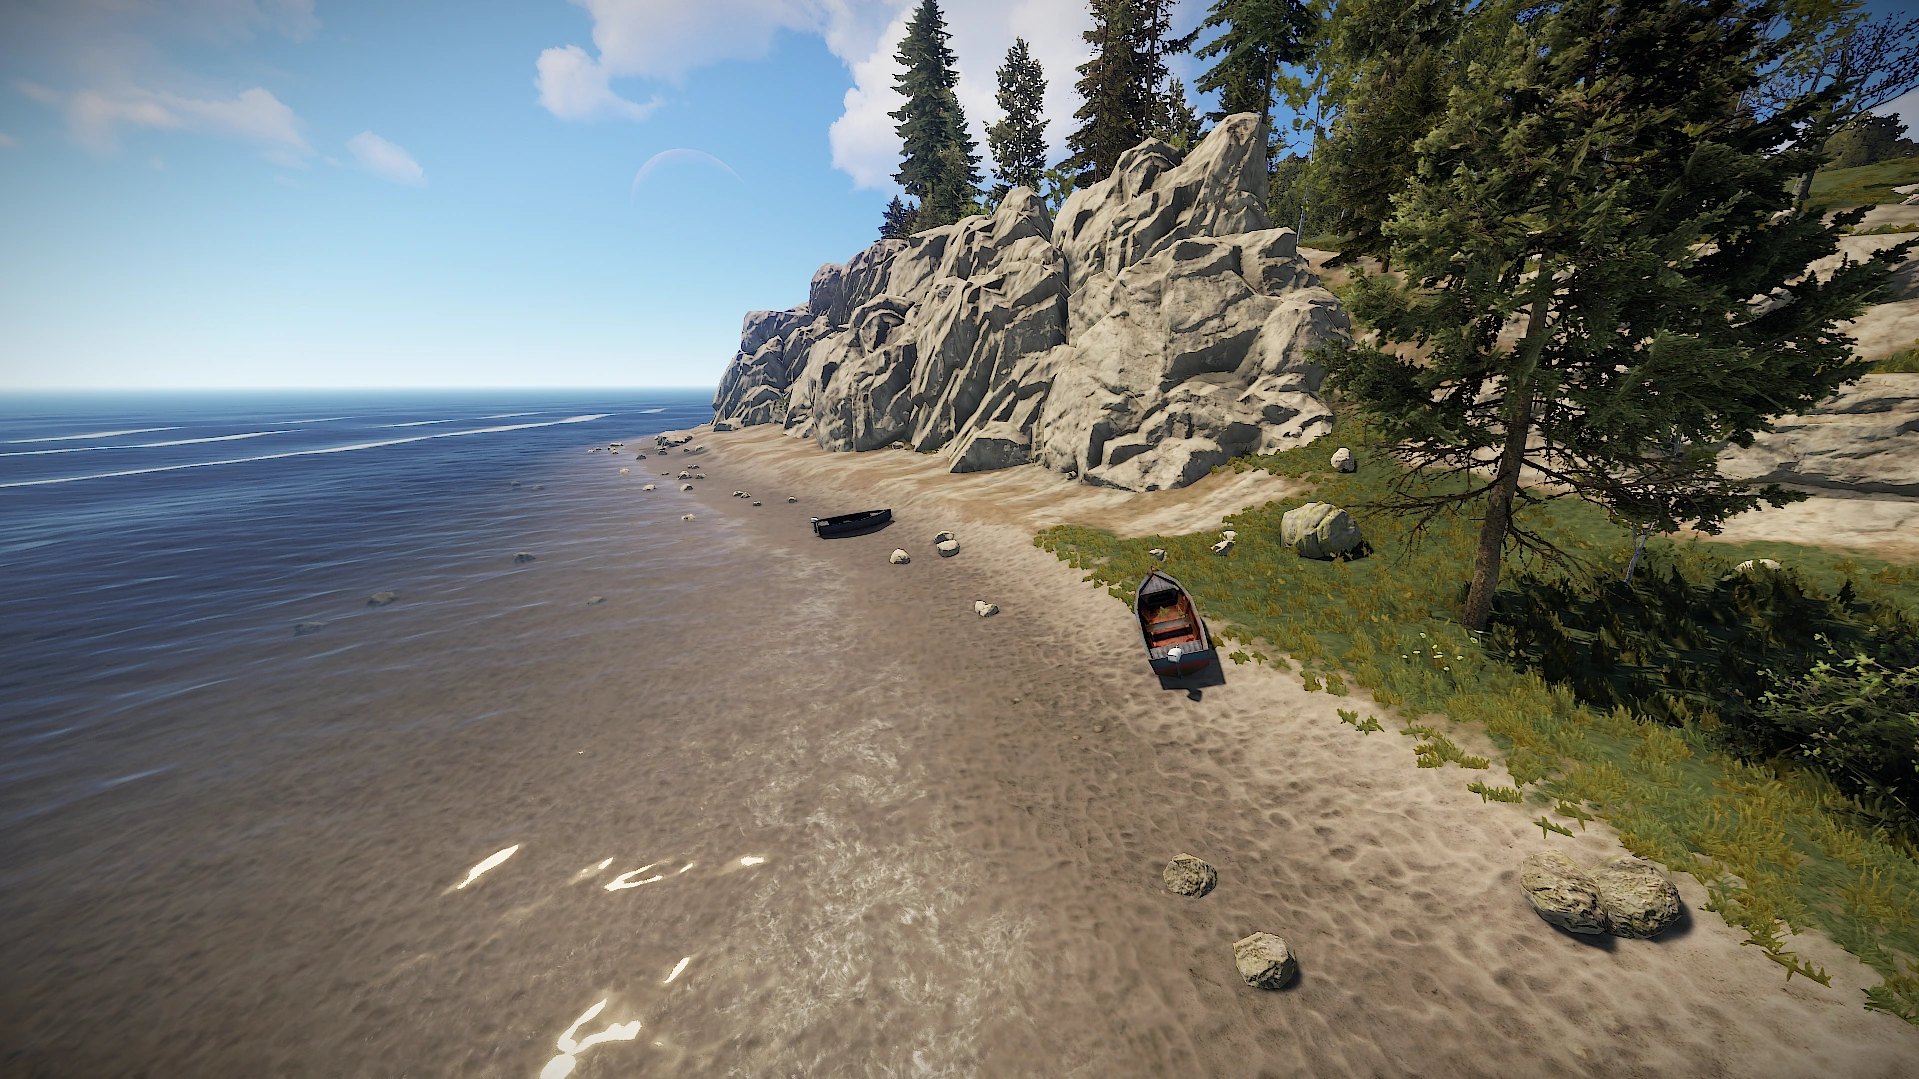
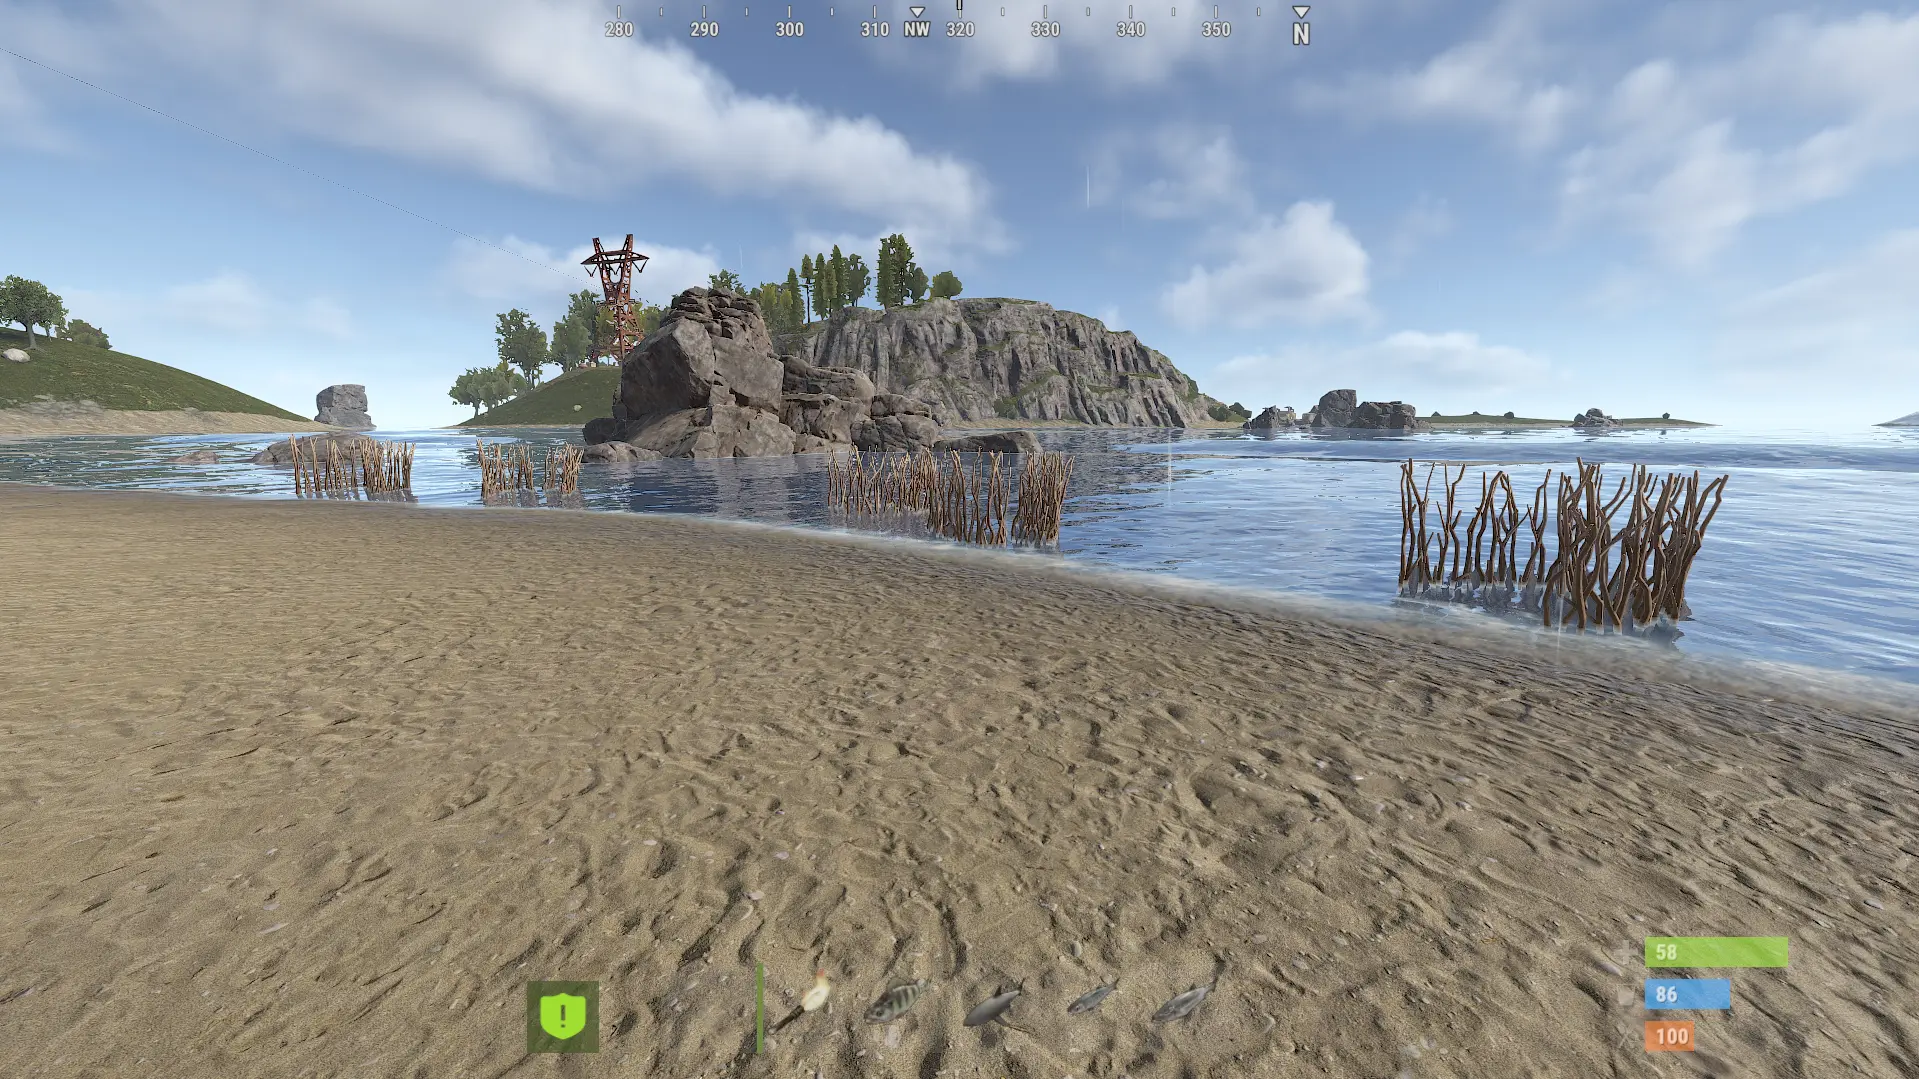
Ocean Shores and Piers
Fishing from the open coastline is common early wipe and offers flexibility, but comes with PvP risk.
Why Ocean Shores Are Good:
1. Easy Early Access
No monument access required! Just find water and start fishing.
2. Mixed Fish Pool
Depending on how far you cast:
Closer casts yield smaller fish.
Long-distance casts improve the odds of salmon and larger fish
3. Flexible Base Integration
Building a small base near water allows you to:
Fish safely from nearby
Store bait and cook fish quickly
The Risks:
No safe zone protection
Visible to roaming players
Snipers can target shoreline fishers
Ocean shores are best for early food generation and moderate scrap farming.
Bandit Camp
Bandit Camp is an underrated fishing location that combines safe zone protection with deeper ocean access.
Why Bandit Camp Is Good:
1. Safe Zone Protection
Like Fishing Villages, Bandit Camp prevents PvP inside the monument.
2. Access to Deeper Water
The docks typically connect to the deeper ocean, increasing chances of:
Salmon
Orange Roughy
Larger trout
Occasional small sharks
3. Immediate Scrap Conversion
You can sell fish nearby, reducing travel risk.
The Risks:
Players may camp just outside the safe zone borders.
You are vulnerable once you leave the monument.
Bandit Camp is excellent for low-risk, mid-wipe scrap generation.

Deep Ocean
Deep ocean fishing offers the highest scrap potential but carries real PvP danger.
Why Deep Ocean Is Good:
1. High-Tier Fish Pool
Far offshore fishing improves the odds of:
Salmon
Orange Roughy
Larger trout
Small sharks
2. Increased Large Fish Chance
Combining maximum cast distance with high bait value greatly improves fish size.
3. Mobility
Using a rowboat or RHIB lets you:
Relocate quickly
Avoid shoreline snipers
Fish far from populated grids
The Risks:
Highly visible boat target
Oil Rig traffic nearby
Vulnerable while reeling
Deep ocean fishing is best for experienced players seeking maximum scrap returns.
The Underwater Labs Moon Pool
The Moon Pool inside Underwater Labs allows deep-water fishing in a semi-contained monument environment.
Why The Moon Pool Is Good:
1. Deep Water Spawn Pool
Despite being inside a monument, the Moon Pool counts as deep water, allowing higher-tier fish.
2. Partial Cover
You are less visible than in the open ocean.
3. Monument Loot Opportunity
You can combine fishing with running Underwater Labs.
The Risks:
Monument PvP
Requires diving access
Tight spaces limit escape routes
The Moon Pool is best for players already running Underwater Labs who want to maximize efficiency.
Rust Fish Types (And Scrap Prices)
Below is a quick reference table for sellable fish:
Sell Amount | Fish | Scrap Value | Water Type |
x5 | Small Trout | 30 | Ocean, Underwater Labs |
x5 | Yellow Perch | 50 | Rivers, Swamps |
x2 | Small Shark | 90 | Ocean, Underwater Labs |
x2 | Salmon | 55 | Any |
x2 | Orange Roughy | 75 | Ocean, Underwater Labs |
x2 | Catfish | 65 | Rivers, Swamps |
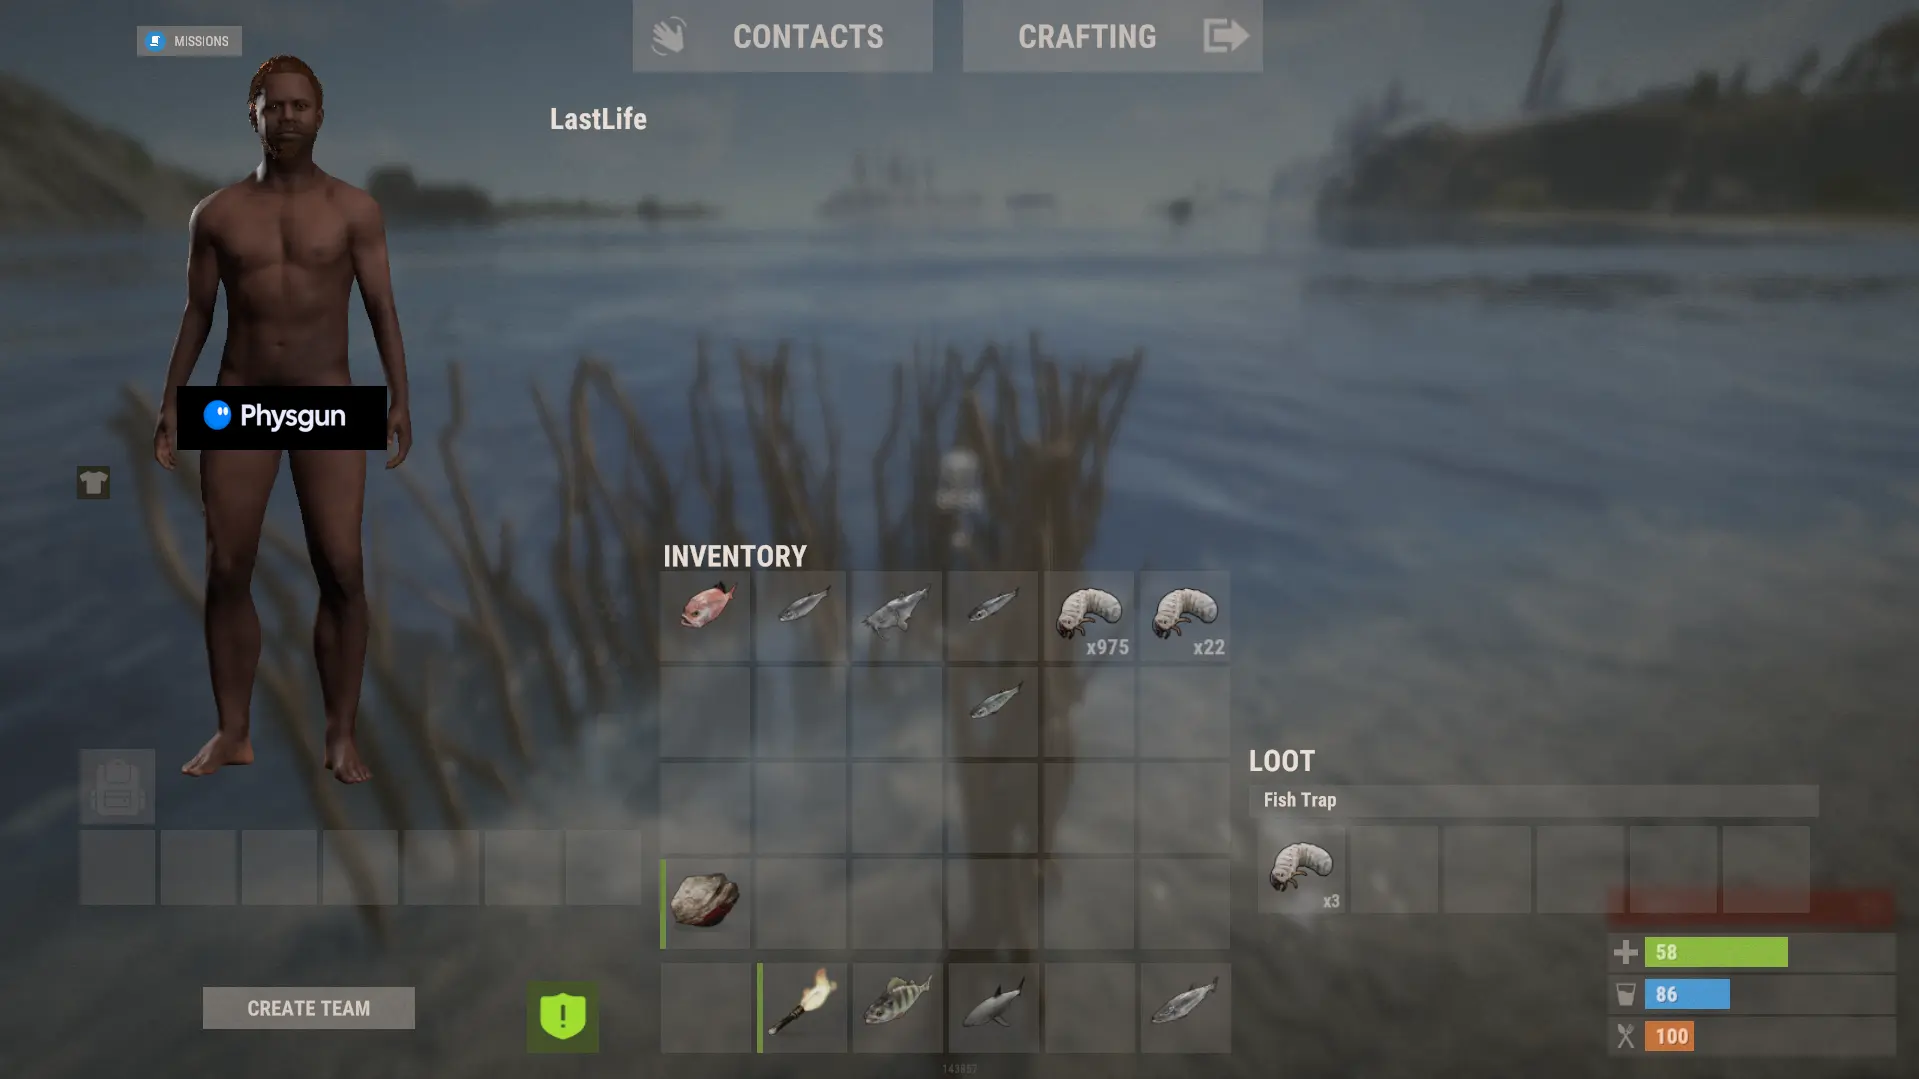
Anchovies, Minnows, and Herring cannot be sold for scrap, but they are still useful for gutting, which you can do in your inventory and can give you a good supply of food. They can also be found in any water type.
The difference between river fishing and ocean fishing becomes obvious when you compare scrap returns.
Rust Bait Types
In Rust, there are tons of different items that can be used as bait. Each item has its own bait value and stack size for how much can be used in a fish trap. We'll cover fish traps in more detail in a moment.
Item | Bait Value | Bait Stack Size | Max Bait Value |
Grub | 3.5 | x3 | 10.5 |
Small Trout | 10 | x1 | 10 |
Yellow Perch | 10 | x1 | 10 |
Raw Bear Meat | 10 | x1 | 10 |
Raw Wolf Meat | 10 | x1 | 10 |
Raw Big Cat Meat | 10 | x1 | 10 |
Raw Snake Meat | 10 | x1 | 10 |
Raw Crocodile Meat | 10 | x1 | 10 |
Worm | 2.5 | x3 | 7.7 |
Blueberries | 1 | x5 | 5 |
Raw Chicken Breast | 5 | x1 | 5 |
Raw Deer Meat | 5 | x1 | 5 |
Raw Pork | 5 | x1 | 5 |
Raw Horse Meat | 5 | x1 | 5 |
Black Berry | 1 | x5 | 5 |
Blue Berry | 1 | x5 | 5 |
Green Berry | 1 | x5 | 5 |
Red Berry | 1 | x5 | 5 |
White Berry | 1 | x5 | 5 |
Yellow Berry | 1 | x5 | 5 |
Anchovy | 2 | x2 | 4 |
Herring | 2 | x2 | 4 |
Sardine | 2 | x2 | 4 |
Raw Human Meat | 3 | x1 | 3 |
Beehive Nucleus | 2 | x1 | 2 |
Raw Fish | 0.5 | x3 | 1.5 |
Apple | 1 | x1 | 1 |
Black Raspberries | 1 | x1 | 1 |
Bread Loaf | 1 | x1 | 1 |
Jar of Honey | 1 | x1 | 1 |
Corn | 1 | x1 | 1 |
Potato | 1 | x1 | 1 |
Pumpkin | 1 | x1 | 1 |
Wheat | 1 | x1 | 1 |
What's The Best Bait for Fishing Rods?
Every bait has a value that affects what fish you can catch.
Higher bait value = better chance at high-tier fish.
Some of the best 10-value bait options:
Small Trout
Yellow Perch
Raw Bear Meat
Raw Wolf Meat
Raw Big Cat Meat
Raw Snake Meat
Raw Crocodile Meat
You want baits that provide the most in one item when using a rod.

How To Use Fish Traps to Catch Fish In Rust
Fish Traps are passive fishing tools.
To use them:
Place the Fish Trap in shallow water.
Open its inventory.
Add bait.
Wait (check periodically).
Collect fish.
Fish traps in Rust are good for base-adjacent food generation but slower than active rod fishing.
What's The Best Bait For Fish Traps?
This is where bait stacking comes into play. As mentioned earlier, different baits can be stacked. While you could use baits that provide high values on their own, grubs are arguably the best bait to use for traps because they can stack to the highest value, and they are a renewable resource. You will passively gain grubs from harvesting plants, allowing you to stock up on them and restock your fish traps to a 10.5 bait level.
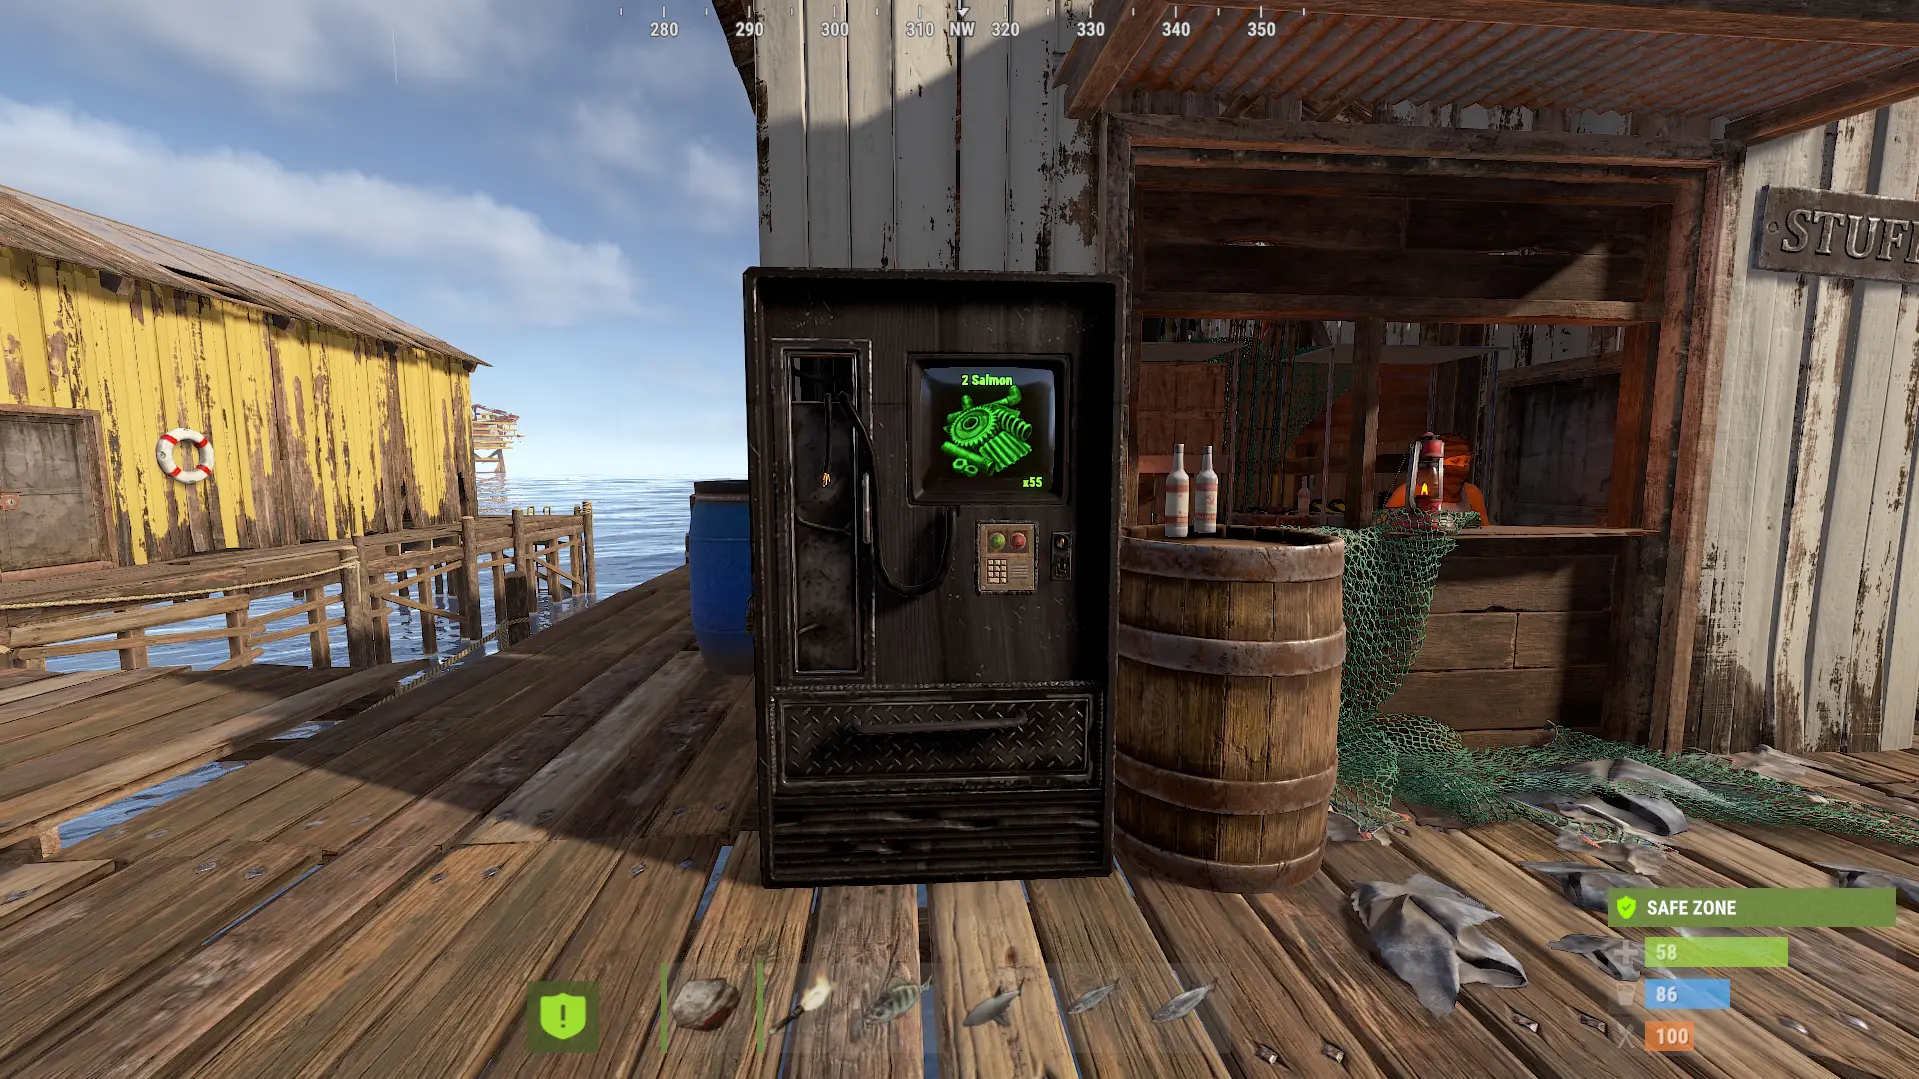
How To Sell Fish In Rust
To sell fish in Rust:
Go to a Fishing Village or Bandit Camp safe zone.
Find the Fishing Vendor.
Trade fish for scrap.
Before you sell everything, consider:
Is it worth more as bait?
Do you need food?
Could it help you catch something better?
Conclusion
Fishing in Rust might not be flashy, but it’s one of the most consistent progression methods in the game, especially if you want to avoid constant fights with other players.
The key to success is understanding control and patience. Don’t drag the reel constantly. Let the fish draw the line out when it pulls, then reel when tension drops. If you panic and overcorrect, you’ll lose the catch.
A couple of final tips to remember:
Don’t forget to cast as far as possible for better fish tables.
Swap low-value fish for bait to improve your odds.
Pay attention to movement when reeling. Aim opposite the fish.
Choose safer locations if other players are nearby.
Know when to leave instead of risking everything.
Fishing rewards patience more than aggression. Once you understand line tension and bait value, you’ll realize it’s not just about getting lucky. It’s about controlling the fight between you and the fish.
If you master these basics, manage line tension, and choose the right fishing spot, you’ll never struggle for food or scrap again.